How to Print Full-Surface Graphics on Drawstring Bags
An edge-to-edge graphic on a drawstring bag is not simply a larger logo. It is a coordinated print-and-construction project: the artwork must survive cutting, seam take-up, the folded cord channel, gathering, and the way the filled bag is carried. The most reliable starting point is to print suitable flat fabric or cut panels before sewing, then approve the finished and cinched sample—not just a flat press sheet. The material, print route, pattern layout and acceptance limits all need to be agreed for the specific order.
This guide is for brand and sourcing teams that want a repeat pattern, photo-led composition or large campaign graphic across a custom drawstring bag. It is deliberately narrower than our general drawstring bag printing methods guide: here, the question is how to engineer coverage across a moving, sewn object.
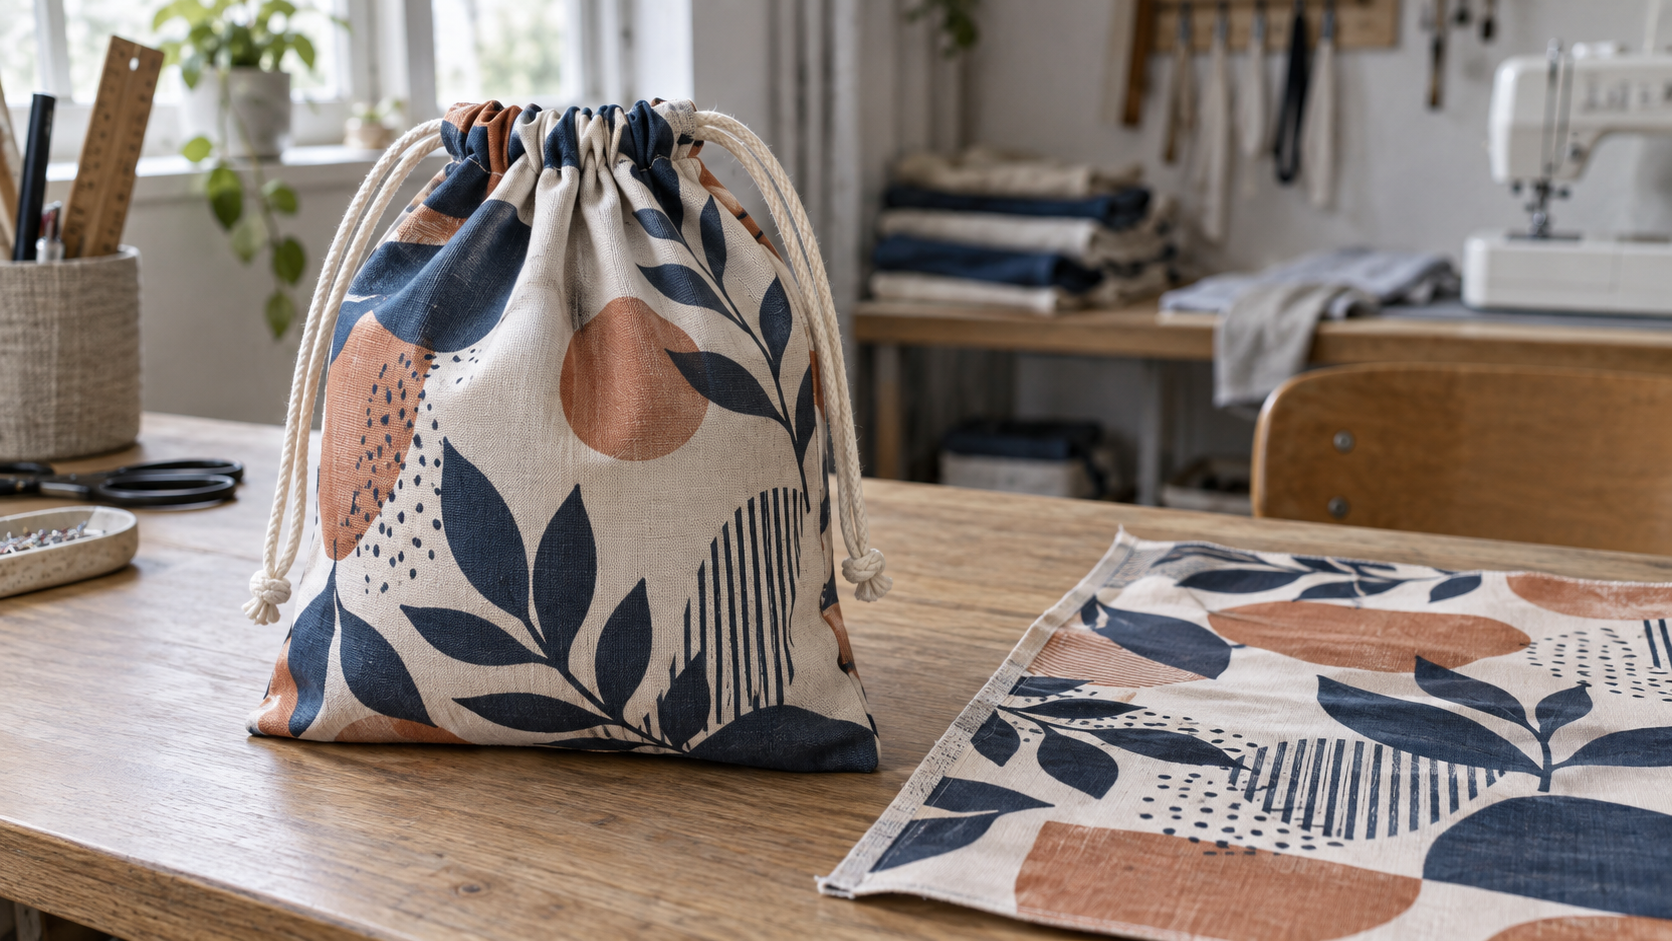
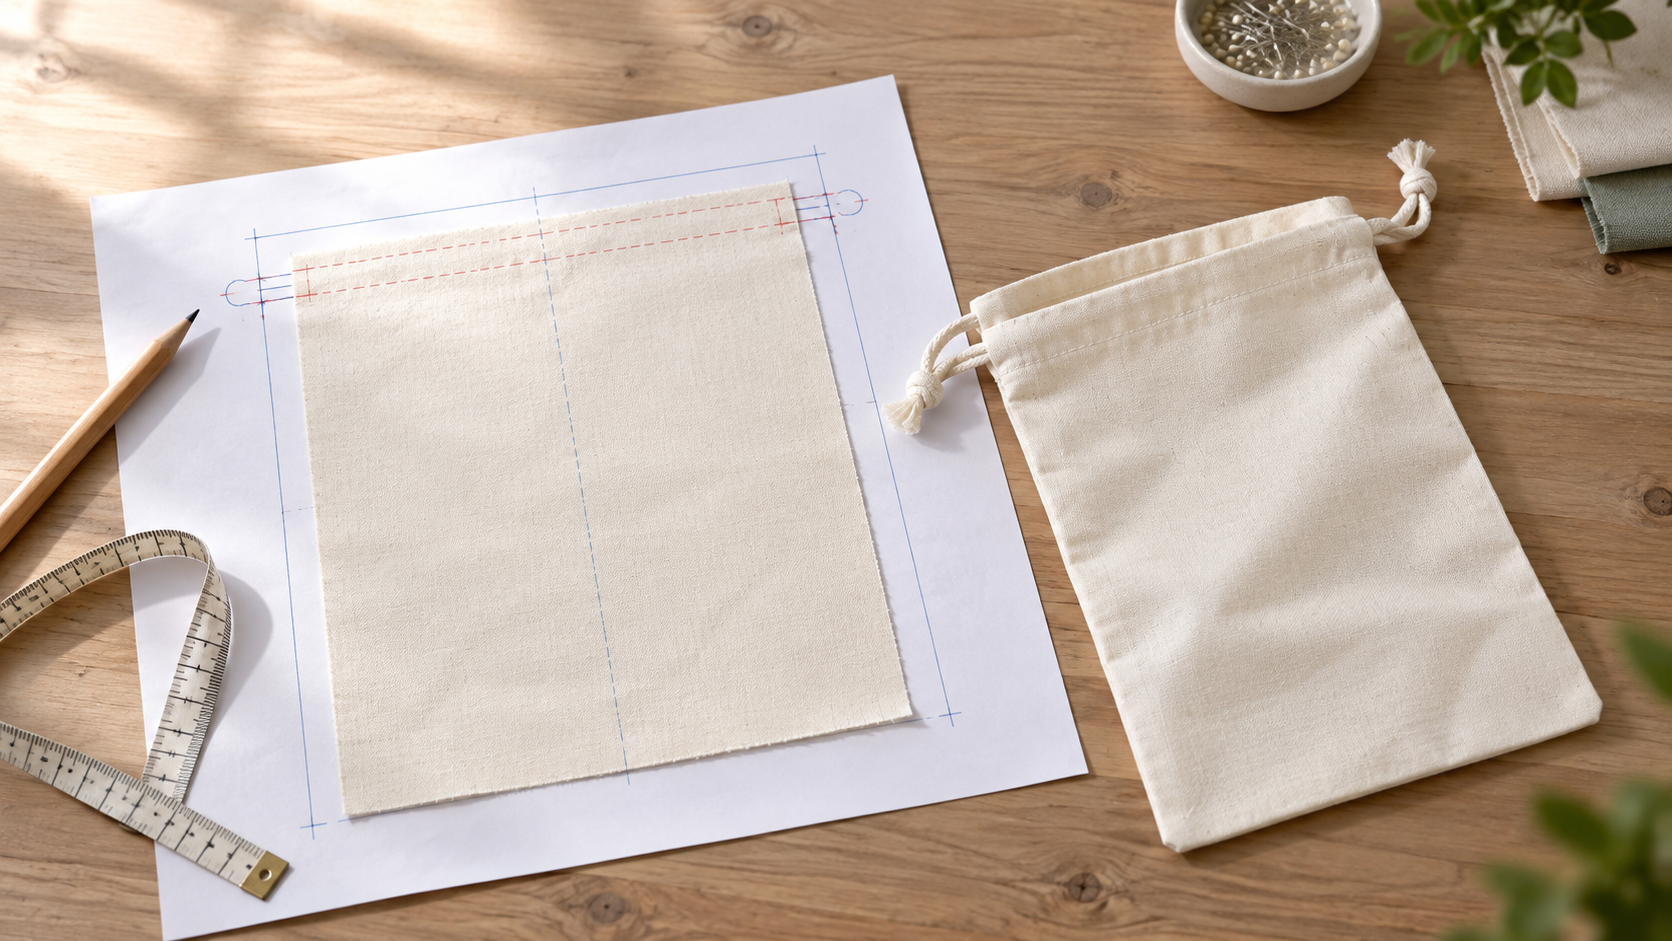
Illustrative concept image, not a photograph of a LUCKYSTAR production order. The separate printed panel shows why print, cut and sew decisions must be made together.
1. Define what “full-surface” means on this bag
Buyers and suppliers often use “all-over,” “full-color,” and “full-surface” as though they mean the same thing. They do not. A full-color transfer may cover only a front rectangle; a repeat print may run across both exterior panels; and an engineered graphic may be designed to appear continuous only in the finished, open state. Define the promised visual result before choosing a technique.
| Requested result | What is actually printed | Main limitation to specify |
|---|---|---|
| Large front graphic | One panel or a broad area of an assembled bag | Unprinted seam, channel and rear may remain visible |
| Edge-to-edge front and back | Flat panels before conversion, with approved bleed | Side and top seams still interrupt the image |
| Repeating exterior pattern | Fabric length or individual cut panels | Motifs may move at seams and under gathers |
| Engineered front/back composition | Separate front and back files registered to cut panels | Tighter cutting and sewing control; no automatic seam continuity |
| “Seamless” wraparound image | Multiple matched components and a construction-specific layout | Exact uninterrupted imagery across sewn seams may be impractical |
For a drawstring pouch, say explicitly whether the top channel, back panel, side gusset, bottom gusset, exterior pocket and cords must carry the design. A plain contrasting cord can be a deliberate feature. A cord accidentally crossing essential text is a design failure.
Start with the use state, not a flat mock-up
Approve three visual states: flat and open, filled and standing, and closed with the cord fully cinched. The channel that looks neat when flat becomes a series of folds when closed. The lower panel may also round outward when filled. A design that works only on the flat rendering is not yet approved for the actual product.
2. Build a drawstring-specific coverage map
Ask for a measured pattern or a production-intent sample. Mark the finished front and back faces, fold lines, seam lines, cord exits, reinforcement areas and any pocket edges. Then map the flat fabric panels back to those finished locations. For broader bag-structure context, see our gusset and bottom construction guide.
| Zone | What happens after sewing or use | Artwork decision |
|---|---|---|
| Top channel | Fabric folds over and gathers | Use low-information pattern; keep essential words below it |
| Side seams | Printed edge is turned inside and stitched | Extend background beyond cut line; do not promise exact motif join without trial |
| Bottom seam or gusset | Panel curves and partly disappears underneath | Avoid focal subjects near fold or center of base |
| Cord exit / eyelet | Hole, opening or hardware removes printed area | Keep critical art away from the cutout and reinforcement |
| Exterior pocket | Pocket covers the base-panel print | Decide whether pocket print matches, contrasts or remains plain |
| Lining / inside | May appear when the mouth opens | Decide whether inside color is part of the campaign design |
The cord, eyelet and reinforcement guide covers the hardware choice; for a full-surface graphic, treat those components as fixed visual interruptions. A first sample should show their exact positions.
Separate design intent from manufacturing tolerance
If a botanical motif must appear continuous across a side seam, specify the intended joining point and acceptable displacement in the signed artwork package. If continuity is not essential, use a repeat that tolerates a pattern break. There is no universal safe distance from every seam: fabric movement, cutting, stitch take-up and print route change it. Let the converter establish order-specific bleed and no-critical-art zones from a real pattern.
3. Choose the production route: roll, panel or finished bag
The stage at which fabric is printed determines how much of the surface can be covered and how tightly the graphic can be placed.
| Route | Useful when | Watch-outs | Evidence to request |
|---|---|---|---|
| Print the fabric roll, then cut and sew | Overall repeats; many identical bags | Pattern phase varies from bag to bag unless cutting is controlled | Repeat swatch, cut plan, assembled sample |
| Cut panels, then print and sew | Engineered front/back placement; named visual center | Each panel needs orientation and placement control | Front/back files, panel IDs, registration references |
| Print assembled bag | Local decoration or large—but not truly edge-to-edge—coverage | Seams, channels and wrinkles obstruct even pressure | Finished-bag print proof in all use states |
For most true edge-to-edge requests, panel-first or roll-first production is the practical route. Printing a pre-sewn bag can still be appropriate when the buyer accepts a margin around seams and channel. Do not call that full-surface coverage without showing the unprinted areas.
How to choose between repeat and engineered art
A repeat is usually more forgiving if its scale and phase can vary slightly. An engineered composition gives more control over the focal image but requires a stable cut plan, panel orientation and sewing reference. The same full-surface visual can therefore have very different production complexity. Ask for separate estimates for both approaches if the campaign design allows it.
4. Match the print route to the actual substrate
The material determines whether a method can reproduce the desired colors and whether the surface remains suitable for sewing. Do not select a print process from a photograph alone; confirm fiber composition, weave, coating, finish and the production-intent fabric lot. Our materials overview and polyester versus nylon comparison help narrow the base fabric.
| Substrate/design brief | Candidate route to sample | Key verification |
|---|---|---|
| White or light polyester; photographic multicolor art | Dye-sublimation on suitable flat fabric/panels | Fiber content, shade, heat response, face/back appearance |
| Cotton or canvas; repeat or multi-color art | Screen, suitable textile digital process, or another approved panel-print route | Ink chemistry, hand feel, curing, rub/wash expectation |
| Dark base with bright or white graphics | Route with an appropriate opaque underbase/transfer, where feasible | White opacity, hand feel, edge definition, migration |
| Coated or laminated fabric | Process qualified for that exact coating | Adhesion, flexibility, heat/pressure damage |
Epson's dye-sublimation explanation says the process works on polyester or polyester-coated surfaces and does not print opaque white; light substrates are normally favored. That makes “sublimate our dark cotton pouch” an unsuitable default specification. A new construction or print route needs to be sampled instead. Our polyester sublimation versus screen-printing comparison goes deeper on that decision.
Do not confuse coverage with print durability
An attractive full-bleed sample can still fail in use if the print abrades where cords rub, cracks at a fold, transfers color during packing, or changes after cleaning. Define a product-specific handling and care expectation first; then request testing on the chosen material and print system. Neither full-surface coverage nor the name of a print technique is a durability guarantee.
5. Design the artwork around the drawstring channel
The top channel is the most distinctive challenge in this category. Its fold consumes some artwork, the cord mouth interrupts it, and closing the bag compresses the visible width. Treat it as a graphic band with a variable appearance, not as a reliable billboard.
Use pattern, texture or background color through the channel. Put faces, product photography, disclaimers, QR codes and small type in a lower stable zone if they must remain readable. If the channel is separately constructed, decide whether its fabric should be printed, solid-colored or deliberately contrasting. If the channel is folded from the body panel, its print orientation and fold allowance belong in the same art file as the body.
A simple visibility test before sampling
On the digital mock-up, draw the approved sewn seam and fold lines. Hide the channel fold allowance, compress the remaining upper strip into irregular gathers, and cover the cord-exit locations. Then view the bag at expected retail distance. If the campaign message disappears, move it. The digital test screens out bad placements; the physical cinched sample makes the final decision.
6. Set up separate front, back and component artwork
Use a production file for each externally visible component: front, back, gusset, channel if separate, and pocket if present. Mark the intended top, finished centerline, cut edge, sew line, fold line and pattern direction. If two sides must be identical, state that expressly; do not assume the printer will mirror or rotate the art correctly.
| File or layer | Minimum information | Why it matters |
|---|---|---|
| Approved graphic | Editable master and linked images/fonts as applicable | Preserves the intended pattern and color references |
| Pattern/cut layer | Cut outline and panel ID | Prevents front/back or top/bottom reversal |
| Sew/fold layer | Seam allowance, channel fold, pocket placement | Shows which areas will disappear or be covered |
| Bleed/keep-out layer | Order-specific extension and no-critical-content zone | Avoids pale slivers and lost essential artwork |
| Color reference | Agreed target, substrate and review light | Makes proof comparisons meaningful |
| Version block | Revision, date and approver | Stops old art from entering a reorder |
Adobe's printer-mark and bleed guidance explains the basic reason for extending art beyond a trim edge. On fabric, however, the converter must set the actual extension from its cut-and-sew route; a generic paper-print bleed number should not be copied into a bag tech pack.
Plan orientation and mirroring deliberately
The transfer sheet for dye sublimation may be mirrored, while the finished panel must read correctly. A one-way pattern also needs an unambiguous “up.” Record whether the art is directional, whether front and back are paired, and whether inside/outside fabric faces are identifiable. A small numbered strike-off can catch an upside-down or backward panel before multiple pieces are cut.
7. Design seam continuity honestly
Printed panels do not magically align after sewing. Seam allowance removes part of each edge; the fabric can stretch slightly; a gusset creates another turn; and a bottom corner may fold a motif away from view. A production target should distinguish an intentional-looking transition from a demand for perfect pixel continuity.
For a repeating pattern, position the repeat so inevitable breaks occur at less noticeable sections. For an engineered picture, determine whether a side seam may contain a planned solid band, a matched color field or a visually quiet motif. If the buyer wants uninterrupted lettering or a face across a seam, recommend redesign before quotation unless a physical trial proves acceptable. See the broader full-surface shopping bag guide for how the same issue appears in other bag structures; the top gathering makes drawstring bags less predictable.
8. Control color on the real fabric, not a screen
Approve color on the actual material and finishing combination, not only a PDF. Fabric whiteness, texture, coating, heat and print chemistry affect the result. A Pantone or digital color value can be a reference, but it is not proof that every method reproduces it identically. Make the print route, substrate lot and review lighting part of the approval record.
For paired front/back panels, check them side by side before sewing and again on the completed bag. If the top channel uses a different fabric or is folded to expose the reverse side, include that view in approval. For future reorders, retain the agreed color reference and artwork revision; our logo and color consistency guide explains the wider version-control principle.
9. Make a sample that tests the construction, not only the press
A printed swatch proves print appearance on a small piece. It does not prove placement on a finished drawstring bag. Use staged approval so each step answers a different question.
| Gate | Physical evidence | Buyer decision |
|---|---|---|
| 1. Material/print trial | Production-intent fabric strike-off | Are color, hand feel and reverse side acceptable? |
| 2. Cut-panel proof | Front/back and any gusset/pocket laid flat | Are repeat, orientation, bleed and panel pairing correct? |
| 3. Sewn sample | Fully assembled bag, open and cinched | Are seams, channel, cords and artwork aligned acceptably? |
| 4. Use simulation | Filled, carried and packed sample | Do focal elements remain visible; is there rub or transfer? |
| 5. Golden sample | Written approval with versioned files | Is this the reference for bulk inspection? |
The drawstring sample-development process explains how to freeze decisions. If anything changes—fabric, print method, channel depth, bag size or graphic scale—decide whether the sample must be repeated. A render-only approval is especially risky for full-surface work.
Photograph more than the flattering front view
Request front and back photos, flat and filled, open and cinched, plus close-ups of both side seams and the cord exits. The angle used in a sales image can hide a pattern jump. A bag turned sideways or fully closed often exposes the actual issue.
10. Build inspection rules around visible failure modes
Quality criteria should be tied to the approved golden sample and the intended viewing condition. Record what is a major defect, what variation is acceptable, who checks it, and how many units will be inspected. The custom bag quality inspection checklist provides the larger order-level framework.
| Defect to watch | Likely control point | Practical prevention or check |
|---|---|---|
| Pale sliver at sewn edge | Artwork/cutting | Confirm project-specific bleed and first sewn unit |
| Reversed or upside-down motif | Panel handling | Mark top, face and front/back on cut panels |
| Abrupt pattern jump at seam | Repeat/cut plan | Use approved seam transition, not screen-only matching |
| Uneven color front to back | Print/substrate lot | Pair panels from controlled run; compare under agreed light |
| Distorted image at channel | Construction/artwork | Keep focal art outside gathering zone; inspect cinched bag |
| Cracking, rub-off or color transfer | Ink/finish/cure/packing | Use agreed use test on production-intent sample |
| Pocket image out of phase | Component artwork/assembly | Approve pocket placement and printed-pocket orientation |
If the first completed bag reveals an issue, trace it to the stage that introduced it. A seam jump is not fixed by changing ink color; a pale edge may require more bleed or a revised cut plan; distorted artwork near the cord may require moving the focal image. Do not approve bulk production solely because the flat panel looks correct.
11. Avoid common artwork mistakes before quotation
A single flattened JPG: It hides separate panel and fold instructions. Supply editable or production-quality files with a component map.
A mock-up without measurements: It cannot establish the final printed area. Provide finished width/height, channel depth, gusset configuration and the pattern or sample.
Important copy at the top edge: It will gather or disappear into the channel. Move mandatory text to a stable body zone or to a separate label.
Assuming every pale fabric is sublimation-ready: Confirm fiber composition and surface treatment first; sample the exact fabric.
Expecting print through a seam: Sewing turns fabric inward. Unless the design deliberately spans component edges and has an accepted mismatch, a seam is a break.
Ignoring rights: A customer's campaign artwork, illustration or logo needs permission for manufacturing and public display. LUCKYSTAR sample or customer imagery should not be reused in marketing without the relevant channel rights.
For file handoff, use our drawstring bag tech pack guide as a companion checklist.
12. Understand what changes price and production time
Full-surface printing can change material consumption, print setup, cut waste, panel sorting, sampling and inspection. An engineered graphic requiring precise alignment is not priced like a loose repeat. Dark bases, white underbases, special coatings and multiple fabric components may add separate feasibility work. Do not infer a universal minimum order or lead time from another bag.
Ask suppliers to quote the same finished dimension, material, print coverage, number of artwork versions, packaging and acceptance criteria. If possible, request an option for a repeat pattern and one for engineered panel art. Our drawstring MOQ and production-time guide and pricing guide explain why order-level specifications matter. Final prices, minimums and dates remain subject to specification and written confirmation.
13. Why discuss this project with LUCKYSTAR?
LUCKYSTAR's public offering covers customizable drawstring bags, OEM/ODM coordination and sampling. For full-surface artwork, the useful value is a connected review of the material, printed panel, channel construction, sample and final inspection point—not an unsupported promise that any image can wrap any pouch flawlessly. The custom drawstring bag product page is the starting point for formats and inquiry; our manufacturer-selection guide explains what evidence a buyer should request from any supplier, including us.
When you send an RFQ, ask us to confirm in writing which process and supplier arrangement will be used for your substrate, where printing and sewing happen in the sequence, what the approved sample will show, and which defects will be checked. This is more useful than a generic “yes, full color is possible.” The broader custom bag manufacturer guide covers supplier due diligence beyond decoration.
We do not claim a company-wide certification, fixed MOQ, guaranteed production time or owned printing facility from this article. Any material, performance, testing, certification or commercial term must be verified for the specific order.
14. A full-surface drawstring bag RFQ checklist
Send this concise set of inputs to make a feasibility response actionable:
| RFQ field | What to supply or ask |
|---|---|
| Use and market | Promotional, retail packaging, dust bag or other use; destination and care expectation |
| Finished bag | Width × height, flat/round/gusset bottom, channel style, cord and pocket details |
| Material | Known fiber/coating/weight or sample; acceptable alternatives |
| Coverage | Front/back, channel, gusset, pocket and lining included or excluded |
| Artwork | Repeat or engineered panels; vector/raster assets; color reference; usage rights |
| Visual priorities | Essential text, focal area, acceptable seam breaks and cinched-state appearance |
| Quantity | Total and splits by artwork/color/size; reorder expectation |
| Quality | Golden sample, color reference, inspection criteria and intended use tests |
| Delivery | Packaging, destination, target arrival window and trade terms to confirm |
Ask for a coverage map and sample plan with the quotation. If the supplier proposes a front-only assembled-bag transfer, you can decide knowingly whether that meets the campaign brief instead of discovering the limitation after approval.
15. Frequently asked questions
Can a full-surface graphic be printed after the drawstring bag is sewn?
Sometimes a large front or back area can be decorated after sewing. It is usually less suitable for true edge-to-edge coverage because seams, channels and wrinkles interfere with flat printing or pressing. Confirm the visible unprinted margin on a physical sample.
Will an all-over pattern line up perfectly at the side seams?
Not automatically. Seam allowance, cut phase, fabric movement and sewing variation affect the join. Specify an acceptable seam appearance and trial an assembled bag if alignment is visually important. A forgiving repeat is easier to manage than a picture that must join pixel-for-pixel.
Is dye sublimation suitable for dark cotton drawstring bags?
No, not as a default route. Epson describes dye sublimation as suitable for polyester/polyester-coated surfaces and notes that its inks do not include opaque white. A dark cotton brief needs a different qualified route or a changed substrate, validated by sampling.
What artwork should a buyer provide?
Provide separate front, back and component files; finished dimensions; cut/fold references; pattern direction; color targets; critical-content locations; revision details; and artwork rights. If those references are not yet available, begin with a sample and pattern-development request rather than guessing print coordinates.
Does “full-surface” include the gathered top and the cord?
Only if the purchase specification says so and the approved sample demonstrates it. The body fabric can be printed through the top channel area, but folds will obscure portions of the graphic. A cord is a separate component that can be selected or printed only if an appropriate option is confirmed.
16. Final decision: approve the finished visual experience
The route to a successful full-surface drawstring bag is define coverage → map the sewn construction → choose the substrate and print sequence → prepare component artwork → approve a cinched and filled sample → inspect bulk against the same reference. That sequence is the distinct drawstring-specific issue that broad printing-method comparisons cannot resolve.
If you have artwork, a target material and an approximate quantity, send LUCKYSTAR the project brief. We can discuss a project-specific print route, coverage map, sample and quotation, each subject to specification and written confirmation.

Technical references: Epson, How Dye-Sublimation Works and Adobe, Printer's Marks and Bleeds. Process recommendations in this article are general design guidance, not a test result or production claim for a specific LUCKYSTAR order.