A graphic that appears to reach every visible edge of a shopping bag is not simply a large logo. The artwork has to survive cutting, folding, gusset formation, handle attachment, stitching or heat sealing, and normal conversion tolerances. A design can look perfect on a flat mock-up yet lose a border inside a seam, reverse direction on a side panel or create a white sliver after cutting.
This guide explains How to Print Full-Surface Graphics on Shopping Bags as a production system. It covers panel mapping, repeat design, bleed, safe zones, white layers, material-specific print routes, seam matching, samples and bulk inspection. It complements the broader custom shopping-bag printing methods guide, while concentrating on artwork that covers most or all of the constructed surface.
Browse LUCKYSTAR’s manufacturing examples for custom shopping carriers. The Shopping Bags manufacturer-selection pillar supports category-level screening; broader production capability can be evaluated with this factory qualification guide.
Planning an order? Send a full-surface print brief. Include finished bag construction and panels to cover, acceptable unprinted zones, repeat or engineered composition, motif direction/scale and critical joins, material/layer stack, route and colour/white/finish plan, quantity by SKU, returned dieline/bleed/safe zone, converted sample and bulk first-off gates, packing, destination and required date.
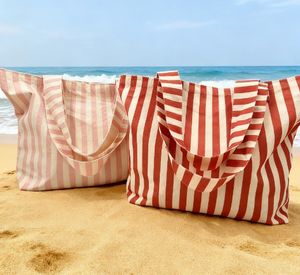
Real striped canvas shopping bags shown by LUCKYSTAR on its Made-in-China product page. The stripes demonstrate how a repeated field interacts with front panels, gussets, handles and seams; the exact production route must still be confirmed for each order.
Page role: This technical guide owns full-surface artwork, panel mapping, bleed, seam matching, proofing and bulk print control. Use the worldwide shopping bag manufacturer guide for a supplier shortlist, and the custom shopping bag collection for specification and quotation planning.
1. Define “full-surface” before asking for a quotation
Buyers use “full print,” “all-over,” “edge-to-edge” and “full bleed” for different results. A factory may quote a large print area on a finished bag while the buyer expects colour under the handles, into the gusset and through the bottom fold. Put the coverage into a panel schedule and mark the areas that may remain unprinted.
| Coverage term | Practical meaning | Suitable use | Main risk |
|---|---|---|---|
| Oversized local print | Large image within a defined printable window; visible margin remains | Campaign artwork where a clean border is acceptable | Calling it “full print” creates an expectation gap |
| Panel full bleed | Artwork extends past the cut line of one or more flat panels | Front/back colour fields, paper bags, cut-and-sew panels | Seams or folds may still interrupt the image |
| All-over repeat | A tile or stripe repeats across roll stock or every required component | Patterns, textures, small motifs and brand monograms | Repeat joins or direction can become visible |
| Engineered placement | A specific image is positioned to each cut part and intended finished view | Murals, large typography, front-to-gusset compositions | Cut and sewing tolerance can disrupt alignment |
| Continuous wrap | Artwork is intended to visually continue around multiple faces | Premium retail or promotional statements | A perfectly invisible join may be technically or commercially unrealistic |
Ask the supplier to return an annotated mock-up showing front, back, side gussets, bottom, mouth turn, handle zones, seam locations and any unprintable strip. This one-page coverage record is more useful than relying on a product name.
2. Build the graphic around the bag construction
A shopping bag is a three-dimensional package made from flat components. Some styles use separate front, back, side and bottom parts. Others begin as one folded web or a tube. A boxed tote may hide part of the design inside the bottom and side folds. A paper bag can include a glued side seam, top turn and reinforced handle patch. Freeze that construction before final artwork.
The shopping-bag artwork and dieline guide explains file setup in more detail. For full-surface work, the critical addition is a finished-view map: it shows which flat regions become visible together after conversion.
| Bag zone | Artwork decision | Conversion allowance | Approval check |
|---|---|---|---|
| Front and back | Primary message, repeat origin or focal image | Cut bleed, top turn, side and bottom seam/fold | Finished centre, visible crop and orientation |
| Side gussets | Continue field, use a separate repeat or accept a designed break | Gusset depth, fold take-up and joining seam | Open and folded appearance |
| Bottom | Continue pattern, use solid colour or omit critical art | Box corners, base insert, weld/stitch and hidden fold | Bag both flat and loaded |
| Top turn / mouth | Decide whether colour wraps inside or ends before the fold | Hem, reinforcement and closure components | No unintended white line at top edge |
| Handle attachment | Choose continuous background or reserved patch | Stitch box, weld, rivet, adhesive and handle shadow | Logo/face is not covered or punctured |
| Side/glue seam | Use overlap, controlled join or intentional interruption | Seam width, adhesive/no-print area and register tolerance | No exposed unplanned sliver |
3. Choose between a repeat and an engineered composition
A repeat tile is usually more tolerant of conversion variation. Small motifs, stripes, terrazzo, checks and textures can continue past cut lines without one exact feature needing to meet another. An engineered composition places a specific subject or word on a known panel. It can create a stronger visual statement, but every cut and seam affects the result.
Use a repeat when the bag family contains several sizes or when the same printed roll will feed multiple SKUs. Use engineered placement when the campaign requires a front focal point, a rear information panel or a deliberate wrap. A hybrid design can use an all-over repeat as the field and reserve a controlled central area for a logo or message.
| Design structure | Advantages | Production burden | Good practice |
|---|---|---|---|
| Random toss | Hides small shifts; easy to crop | Check unwanted motif clusters and direction | Review several adjacent repeats, not one tile |
| Straight or half-drop repeat | Efficient roll coverage and scalable system | Visible repeat lines if spacing is weak | State repeat width/height and origin |
| Stripes or checks | Strong shelf impact and simple colour story | Skew, bow and seam mismatch are easy to see | Define stripe direction on every part |
| One-panel hero image | Controlled front communication | Requires placement to the cutting reference | Add a background that can bleed safely |
| Multi-panel wrap | Immersive premium appearance | Highest mapping, registration and assembly risk | Agree a visible-join tolerance and golden sample |
4. Print flat material before conversion when the design must reach the edge
Printing a finished bag is suitable for many logos, but the seams, handles and three-dimensional shape obstruct the printing head, screen or platen. True edge-to-edge results are normally achieved by printing roll stock, fabric yardage, sheets or separate panels first, then cutting and converting them.
The sequence changes the risk. Pre-printing gives coverage beyond the cut line, but the artwork must tolerate downstream dimensional movement. A laminated woven PP bag may begin with a reverse-printed film, then be laminated to woven cloth before cutting and sewing. A paper bag may be printed in sheet or web form before die-cutting, folding and gluing. A cotton tote may use printed yardage or panel printing before cut-and-sew. “Same picture” does not mean “same production path.”
5. Match the print route to the material and quantity
| Bag platform | Common full-surface route to evaluate | Strength | Watch point |
|---|---|---|---|
| Cotton / canvas | Printed yardage, roll-to-roll textile process or printed cut panels before sewing | Natural hand and broad cut-and-sew freedom | Weave, absorbency, shrinkage, skew and seam take-up |
| Compatible polyester | Qualified transfer/sublimation or direct textile route before cutting | Detailed multicolour imagery on a suitable system | Fibre/finish compatibility, migration, show-through and heat response |
| Non-woven PP | Roll flexo, gravure where justified, or printed film lamination | Repeatable web production for retail and promotion | Surface treatment, fine detail, weld zones and laminate claims |
| Woven PP | Direct web printing or reverse-printed BOPP film laminated to woven base | Durable grocery format; laminate supports photographic graphics | Distortion, white layer, lamination bond, fold cracking and registration |
| Paper shopping bag | Offset, flexo, gravure or production digital on sheets/web before conversion | Clean full-bleed panels and premium finishing options | Crease, glue flap, top turn, paper shade and cracking |
| PVC / TPU film | Compatible surface or reverse print on flat film/panels before welding or sewing | Transparent, translucent or colour-layer effects | Ink/film compatibility, blocking, migration, clarity and weld contamination |
For detailed non-woven and woven choices, see Printing Methods for Non-Woven Shopping Bags and Printing Methods for Woven PP Shopping Bags. The route should be named in the quotation; “full colour printing” alone is not a manufacturing specification.
6. Bleed must be set by the converter, not copied from another package
Bleed is artwork extending beyond the intended cut or trim so normal cutting variation does not expose an unprinted edge. There is no universal shopping-bag bleed value. The required allowance depends on the material, press repeat, cutting system, panel size, fabric relaxation, lamination, fold and converting method.
Ask the producing factory to mark the cut line, fold/crease lines, seam allowance, glue/weld exclusion, handle attachment, top turn and safe zone. Extend only background elements into the bleed. Keep legal text, barcodes, faces, QR codes, thin borders and essential logos inside the factory-confirmed safe zone.
The FTA FIRST 7.0 Design Guide treats packaging design as a collaborative process among customer, designer, prepress provider and printer, and covers issues such as print specifications, distortion, trapping and dielines. Use the assigned printer’s specification rather than a generic desktop template.
7. Prepare a production artwork package, not only a rendered mock-up
The factory needs editable production files plus the visual reference. Supply vector logos and type where possible, package linked images, outline or include fonts as requested, and maintain raster images at suitable effective resolution after scaling. Do not hide a low-resolution screenshot inside a large Illustrator artboard.
For repeating graphics, include the master tile, repeat dimensions, repeat type, direction arrow and a view of several repeats. For engineered art, identify each panel and the final reading direction. Separate process colour, named spots, white, varnish or other technical layers. Use the logo placement and print size guide for local branding inside the larger composition.
Adobe’s colour-separation guidance explains how process and spot artwork create separate output plates. That separation logic matters when a full-surface image also needs an opaque white layer, a protected spot logo or a finish.
| File item | What to supply | Factory return | Release gate |
|---|---|---|---|
| Construction | Chosen style, dimensions, gusset/bottom, handles and closure | Controlled dieline/panel map and revision | Dimensions match approved sample brief |
| Artwork | Editable file, links, fonts and placed reference PDF | Preflight report and production proof | No missing links or unintended substitutions |
| Repeat | Tile, width/height, drop, direction and motif scale | Step-and-repeat layout across usable web | No visible seam or accidental motif cluster |
| Separations | CMYK/spot/white/finish intent and overprint notes | Named station/tool plan and preview | Separation count agrees with quotation |
| Colour target | Pantone or physical standard plus approved process reference | Material-specific drawdown, strike-off or proof route | Target and tolerance recorded |
| Finished view | Front/back/side/bottom render with critical zones | Converted sample photos and physical sample | Crop, direction and join are accepted |
8. Plan colour and white as part of the material stack
Full-surface imagery exposes colour variation over a large area. A natural canvas shade, brown kraft base, translucent film or coloured PP body changes the result. Decide whether the substrate should remain part of the design, whether an opaque white underbase is required, or whether the image will be reverse printed against a white backing film.
A large colour field can make small density shifts easier to see. Photography may favour process colour; a critical flat brand tone may need a spot separation or an accepted process simulation. The Pantone vs CMYK guide covers that choice, while the shopping-bag colour matching article covers drawdowns and bulk approval.
If colour measurement is part of the specification, record substrate, backing, instrument geometry, illuminant/observer, aperture, measurement mode and tolerance method. ISO 12647-6 is the process-control standard for flexographic printing; whether and how it applies must be agreed with the actual printer and product, not assumed from a supplier’s generic capability statement.
9. Registration is a tolerance stack, not one press number
A multi-colour image can be well registered on the printed web and still shift relative to a seam. Total placement reflects print repeat, web stretch, lamination, slitting, cutting, fold, sewing or welding. A full-surface project therefore needs two related controls: colour-to-colour registration within the image and image-to-construction placement on the finished bag.
For exact wraps, identify the most important join. Protect one hero alignment rather than demanding perfect matching at every seam if the process cannot economically hold it. Hide lower-priority joins under the side seam, bottom or fold. Use background texture, overlap or a designed colour break to absorb variation.
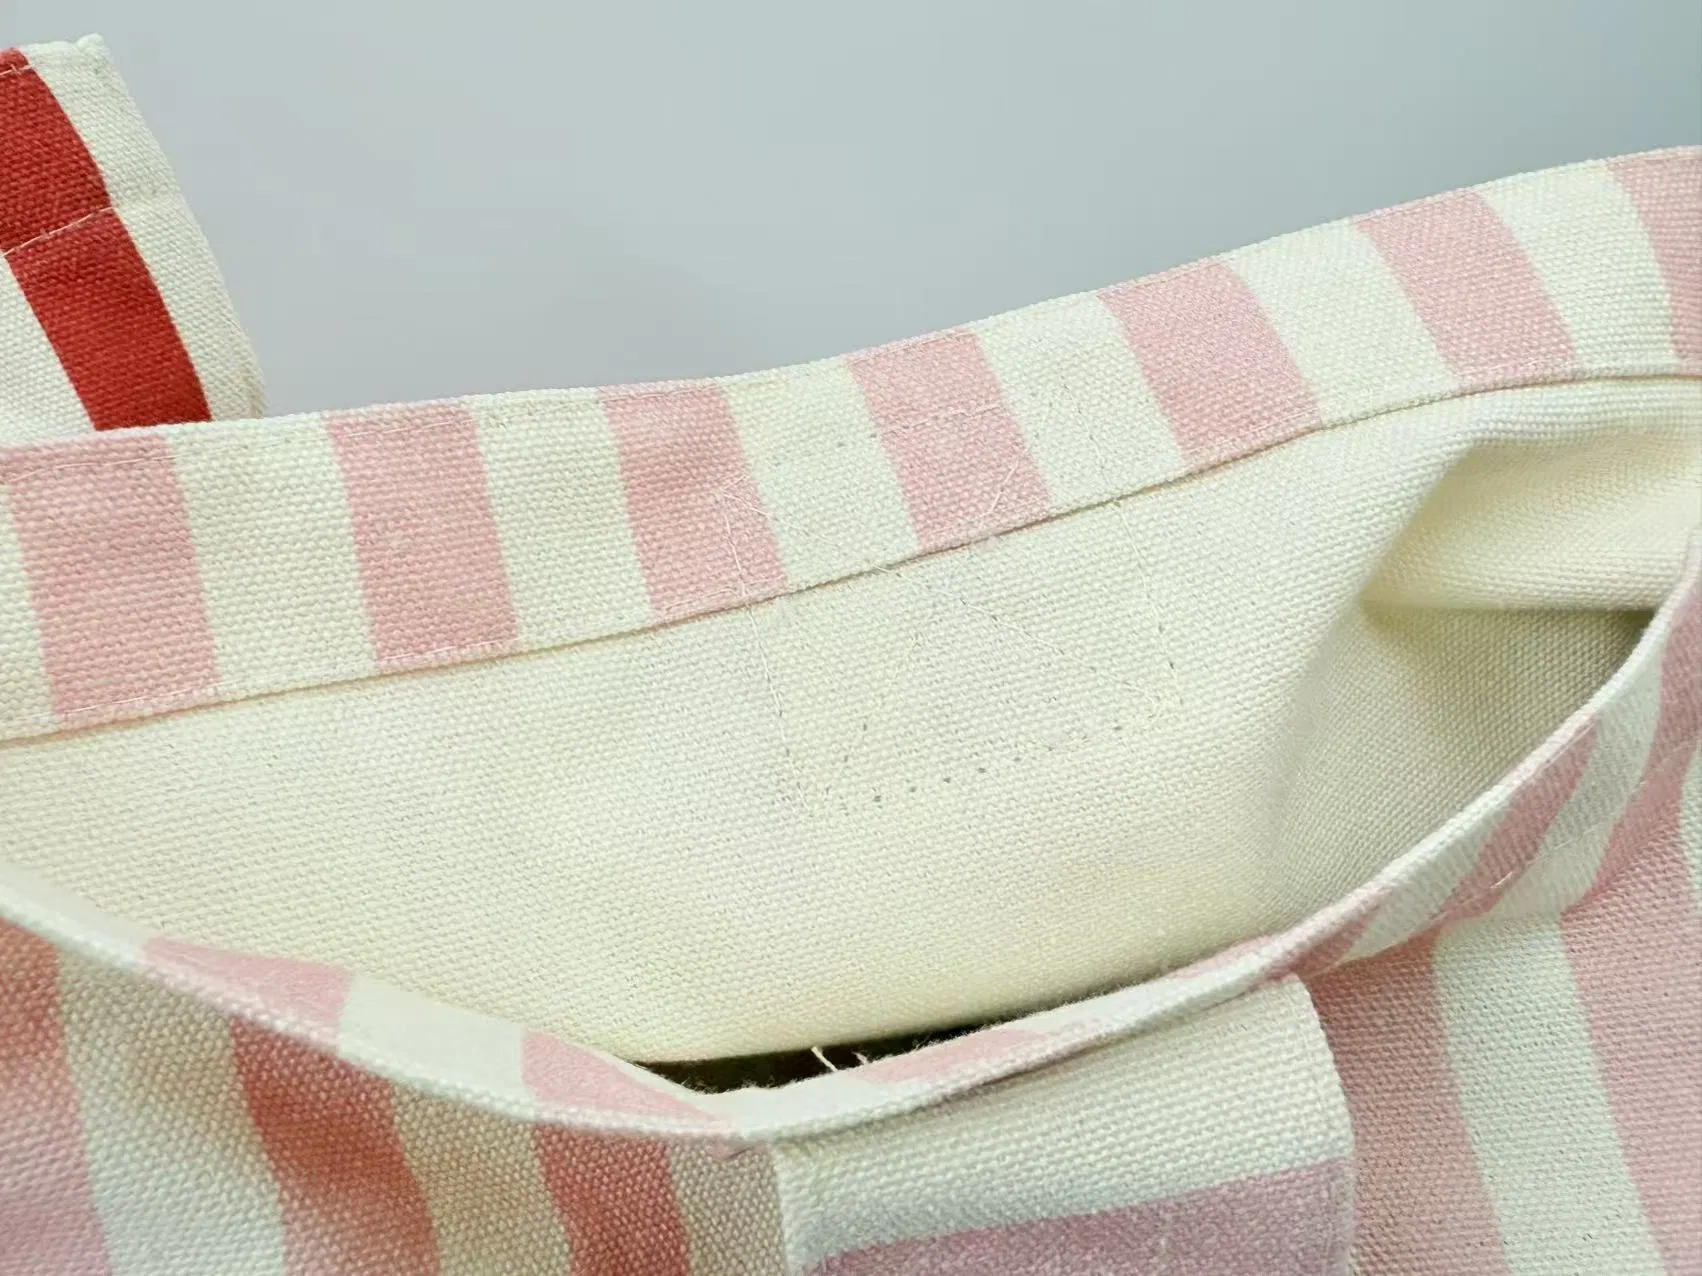
A close-up from the same real LUCKYSTAR product listing shows the relationship between the striped field, folded mouth, handle webbing and stitch box. Full-surface approval must include these construction interactions, not only the flat printed panel.
10. Sampling should move from flat evidence to a converted bag
A screen PDF can confirm content and approximate placement but not substrate colour, texture, opacity, hand, fold or seam matching. A flat strike-off can confirm ink behaviour and repeat. A converted sample confirms the three-dimensional result. Build approvals in that order and state what each stage is authorized to approve.
| Approval stage | Evidence confirmed | Evidence still missing | Decision |
|---|---|---|---|
| Dieline / digital layout | Content, panel assignment, repeat logic, bleed and direction | Final colour, material response or sewing accuracy | Release prepress only |
| Colour drawdown / strike-off | Ink-substrate appearance, opacity and early adhesion response | Full repeat and constructed placement | Approve colour/process trial |
| Full repeat / press panel | Scale, repeat join, process detail and register | Final seams, folds and loaded shape | Release conversion sample |
| Converted pre-production sample | Crop, fold, gusset, handle obstruction, seam and finished appearance | Long-run consistency by itself | Sign golden sample and defect rules |
| Bulk first-off / first roll | Actual production materials, press and conversion setup | Entire run without continued checks | Authorize production and in-process frequency |
The detailed custom shopping-bag sample development process helps define sample rounds and change control. For full-surface graphics, each approval should carry the artwork revision, dieline revision, material, print route, colour reference and date.
11. Set quality rules around the intended visual experience
Inspect the finished bag in both flat and opened states. A gusset graphic can look misaligned when folded but correct when expanded—or the reverse. Define the viewing state that matters at retail. Check both sides, side joins, bottom, top edge and handle attachments.
| Control item | How to evaluate | Typical failure | Preventive control |
|---|---|---|---|
| Coverage / bleed | Inspect every visible cut, fold and opening edge | White or body-colour sliver | Converter-set bleed and first-off check |
| Repeat | Compare motif scale, direction and join over several bags | Repeat line, doubled motif or reversed panel | Approved step-and-repeat and orientation map |
| Colour registration | Use agreed critical edges and magnification where appropriate | Halo, fringe or blurred small type | Process-specific trap and register target |
| Image placement | Measure focal art to converted reference points | Logo drifts into seam or under handle | Cut/print marks and placement tolerance |
| Seam / gusset continuity | Open bag and compare accepted join tolerance | Broken stripe, stepped horizon or lost subject | Designed overlap/break and trained assembly |
| Durability | Rub, flex, fold, pack hold and intended care/use tests | Scuff, crack, transfer, blocking or delamination | Qualified material/ink/laminate stack |
Integrate print acceptance with this bag QC protocol. A beautiful full-surface panel does not compensate for weak handle attachment, incorrect dimensions or an unstable bottom.
12. Diagnose common full-surface graphic failures
Unprinted line at the edge: check bleed, cutter registration, web wander and whether that edge is actually a fold or cut. Pattern jumps at the side seam: compare repeat length, seam allowance, print-to-cut placement and assembly orientation. Graphic tilts across the bag: inspect print skew/bow, fabric grain, lamination and cutting alignment.
Fine image looks muddy: evaluate artwork resolution, screening, ink spread, fabric texture and whether a smoother printed layer is needed. Colour changes over the gusset: check whether the gusset is a separate lot/material, whether it was printed in a different direction or whether folds change light reflection. Cracking at the fold: review ink/film flexibility, laminate bond, crease severity and conditioning.
White halo around artwork: inspect white-to-colour register and choke/spread. Back panel reads upside down: correct the panel orientation map rather than rotating the entire artwork without checking the construction. Logo is hidden by handles: use the true attachment footprint, including stitch/weld and handle shadow, not only the centreline.
13. Full coverage changes MOQ, setup and cost
Cost is driven by more than ink area. Full-surface work can require a larger screen, extra plates or cylinders, a white layer, laminated film, longer makeready, more proofing and tighter print-to-cut control. Engineered placement can reduce yield if components must be cut to a specific image. A repeat may use the web more efficiently.
Request a cost breakdown for artwork/prepress, tools, sample route, printed material, white or finish layers, lamination/transfer, conversion, inspection, packing and freight. Group quantities by each combination of bag base, art file, dimensions, finish and body shade, because apparently related SKUs can still require separate setups.
| Cost lever | Why it changes price/MOQ | Smart simplification | Do not compromise |
|---|---|---|---|
| Repeat vs engineered art | Placement cutting can reduce material yield and speed | Use a repeat field with one controlled focal zone | Approved motif scale and direction |
| Ink / station count | Each spot, white or finish may add setup/tooling | Remove redundant spot channels or accept a qualified process build | Critical brand colour and legibility |
| Artwork count | Each unique print can create separate makeready and minimum | Use one common background across SKUs | Correct legal and market information |
| Seam matching | Tight visible joins need slower, controlled conversion | Move join or design an intentional break | Signed tolerance on the hero seam |
| Proofing | Converted samples consume printed material and setup time | Approve in staged gates to avoid unnecessary remakes | At least one route-representative converted approval |
| Material width | Panel nesting and web width affect waste | Adjust non-critical dimensions to improve yield | Required capacity and functional strength |
14. Do not turn “all-over print” into an unsupported sustainability claim
More ink coverage, a white layer or a laminated printed film can change material composition, recyclability pathways, energy use and durability. The correct comparison is project-specific. A durable design that remains attractive through repeated use may support a reuse programme, but “reusable,” “recycled,” “eco-friendly” or “recyclable” claims still need defined evidence and market review.
Ask whether a full-surface effect can be achieved with the base material colour, fewer layers, a smaller but stronger visual field or a mono-material construction. At the same time, do not remove a protective layer if it causes the print to fail prematurely. Record material composition, ink/coating or laminate stack, durability result, packaging and the intended end-of-life route.
Company-claim boundary: LUCKYSTAR statements in this section are publisher self-description, not third-party verification, ISO/FTA/Adobe certification, print/conversion capability report, laboratory result or assurance of edge-to-edge coverage, seam matching, colour, tolerance, MOQ, price, durability, environmental result or delivery date. Confirm the contracting entity, assigned material/printing/laminating/converting sites and subcontracting; returned dieline, layer stack, tools, proofs, samples, tests, inspection, packing and release terms for the order.
15. How LUCKYSTAR describes its full-surface review
LUCKYSTAR states that its project team can connect a full-surface design with one locked bag construction, named production route and staged approval plan, subject to specification and written confirmation.
- Define coverage: mark every front, back, gusset, bottom, top-turn and handle area to print, plus deliberate unprinted zones and the intended filled/flat viewing state.
- Freeze construction: record finished dimensions, pattern/panel map, seams or glue/welds, folds, hems, handles, reinforcements, closure and assembly order before setting bleed.
- Choose design logic: label repeat or engineered composition, motif scale/direction, focal subjects, pattern phase and critical joins; design intentional breaks where exact continuity is not achievable.
- Return the production file: require converter-controlled dieline, cut/fold/seam/handle layers, route-specific bleed/safe zone, repeat and white/spot/process/finish separations.
- Approve physical stages: separate file/separation review, printed material or film, lamination/transfer where used, converted golden bag and bulk first-off.
- Inspect the tolerance stack: define print-to-cut, panel placement, seam/gusset continuity, register, colour, rub/flex/fold, bond/blocking and complete-bag acceptance by SKU and production interval.
Review the public custom shopping bag constructions, the artwork-and-dieline guide and the print-route overview. Then send the construction, coverage map, artwork and SKU matrix for a route-specific proposal.
16. Send a full-surface-print-ready RFQ
| RFQ field | Buyer input | LUCKYSTAR response |
|---|---|---|
| Bag brief | Use, load, material preference, size, gusset/bottom, handles, closure and quantity | Recommended construction and production route |
| Coverage | Panels to print, acceptable unprinted zones and finished viewing state | Annotated coverage map and technical exclusions |
| Design | Repeat or engineered art, master files, motif scale, direction and critical joins | Dieline, repeat layout, bleed/safe zone and preflight notes |
| Colour / layers | CMYK/spot intent, white, opacity, finish and physical colour references | Separation and proofing plan for the selected surface |
| SKU matrix | Units for every bag base, dimension, art file, body shade, finish and destination | MOQ/changeover/tooling map and cost options |
| Approval | Required digital proof, strike-off, converted sample, first-off and test protocol | Milestones, lead time and controlled references |
| Commercial | Deadline, packing, carton limits, trade term, reorder horizon and tool ownership | Itemized quotation and production schedule |
Frequently asked questions
Can a finished shopping bag be printed edge to edge?
Usually not across every seam, fold and handle zone. Finished-bag printing is suitable for local artwork. True edge-to-edge results normally require printing flat material or cut panels before conversion.
What is the difference between all-over print and full bleed?
All-over print usually describes a repeat or image covering a broad material area. Full bleed means artwork extends beyond a specific cut line. A bag can have full-bleed front panels without a continuous all-over design on gussets and bottom.
How much bleed should shopping-bag artwork include?
Use the converting factory’s value. Material movement, cutting, seams, folds and bag size affect the requirement, so a generic paper-print bleed should not be copied into every bag file.
Can a pattern match perfectly across a sewn side seam?
It may be possible within an agreed tolerance, but a perfectly invisible join should not be assumed. Print, cut and sewing variation accumulate. A forgiving repeat, overlap or designed break is often more reliable.
Which file format is best for full-surface graphics?
Provide the editable source requested by the printer—often AI, PDF or another production format—plus linked high-resolution images, fonts or outlined type, the master repeat and a visual reference PDF. The correct file depends on the assigned workflow.
Are stripes easy to print on shopping bags?
They are simple artwork but expose skew, bow, cutting drift and seam mismatch. Define direction, stripe width, repeat origin and the most important alignment zone.
Can full-surface graphics use Pantone colours?
Yes. A design may use spot colours, CMYK, a hybrid system or a device-specific digital ink set. Large spot fields and process images have different setup, colour and register considerations.
Is white ink always needed?
No. White may be needed for opacity on dark, coloured or transparent materials, but natural substrate colour can also be part of the design. Confirm the white plan because it affects appearance, station count, hand and cost.
What sample is needed before bulk production?
At minimum, approve a route-representative printed and converted sample for crop, seams, folds, handles and colour, then approve or inspect the bulk first-off against that controlled reference.
Why does full-surface printing have a higher MOQ?
Roll/web setup, plates or cylinders, printed film, white layers, lamination, colour makeready and placement cutting can create economic minimums. MOQ should be quoted by each material, artwork, size and finish combination.
Conclusion
Successful Full Surface Shopping Bag Printing begins with the three-dimensional bag, not the rectangular artboard. The same is true for projects described as All Over Print Shopping Bags. Define coverage, freeze construction, map every panel, choose a repeat or engineered composition, use converter-set bleed and safe zones, and match the print route to the real substrate. Then approve colour, a full repeat, the converted sample and bulk first-off as separate evidence.
Explore LUCKYSTAR’s custom shopping bag capabilities. The Shopping Bags sourcing framework supports category purchasing, while the main custom bag manufacturer guide helps qualify broader production resources.

Send LUCKYSTAR your bag dimensions, construction, artwork, quantity by design and critical seam/colour requirements for a full-surface printing recommendation.
Request a full-surface production proposal
Use one construction, coverage map, production artwork package and SKU matrix so print and conversion assumptions can be compared.
Review LUCKYSTAR custom shopping bag options, then send your project details through the contact form or Email a project brief. The email link opens a draft for your review before sending.
Site assignment, construction, layer stack, print/lamination/transfer route, tools, bleed, registration, proofs, samples, performance, inspection, price, MOQ, packing, schedule and release terms are subject to due diligence, specification and written confirmation.