Drawstring Bag Gusset and Bottom Construction Guide
A drawstring bag’s bottom determines how it changes from a flat textile article into a three-dimensional package. A simple flat pouch is economical and compact. A boxed or gusseted base can create usable depth and a more stable footprint. A separate round or rectangular base offers stronger shape control, but adds pattern pieces, seams, labor, and inspection points. The best construction is the one that fits the packed product, closure behavior, material, presentation, cleaning, packing, and agreed performance plan—not the one with the deepest nominal gusset.
This guide explains the principal bottom architectures, how to specify them without ambiguous measurements, and how to validate a finished sample. Buyers exploring custom materials, sizes, printing, lining, and construction can start with LUCKYSTAR’s custom drawstring bags.
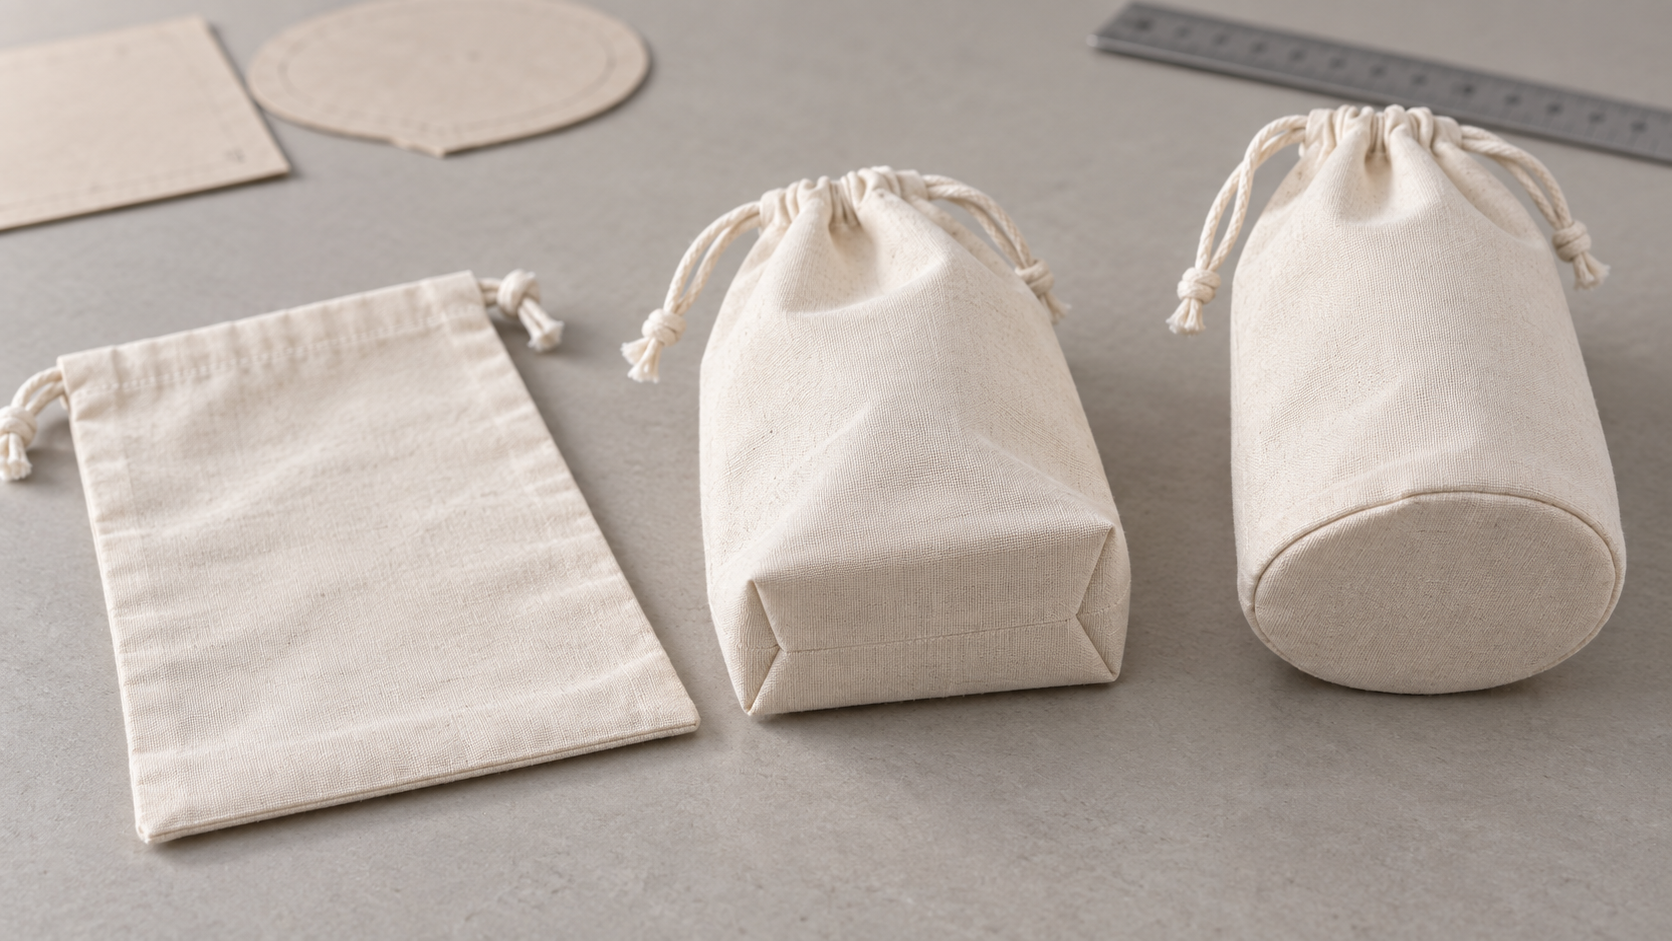
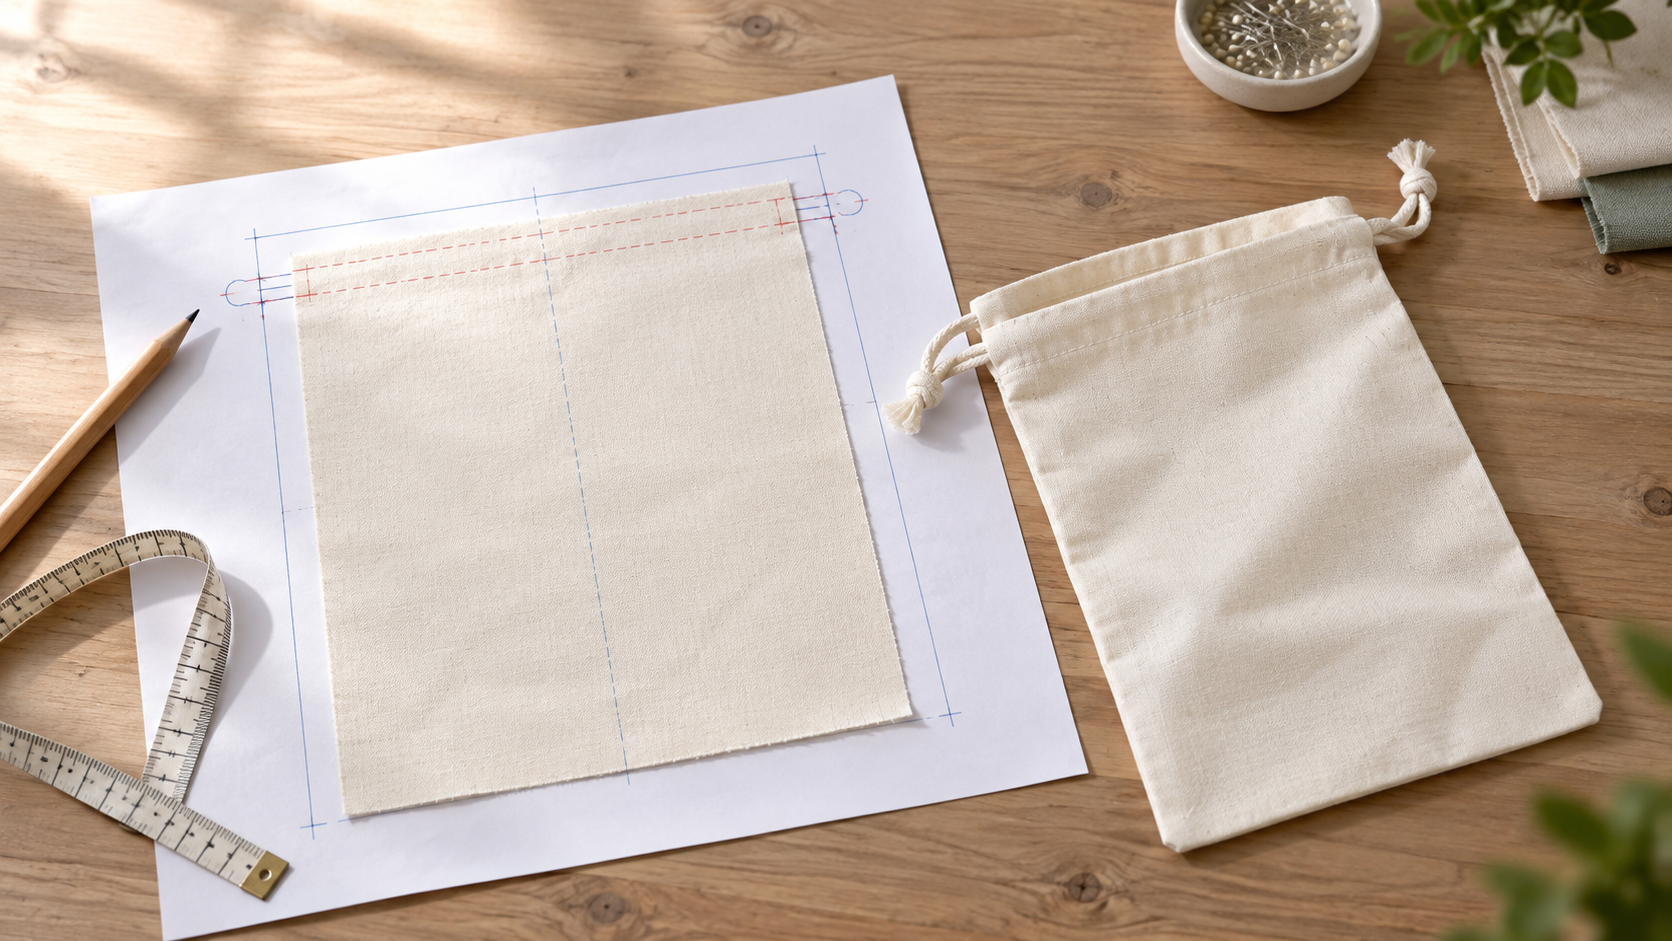
Visual disclosure: this reference-guided AI image uses an internal LUCKYSTAR sample only to inform realistic weave, seam scale, drawcord proportion, and natural fabric behavior. The three unbranded cream prototypes are illustrative bottom constructions, not current SKUs, customer orders, factory evidence, fixed dimensions, or tested capacity claims.
The Short Answer: Which Bottom Should You Specify?
Use a flat two-panel or folded-body bottom for slim items, soft products, dust protection, and projects where low bulk and simple packing matter. Use a boxed-corner or bottom-gusset construction when the contents need controlled depth and the bag should form a broader footprint. Use a separate rectangular, oval, or round base when the container shape itself is important and the added seams, pattern complexity, and cost are justified.
Do not select from an empty-bag photo alone. Load the exact product, close the cord, lift or handle the bag as intended, and inspect its footprint, usable height, seam stress, logo position, and packed presentation. A base that looks tidy when empty may distort when filled; a soft, wrinkled empty base may form correctly around the product.
| Bottom route | Shape when empty | Shape when filled | Main advantages | Main controls |
|---|---|---|---|---|
| Flat two-panel with bottom seam | Flat | Follows contents | Simple pattern, compact fold, clear front panel | Bottom seam, corner turning, product fit |
| One-piece folded body | Flat | Follows contents | No bottom joining seam; efficient for suitable layouts | Fold position, grain/direction, side-seam junctions |
| Bottom tuck or folded gusset | Mostly flat | Expands into depth | Packable with more three-dimensional capacity | Fold geometry, symmetry, usable height, seam intersections |
| Boxed corners | Flat or semi-flat | Rectangular footprint | Defined depth and improved standing shape | Corner stitch position, equal triangles, retained/trimmed bulk |
| Side gussets | Collapsible | Wider side profile | Accommodates bulky contents and controls side expansion | Side-panel width, lower junction, artwork across folds |
| Separate rectangular base | Structured | Box-like | Strong dimensional control and flat footprint | Four corner junctions, easing, seam allowance, alignment |
| Separate round/oval base | Structured | Cylindrical | Suitable for bottles, candles, rolled textiles, or round packs | Perimeter matching, notches, curved seams, puckering |
Start With the Product Footprint, Not a Gusset Number
The first measurements should come from the packed product in its intended orientation. Record maximum width, height, depth, corner radius, compressibility, rigid projections, retail packaging, and the clearance needed to insert and remove it. Then decide whether the bag should hug the contents, form a presentation silhouette, stand temporarily, or collapse for storage.
A nominal 8 cm gusset does not guarantee 8 cm of usable internal depth. Seam allowances, fold radii, material thickness, lining, a bottom insert, and the geometry where the base meets the side walls all consume space. Flexible bags also round outward under load, so the actual footprint can differ from the flat pattern.
The broader drawstring bag size and capacity guide covers product clearance, openings, usable height, and capacity validation. This article concentrates on the lower architecture and how it is made.
Clarify the Vocabulary Before Requesting a Quote
“Gusset,” “box bottom,” “stand-up bottom,” and “flat base” are used differently across brands, pattern makers, and suppliers. Attach a drawing, cross-section, opened-base photo, and measurement method to the term.
| Term | Useful working definition | What it does not prove |
|---|---|---|
| Bottom gusset | Material folded or inserted to create depth at the lower end | Guaranteed internal depth or load rating |
| Side gusset | Added or folded depth along the sides | A flat, stable base |
| Boxed corner | A corner sewn across to convert flat width into base depth | A separate bottom panel |
| Separate base | An additional panel joined around its perimeter | Reinforcement or stiffness by itself |
| Flat bottom | A finished base intended to form a planar footprint | Self-standing performance under every load |
| Bottom insert | A distinct piece placed inside or between layers to modify stiffness or load spread | Permanent attachment, washability, or compliance |
| Base reinforcement | Extra material or construction intended to support a defined need | Automatic strength improvement |
Ask the supplier to state which pattern pieces and seams create the shape. A photograph of a filled pouch can hide whether its base comes from a tuck, boxed corners, a separate panel, or simply the product pushing the body outward.
Measurement States Must Be Written Down
A collapsible gusset changes dimension depending on how it is presented. The same bag can produce different readings when laid flat, naturally relaxed, fully opened, or loaded over a form. A specification should name the state and the exact measurement points.
Flat-State Measurements
Record overall width and height, folded gusset depth or half-depth if applicable, bottom fold location, boxed-corner seam position, and finished seam allowance where it can be inspected. Include a diagram showing whether width includes folded side material.
Opened-State Measurements
Define the base length and width at named seam lines or finished edges. For round and oval bases, identify diameter or major/minor axes and whether the value follows the seam line, cut panel, or finished exterior.
Loaded-State Measurements
Use the agreed product or a controlled form. Measure only if the value helps a buying decision—for example, maximum footprint for shelf space, closure height above a box, or logo position after filling. Loaded shape is a functional verification, not a substitute for pattern dimensions.
Flat Two-Panel Bottom: The Simplest Route
A conventional flat pouch joins front and back panels along the sides and bottom. It stores efficiently and gives broad printable faces, but it has no designed depth. When filled, the product borrows width and height to create a rounded lower volume. That can reduce the clear opening, pull artwork around an edge, and leave corner voids around a rectangular item.
This construction often suits:
- jewelry, amenity, or small gift pouches;
- flexible apparel and textile items;
- dust bags that drape around the product;
- promotional packs where compact unit packing is important;
- slim products that do not need a stable standing base.
Inspect the lower seam for consistent allowance, secure start/stop or corner turning, clean internal finishing, and distortion where side and bottom seams meet. If cord anchors also sit at the lower corners, treat those loads separately using the metal eyelet versus fabric-reinforced corner guide.
One-Piece Folded Bottom: Flat Without a Joining Seam
Front and back can be created from one continuous piece folded at the bottom, leaving side seams but no transverse bottom seam. This can reduce one sewn junction and create a clean exterior, provided the material direction, print orientation, pattern utilization, and body length suit the design.
The fold is not a gusset by itself. It does not create a controlled horizontal footprint; the bag still behaves like a flat pouch. The fold can also become a wear line, especially in coated or stiff materials, and artwork on the reverse panel may need rotation in the layout.
Specify:
- finished fold position and overall size;
- which face is front after folding;
- print direction on both sides;
- any crease-setting or pressing requirement;
- side-seam termination at the lower fold;
- whether lining follows the same fold or uses separate panels.
Bottom Tuck or Folded Gusset
A bottom tuck introduces an inward fold that opens when the bag is filled. It keeps the empty unit relatively flat while adding depth. Depending on pattern and assembly, the base may be formed from the body panels, an inserted gusset piece, or a sequence of folds captured in side seams.
The buyer should approve the construction in both collapsed and opened states. Important details include fold direction, total folded depth, symmetry, lower edge position, usable internal height above the expanded base, and whether the fold creates hidden pockets that trap small items.
A tuck can accommodate boxed products, candles, toiletries, shoes, or bundled textiles, but product geometry should determine the final depth. Excess material may create an untidy base; insufficient depth forces the walls outward and prevents full closure.
Boxed Corners: Turning a Flat Body Into a Footprint
Boxed corners are typically made by aligning each lower corner and sewing across a triangle. The distance from the corner controls the resulting depth, but the finished relationship depends on seam placement, material thickness, and whether the corner triangle is retained, trimmed, or secured.
Retained Corner Triangles
Keeping the triangles inside avoids a cut edge near the new corner seam and can allow the bag to return to a flatter state. It also adds bulk and may create internal pockets. Define whether the triangles point inward, upward, or toward the side seams and whether they are tacked in place.
Trimmed Boxed Corners
Trimming reduces interior bulk and can create a cleaner base, but it introduces cut edges and a new finishing requirement. Seam allowance, overlocking or binding, coating behavior, and corner strength must be evaluated in the real material.
External Box Corners
Some designs keep a seam or fold visible on the exterior as a styling feature. This can make construction easier to inspect while changing abrasion, aesthetics, and artwork placement. Approve the filled view and bottom view together.
Side Gussets Do Not Automatically Create a Flat Base
Side gussets add depth along the sides, but their lower ends must still be resolved. They may close into a bottom seam, merge into boxed corners, meet a separate base, or collapse as folded extensions. Each route creates a different lower junction.
Side gussets are useful for bulky soft goods, footwear, apparel, sets, or packs that need a wide opening. They also affect logo placement because part of the printed side may disappear into the fold when empty or become highly visible when full.
Specify the side panel at top, mid-body, and base. If the gusset tapers, state the taper and measurement references; “10 cm side gusset” is incomplete when the lower depth differs from the opening.
Separate Rectangular Bottom Panel
A rectangular or square base panel creates a defined footprint by joining four sides of the bag body to a separate piece. This route can support a box-like presentation and offers the option of a contrasting material or hidden stiffener, but it creates multiple corners where seam allowances meet.
Production controls include:
- matched panel lengths along each seam line;
- corner notches and turning method;
- easing without puckers;
- seam allowance through all four corners;
- lining attachment and bagging-out sequence;
- topstitching or binding if visible;
- orientation of grain, coating, print, and nap;
- squareness of the opened footprint.
A flat base panel does not guarantee the bag will stand. Body stiffness, height-to-width ratio, load location, cord closure, and product shape remain influential.
Round and Oval Bottom Panels
A circular or elliptical base is appropriate when the product or brand presentation benefits from a cylindrical silhouette. Common examples include bottles, jars, candles, rolled towels, shoes, and gift sets arranged around a center.
The curved perimeter must match the body seam line. If the two lengths differ, operators may stretch one layer, create gathers, or accumulate excess near the closing point. Use alignment notches or approved reference points, and inspect the full circumference rather than only the front half.
Round-base specifications should include:
- finished diameter or oval axes;
- seam-line dimensions, not only cut-panel size;
- number and location of matching marks;
- orientation of any base artwork;
- seam finish and topstitching;
- lining and insert geometry;
- allowed puckering or ovality;
- a defined filled-product trial.
Darts, Pleats, and Shaped Lower Bodies
Darts remove material to create local volume; pleats add controlled folds; curved side seams can shape the lower body without a separate gusset. These methods can produce a tailored pouch or fit an unusual product while keeping the number of pattern pieces low.
They are less intuitive to measure than a rectangular gusset. The tech pack should show dart intake, length, angle, stitch termination, fold direction, and symmetry. A few millimeters of variation at a dart tip can change the silhouette or create puckering, so approve the appearance on a controlled form.
Lining Must Follow the Bottom Architecture
The lining can mirror the outer shell, use a simpler suspended shape, or form a separate internal pouch. Each decision changes usable capacity and how stress is shared.
| Lining route | Benefit | Risk to control |
|---|---|---|
| Same shape as shell | Consistent interior volume and finished appearance | Layer mismatch and trapped excess at corners |
| Simplified flat lining | Easier assembly for some soft pouches | Lining may bridge a gusset and reduce usable depth |
| Drop-in lining | Access for pockets or finishing | Attachment line may carry load unexpectedly |
| Bonded/interlined construction | Can add body and hide seams | Delamination, stiffness change, washing limits |
Turn the finished bag inside out during sample review if construction permits. Check seam coverage, loose corners, raw edges, excess lining, and whether small products can enter spaces between shell and lining.
Bottom Inserts and Boards Are Separate Components
A removable or enclosed insert can flatten the footprint, spread point loads, or improve display. It also adds material, mass, cost, packing volume, and compliance questions. Do not call an insert “reinforcement” without defining the problem it is intended to solve.
Record the insert material, finished dimensions, thickness, corner radius, surface, color, placement, retention, removability, care instructions, and required declarations. Confirm whether it sits loose, enters a pocket, is laminated between layers, or is permanently sewn in.
A rigid insert can push force into the perimeter seam or wear through the lining. It can also interfere with folding and increase carton volume. Evaluate the whole assembly with the product, not just the board on a table.
Gusset Depth Changes More Than Capacity
Increasing depth changes panel geometry, the filled silhouette, closure height, print viewing angle, seam length, material consumption, folding method, and carton pack-out. It may also require a wider opening so a rigid product can pass through before settling into the base.
Theoretical volume can help compare early concepts, but flexible textile geometry is not a rigid box. Use the calculation as a design estimate, then verify actual pack-out with a production-equivalent sample. Do not translate volume directly into a load claim.
| Design change | Likely downstream effect |
|---|---|
| Deeper bottom tuck | More potential depth; less effective body height when opened |
| Wider boxed corner | Broader footprint; shorter front/back face at the base |
| Added side gusset | Wider opening and sides; more fold-sensitive artwork |
| Separate base | More seams and dimensional control; more assembly steps |
| Added insert | Flatter interior floor; more stiffness and pack volume |
| Thicker body material | More seam bulk; potentially smaller clear interior |
The Drawcord Closure and Bottom Must Be Designed Together
A deep base can hold a large item while the mouth remains too narrow to insert it. A tall cylindrical pouch may accept the product yet leave too little usable height above it for gathering. A bottom insert may prevent the bag from collapsing enough to close cleanly.
Check the sequence a user follows:
- Open the mouth to its practical maximum.
- Insert the product without scraping decoration or stretching seams.
- Settle the item into the intended footprint.
- Pull the cord without the product entering the channel zone.
- Confirm the gathered top, tail lengths, and carrying method.
- Remove the product without turning the lining or base inside out.
For cord clearance, channels, and exits, refer to the drawstring cord, eyelet and reinforcement guide.
Material Behavior Changes the Finished Base
A pattern cannot be transferred blindly between materials. Lightweight cotton may fold and gather softly; firm canvas holds corners but adds bulk; coated polyester can crease or show needle holes; nonwoven sheet can tear or creep at junctions; mesh needs stable binding or solid panels where seams converge.
Use the best materials for custom drawstring bags to screen the main options. Then review the relevant construction details in cotton versus canvas drawstring bags, polyester versus nylon drawstring bags, the non-woven GSM and construction guide, or the mesh fabric and strength guide.
Sample using production-representative material. A substitute with different stiffness, coating, shrinkage, friction, or thickness can make the same pattern appear to fit while hiding the actual assembly risk.
Trace the Lower Load Path
Contents press on the base, then force travels through base material, perimeter or corner seams, body panels, and any insert or reinforcement. Carrying can add dynamic motion, point loads, and diagonal distortion. If the cords act as backpack straps, lower anchors introduce another concentrated path.
Map the likely failure locations:
- seam opening at the base center;
- stitch rupture or yarn slippage near a corner;
- tearing from a boxed-corner cut edge;
- puckered curved seam under internal pressure;
- lining rupture while the shell remains intact;
- insert edge wearing through a layer;
- cord anchor pulling against the base junction;
- coating cracking along a permanent fold.
Stronger shell fabric does not compensate for a poorly controlled junction. Define what failure is unacceptable for the intended use and build a project-specific test around the finished article.
Seam Allowance and Finish Are Structural Fields
“Sewn bottom” leaves out needle, thread, seam type, allowance, edge finish, density, corner transitions, and the layers captured. Narrow allowances may save material but reduce process tolerance. Dense stitches can secure some fabrics yet perforate or pucker others.
The approved sample should establish:
- seam type and visible/reverse appearance;
- finished allowance at named points;
- stitch density range and thread reference;
- start/stop and overlap rules;
- overlock, binding, fold, tape, or raw-edge treatment;
- treatment at notches and curved sections;
- topstitch distance where applicable;
- acceptable seam grin, slippage, puckering, and skipped stitches.
Artwork Must Be Approved in the Filled State
Gussets consume and redirect printable area. Artwork near a bottom tuck can disappear when empty, unfold into view when loaded, or bend across multiple planes. A centered logo on a flat panel may look low or distorted after a box bottom opens.
Create separate artwork views for:
- the flattened production panel;
- the collapsed finished bag;
- the bag filled with the intended product;
- the opened bottom if base printing is required.
Keep critical text, QR codes, registration-sensitive graphics, and fine borders away from fold and seam zones unless the printing and construction trials prove the result. Changes to gusset depth after artwork approval should trigger a new placement check.
Cleanability and Small-Item Traps
Bottom folds and retained corner triangles can create crevices.In a jewelry, amenity, cosmetic, food-adjacent, laundry, or reusable application, buyers may need to consider whether particles, moisture, or small items collect there. The correct response depends on the actual product and target-market requirements.
Inspect the interior using the smallest packed component. Check whether it becomes trapped under a lining fold, behind a bottom insert, or inside an unsecured boxed-corner triangle. If washing or wiping is expected, validate drying, lining recovery, insert removal, seam finish, and coating behavior. The waterproof drawstring bag materials guide explains why a coated material does not by itself establish finished-product protection.
Build a Production-Ready Bottom Specification
A useful tech pack makes the base reproducible without relying on “same as photo.” Include top, front, side, opened-bottom, and cross-sectional drawings where needed.
| Specification block | Required fields |
|---|---|
| Product and use | Contents, orientation, handling, closure, user group, target market |
| Finished geometry | Width, height, depth, base dimensions, dimension order, measurement state |
| Pattern architecture | Panel count, folds, gusset type, boxed corners, separate base, darts/pleats |
| Material stack | Shell, lining, interlining, reinforcement, insert, coating |
| Seam system | Type, allowance, finish, stitch density, thread, topstitch, junction detail |
| Functional fit | Opening clearance, usable height, footprint, product removal, standing expectation |
| Decoration | Artwork files, print method, safe zones, flattened and filled positions |
| Quality | Tolerances, defect examples, test method, sample size, acceptance rule |
| Packing | Fold route, insert handling, unit pack, carton, required presentation |
The custom drawstring bag tech-pack guide provides a wider document structure for the complete product.
Sample the Shape in Stages
Start with a shape prototype before spending time on final color and decoration. Load it with the exact product or a documented surrogate, mark the areas that pull or collapse, and revise controlled dimensions. Then move to material- and construction-representative samples.
A practical approval sequence is:
- Paper or low-cost pattern check for basic footprint and opening.
- Construction sample for folds, seams, lining, and insert behavior.
- Decorated pre-production sample using approved artwork and placement.
- Loaded, closed, handled, and packed evaluation.
- Written approval of measurements, tolerances, workmanship, and test criteria.
- Change freeze before bulk production.
Record photos of the empty, opened, filled, closed, bottom, and inside-out views. Follow the broader custom drawstring bag sample development process.
Quality-Control Checklist for Gussets and Bases
Incoming and Cutting Checks
- Verify body, lining, reinforcement, and insert against approved references.
- Confirm material direction, coating/face orientation, and panel count.
- Inspect cuts, notches, curves, boxed-corner markings, and paired symmetry.
- Prevent mixed base sizes or substituted insert materials.
First-Article Checks
- Measure the bag flat and opened using the documented method.
- Compare fold direction, base geometry, seam allowance, and corner alignment.
- Load the product, close the mouth, and examine the footprint and silhouette.
- Verify logo location in collapsed and filled views.
- Conduct agreed functional and destructive checks before bulk release.
In-Process Checks
- Monitor fold guides, notch matching, curved-seam feeding, corner stitching, and trimming.
- Check lining-to-shell matching and trapped layers.
- Control start/stop security, skipped stitches, puckering, and seam finish.
- Segregate units with asymmetric depth or distorted bases.
Finished and Packing Checks
- Inspect the exterior base, interior corners, closure, and product fit.
- Verify that inserts sit flat and can be removed if specified.
- Confirm folded units recover to the approved shape after unpacking.
- Check carton stacking for permanent creases or crushed structured bases.
For the wider order inspection plan, use LUCKYSTAR’s custom bag quality inspection checklist.
Use Laboratory Methods Within Their Published Scope
Material and seam methods can characterize inputs or selected straight seams, but they do not automatically predict the behavior of a three-dimensional gusset junction.
ISO 13934-2:2014, confirmed current in 2025, describes a grab method for maximum force of textile fabrics. ISO identifies woven textile fabrics as the principal application and lists several categories—nonwovens and coated fabrics among them—for which the procedure is not normally applicable. A fabric result does not reproduce a folded base, curved seam, insert edge, or loaded finished pouch.
ISO 13935-2:2026 addresses maximum force to seam rupture using a grab method with force perpendicular to a sewn seam. Its current scope is limited to straight seams and mainly woven textiles, with similar exclusions. A boxed corner or round-base perimeter contains angles, curves, and junctions that require an assembly test in addition to any applicable laboratory seam characterization.
Specify the method edition, specimen, conditioning, direction, machine settings, result format, and acceptance criteria. If the method does not fit the material or construction, agree on another competent laboratory or buyer-defined procedure rather than claiming compliance from an inapplicable test.
Whole-Bag Functional Test Plan
| Evaluation | What it should reveal | Variables to document |
|---|---|---|
| Product fit trial | Insertion, settling, closure, removal, corner voids | Exact contents, orientation, clearance |
| Static loaded hold | Sagging, seam strain, base deformation | Load pattern, duration, support/carry method |
| Cyclic handling | Progressive stitch, fold, coating, or insert wear | Cycle route, speed, rest, failure definition |
| Directional lift | Diagonal distortion and junction stress | Cord/handle setup, direction, rate |
| Drop or set-down simulation | Point impact and product movement | Surface, height if used, orientation, repeats |
| Wash/wipe conditioning | Shrinkage, delamination, puckering, drying | Care method, detergent, recovery time |
| Pack-out trial | Fold recovery and carton effects | Unit arrangement, carton, compression, duration |
Do not invent a universal load or cycle count. Choose conditions from the intended product, customer protocol, target market, and risk assessment, then confirm them in writing.
Diagnose Common Bottom Defects
| Defect | Possible causes to investigate | Corrective direction to evaluate |
|---|---|---|
| Unequal base depth | Misplaced fold, mismatched notches, feeding variation | Improve reference marks and first-piece measurement |
| Twisted footprint | Side lengths differ, lining pulls shell, base orientation error | Compare seam-line lengths and assembly sequence |
| Puckered round seam | Perimeter mismatch, excessive easing, thread tension | Correct pattern matching and feeding control |
| Bottom seam opens | Allowance, stitch security, thread, material slippage, load | Rebuild and test the seam system |
| Box corner tears | Trim too close, notch damage, load concentration | Review allowance, finish, material, and geometry |
| Lining bridges gusset | Lining too small or incorrect bottom architecture | Match functional interior shape |
| Insert curls or shifts | Material memory, undersize, no retention, packing heat | Review insert material, fit, and pocket design |
| Bag will not stand | Soft walls, high center of gravity, uneven product, rounded base | Reassess entire structure and use expectation |
| Logo bends into base | Artwork placed before shape approval | Re-map graphics on the filled sample |
Correct the cause shown by evidence. Adding material or more stitches without understanding the failure can increase bulk, create perforation, or move the weak point elsewhere.
Packing and Carton Effects
Flat pouches compress efficiently. Boxed or tucked bases may also fold well, but repeated folding along an unapproved line can create permanent marks. Separate base panels, padded linings, and inserts occupy more space and may require alternating orientation in cartons.
Run a real pack-out after the production-equivalent sample is approved. Confirm:
- folding route and recovery time;
- whether inserts ship inside, separately, or pre-fitted;
- protection for print, coating, or shaped seams;
- unit packaging and moisture controls;
- pieces per carton, carton dimensions, and gross weight;
- appearance after representative storage and transport handling.
Carton estimates made from a flat pattern can be misleading once seam bulk, cords, inserts, and unit packs are included.
Cost, MOQ, and Lead-Time Drivers
Simple flat or folded-body constructions usually require fewer operations. Gussets add pattern area, folding and alignment. Boxed corners add sewing and possibly trimming/finishing. Separate bases introduce another component, perimeter seam, matching marks, and more complex lining. Inserts add sourcing, cutting, packing, and documentation.
| Cost area | What changes with a more complex base |
|---|---|
| Material | Additional panels, folds, seam allowance, lining, reinforcement, insert |
| Cutting | More pieces, curves, notches, direction control, pairing |
| Sewing | Longer seams, corners, easing, binding, topstitching, turning |
| Sampling | More fit iterations and construction trials |
| QC | Extra dimensions, interior checks, loaded-shape criteria |
| Packing | Greater volume, insert handling, shape protection |
| Variants | More size-specific patterns and opportunities for mixed components |
No single MOQ, unit price, sample fee, or production time applies to every bottom construction. Values depend on material, dimensions, panel count, lining, insert, decoration, quantity, color split, tests, packing, and schedule. The drawstring MOQ and scheduling article explains the production dependencies. Use the separate 2026 cost guide to structure a comparable quotation.
Reduce Cost Without Removing Functional Depth
- Begin with the real product footprint and avoid unused gusset volume.
- Keep a shared base architecture across size variants only when each fit is validated.
- Use a folded-body solution where the shape allows it and print direction is controlled.
- Avoid an insert when the product itself forms the base and display does not need stiffness.
- Standardize lining and seam finishes across compatible variants.
- Keep critical artwork away from folds that require additional registration work.
- Approve the shape before ordering decorated or custom-colored materials.
- Prevent rework through clear notches, measurement diagrams, and first-article release.
Cost reduction should preserve insertion, closure, presentation, seam integrity, and packing. The broader drawstring bag cost-reduction guide provides a specification-first framework.
Sustainability and Compliance Claims Need Product Evidence
A gusset can improve product fit, but calling it “material efficient” or “sustainable” requires a defined comparison and evidence. A more compact pattern may reduce one type of material while adding lining, binding, reinforcement, or an insert. A longer-lasting base is valuable only if the durability claim is supported by the intended-use test.
Do not present GRS, GOTS, BSCI, ISO, REACH, RoHS, CE, or similar terms as universal current LUCKYSTAR certifications. Documents in the company knowledge base have different subjects, products, scopes, and dates. Any compliance or environmental statement must be matched to the selling entity, final material set, target market, order, and current evidence.
Why Choose LUCKYSTAR for Gusset and Bottom Development?
LUCKYSTAR supports OEM/ODM, sampling, and custom development from buyer specifications, drawings, product information, and reference samples. Bottom construction benefits from this coordinated approach because geometry, fabric, lining, cord, decoration, testing, packing, and commercial terms influence one another.
For a custom base project, LUCKYSTAR can help coordinate:
- product measurements and intended pack orientation;
- comparison of flat, folded, gusseted, boxed, or separate-panel concepts;
- sample revisions tied to written measurement states;
- alignment of shell, lining, insert, seam, and artwork requirements;
- loaded-shape and closure checks before bulk approval;
- incoming, first-article, in-process, and finished-bag controls;
- order-specific review of MOQ, price, timing, testing, packing, and delivery.
This is a controlled development service, not a blanket promise that one base fits every product or that all projects share the same commercial conditions. Assess the partner-selection process in how to choose a custom drawstring bag manufacturer, then use the wider custom bag manufacturer guide for supplier qualification and sourcing governance.
RFQ Checklist for Drawstring Bag Gussets and Bottoms
Send the information needed to reproduce the intended shape:
- packed product dimensions, weight distribution, orientation, and photographs;
- bag use, closure, handling, cleaning, presentation, and target market;
- finished width, height, depth, base size, and measurement states;
- preferred flat, fold, tuck, boxed-corner, side-gusset, or separate-base route;
- shell, lining, reinforcement, insert, coating, and cord requirements;
- seam type, finish, tolerances, and visible quality expectations;
- logo artwork, process, placement, and filled-view priority;
- functional test conditions and acceptance rules;
- quantity, variants, sample needs, packing, destination, and delivery target.
When importing, combine the technical pack with the documentation and logistics questions in how to import custom drawstring bags from China. Every price, MOQ, timing, test, and delivery condition remains subject to final specification review and written confirmation.
Frequently Asked Questions
What is a gusset in a drawstring bag?
A gusset is folded or inserted material that allows part of the bag to expand into depth. It may be located at the bottom, sides, or both. The word does not define the pattern, finished measurement method, capacity, or strength, so a drawing and sample are still required.
Is a bottom gusset the same as a box bottom?
Not always. A bottom gusset can be an inward tuck or separate folded piece; a box bottom often refers to corners sewn across or a separate rectangular footprint. Suppliers use the terms differently, so specify panels, folds, seams, and opened dimensions.
Does a deeper gusset always provide more usable capacity?
It can create more potential depth, but usable capacity also depends on width, height, opening, seam bulk, lining, material flexibility, and product shape. A deeper fold may reduce effective height or leave unused corner volume. Confirm with a loaded sample.
Which base is best for bottles or candles?
A round, oval, boxed, or separate flat base may suit those products, depending on the container footprint, protection, presentation, and closure clearance. Test the exact retail pack and evaluate tipping, abrasion, insertion, and removal.
Can a drawstring pouch stand upright without a bottom board?
A suitably shaped base and a stable packed product may allow temporary standing, but soft walls, height, weight distribution, and closure can change the result. Treat self-standing behavior as a finished-product requirement and validate it rather than assuming it from a gusset.
Should boxed-corner triangles be cut off?
Either retained or trimmed construction can be appropriate. Retained triangles add bulk and may trap small items; trimming needs controlled allowance and edge finishing. Approve the internal appearance, performance, cleanability, and packing for the actual material.
How should gusset depth be measured?
Use a diagram naming the collapsed or opened state, reference edges or seam lines, units, and tolerances. State whether the figure is total depth or one folded half. The production team and inspector must use the same method.
Does a separate bottom panel make the bag stronger?
Not automatically. It creates a defined shape and additional seams. Performance depends on material, panel geometry, seam allowance, thread, stitch, lining, load distribution, and workmanship. Test the complete bag under the intended conditions.
How do gussets affect logo printing?
Folds and base transitions can hide, bend, or rotate artwork. Approve the flattened print layout and the loaded bag. Keep critical information away from seams and fold zones unless a production trial confirms registration and readability.
Can the same gusset pattern be used for cotton and polyester?
Only after validation. Different fabrics can change thickness, drape, friction, shrinkage, coating response, fold memory, and seam appearance. A production-representative sample should confirm any pattern transfer.
Can LUCKYSTAR develop several bottom options for comparison?
Buyers can ask LUCKYSTAR to coordinate custom sampling from their product details, drawings, or written specification. Feasibility, sample route, material, measurements, performance plan, price, MOQ, timing, and bulk conditions need project-level review and written confirmation.
Final Recommendation
Choose the bottom by working upward from the product. Define its footprint and insertion route, decide how the bag should look and behave when filled, select the least complex architecture that meets those needs, and document the measurement state. Then test the shell, lining, seam, insert, closure, artwork, and packing as one finished system.
A flat pouch is not inferior when the product needs drape and compact packing. A gusset is not automatically better because it adds depth. A separate base is justified when shape control and presentation are worth the additional components and process controls.
LUCKYSTAR can help turn your product dimensions and presentation goals into a controlled custom drawstring bag specification and sample. Send the product, measurements, material direction, artwork, quantity, destination, delivery target, preferred bottom route, and test priorities for review.