Last reviewed: September 24, 2026
Wholesale Crewneck Sweatshirts: Fabric, Fit and Bulk QC Guide
A wholesale crewneck sweatshirt program succeeds when the body fabric, rib, neckline, fit, wash behavior, decoration and assortment remain repeatable across sizes, colors and reorders. This guide converts “soft, comfortable and stylish” into measurable specifications and approvals for retailers, merchandise buyers, uniform programs and private-label brands.

1. Buyer Quick Answer
Approve composition, fabric structure, finished GSM, face yarn, inside finish, body-to-rib shade, collar geometry, measurement chart, grade rules, shrinkage, spirality, pilling, fleece shedding, decoration and packing before bulk. Test the complete garment after the intended wash and decoration process. For wider supplier due diligence, use the Custom Bag Manufacturer Guide.
2. Scope: Crewneck-Specific Wholesale Control
This page owns the round neckline, body-and-rib fabric system, wholesale assortment and crewneck bulk acceptance. It does not repeat hood shape, drawcord, kangaroo pocket or hood-weight balance, which belong in the Hoodie Supplier Fabric, Fit and Finish Guide. It also avoids duplicating jersey T-shirt, polo collar and uniform-program decisions handled by their dedicated pages.
3. Define the Selling Program
State whether the sweatshirt is a stocked blank, decorated merchandise item, private-label retail style, corporate uniform layer or school/team product. Name destination market, season, target retail price, required sizes, colors, replenishment window and care expectation. A single specification rarely optimizes lightweight promotional volume and premium heavyweight streetwear at the same time.
4. Set the Functional Brief Before GSM
Describe warmth, layering, drape, surface smoothness, durability, print area and carton-weight limits before selecting fabric weight. GSM is mass per area, not a complete quality grade. Two fabrics with equal GSM can differ in density, thickness, yarn quality, brushing, recovery and pilling. Use approved physical swatches and test data with the number.
5. Separate Crewneck From T-Shirt and Hoodie
A crewneck sweatshirt normally uses sweatshirt fleece or loopback terry with rib at the neck, cuffs and hem. A T-shirt generally uses lighter jersey; a hoodie adds a hood and often a pocket. Route jersey-body controls to the Custom T-Shirt Manufacturer Guide and hood engineering to the hoodie page, preserving one search intent per URL.
6. Choose the Fabric Structure
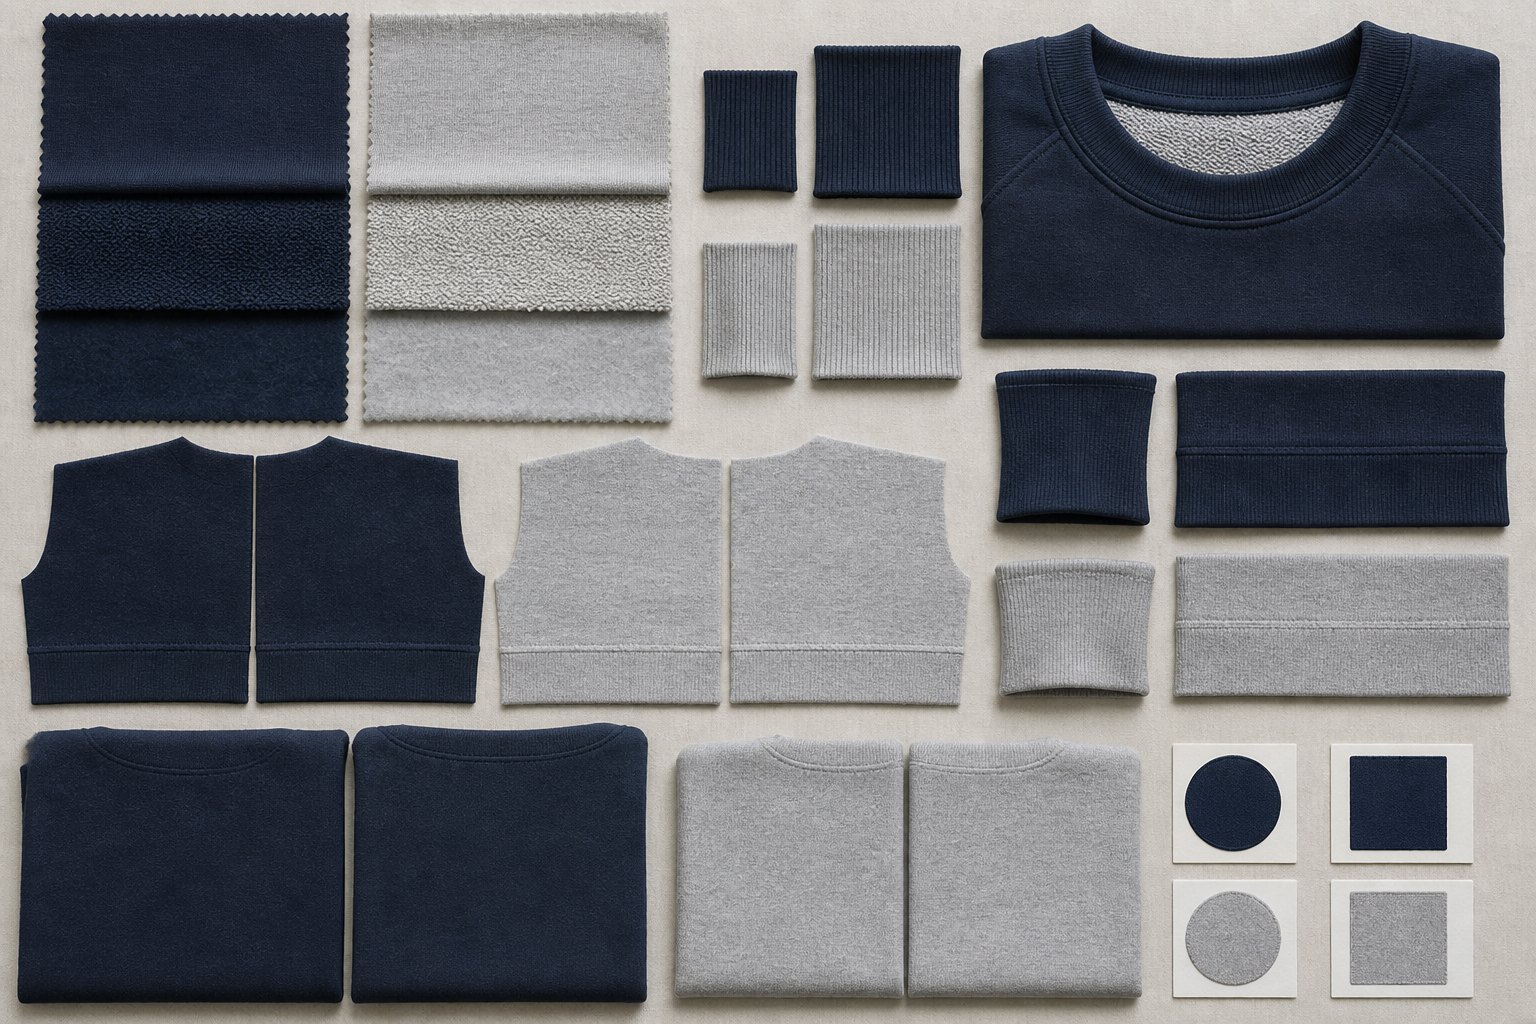
Confirm whether the fabric is brushed-back fleece, unbrushed French terry, double knit or another controlled structure. Record face, back, composition, finished GSM, usable width, stretch and finish. Avoid accepting “cotton fleece” as a full specification; it does not state blend, face yarn, brushing intensity or whether the same article will be available for reorders.
Brushed fleece
Brushing raises internal fibers for warmth and softness. Approve pile evenness, shedding, compression recovery and post-wash appearance. A highly fluffy first touch can hide weak anchoring or rapid pilling. Review both new and laundered samples and specify whether the face must remain smooth for printing.
French terry
French terry retains looped yarns on the inside rather than a fully brushed pile. It can support transitional-season products and a less bulky silhouette. Inspect loop uniformity, snagging, skew and shrinkage. Do not describe it as lightweight without a measured finished GSM and physical sample.
Engineered blends
Cotton can improve natural hand and print surface, while polyester can influence stability, drying, strength and cost. The outcome depends on yarn placement, not percentage alone. Ask whether the visible face is cotton-rich, how the inside is built and whether dark polyester content creates dye-migration risk during heat decoration.
7. Compare Fabric Routes
| Route | Best fit | Buyer risk | Approval evidence |
|---|---|---|---|
| Brushed fleece | Warm seasonal programs | Pilling and shedding | Wash, pill and lint review |
| French terry | Layering and transitional use | Loop snag and skew | Loop, spirality and shrinkage |
| Cotton-rich blend | Print-focused retail | Body/rib differential shrinkage | Decorated wash sample |
| Poly-rich blend | Stable high-volume programs | Hand, pilling and dye migration | Pill and heat-decoration trial |
8. Specify Finished GSM and Tolerance
Measure conditioned finished fabric, not an unprocessed greige target. State test method, sampling points and allowed tolerance by color. Brushing and finishing can alter mass, thickness and hand. Large GSM drift affects garment measurements, sewing, freight and perceived value. Retain a sealed swatch from the approved dye and finishing route.
9. Control the Face Yarn
The outer face drives print detail, embroidery support, pilling visibility and retail appearance. Specify whether the face must be cotton-rich, its smoothness and acceptable knit lines. Review under raking light and after wash. Do not infer face composition from the total garment blend; plated or multi-yarn structures can distribute fibers differently.
10. Match Body Fabric and Rib
Neck, cuff and hem rib must coordinate with body shade, stretch, recovery, thickness and laundering behavior. Record rib composition, construction, weight, width and supplier article. Body and rib that look matched before washing can shrink differently, creating a tight collar, flared hem or twisted cuff. Approve them as a paired system.
11. Choose 1x1 or 2x2 Rib Deliberately
Rib notation describes knit appearance but does not guarantee recovery. Compare stretch force, return, surface definition and compatibility with the target silhouette. A heavier 2x2 look may suit premium programs; a refined 1x1 may give a cleaner edge. The sealed sample and measurable recovery limit govern bulk, not the notation alone.
12. Engineer the Neckline Geometry
Specify neck width, front neck drop, back drop, finished rib height, seam shape, head opening and high-shoulder-point references. The collar must pass over the head, recover and lie flat. A neckline can be dimensionally within tolerance yet wave because rib ratio, seam stretch or body-rib shrinkage is wrong.
13. Approve Collar Recovery
Mark a controlled opening distance and time, then measure recovery after the specified interval and laundering. Observe permanent growth, waviness and seam damage. Test the assembled collar, not rib alone, because seam tension and neck shape affect performance. Keep an approved washed reference beside the new golden sample.
14. Decide on a V-Insert or Clean Crew
A V-shaped rib insert can be functional, decorative, true inset or merely topstitched. If used, specify dimensions, symmetry, material and stitch construction. Do not add it because competitors use the detail; it changes labor and visual identity. A clean round neck is often the better wholesale blank when decoration versatility is the priority.
15. Define Shoulder and Sleeve Silhouette
Set regular, dropped or raglan shoulder construction and explain the intended ease. Record shoulder point, cross shoulder, sleeve length reference, bicep and cuff opening. Oversized is not a grade rule. A sample in medium cannot define how shoulder drop and sleeve volume should behave from small through extended sizes.
16. Build a Fit Block, Not a Size Label
Choose target wearer, base size, body measurements, ease and posture. Compare physical fit on the intended body range. “Unisex” needs a defined block and size chart; it is not a universal shape. For apparel accessory coordination and broader basic-wear planning, see the Basic Wear B2B Guide.
17. Control Body Length and Hem Behavior
Record high-shoulder-point body length, chest, sweep, hem rib height and blousing target. After wash, compare body shrinkage with hem recovery. A stable body attached to a high-shrink rib can pull inward; an under-recovering rib can flare. Inspect the garment relaxed and worn, not stretched flat only.
18. Create Explicit Grade Rules
Write increments for chest, length, shoulder, sleeve, armhole, bicep, neck and rib openings. Decide where extended sizes need non-linear grading. Validate at least base, small-end and large-end samples when risk warrants it. A single proportional scale can distort neck opening or sleeve balance at range extremes.
19. Set Measurement Tolerances by Point
Not every point needs the same tolerance. Neck opening and collar height affect fit visibly and deserve tighter control than some low-risk dimensions. State measurement method, garment resting condition and whether half or full circumference is recorded. Train buyer and factory teams from the same illustrated measurement chart.
20. Test Dimensional Change After Laundering
AATCC TM135 is intended to determine length and width changes of fabrics under standard home-laundering procedures, with multiple wash, agitation and drying options. Use the relevant current method or an agreed equivalent and document the actual procedure. See the official AATCC TM135 summary. Garment measurements should also be checked because construction adds interactions.
21. Compare Body and Rib Shrinkage
Report lengthwise and widthwise change separately for body fabric and rib. Then wash the assembled garment and inspect neckline, cuff and hem. A total shrinkage number can hide opposing changes. Pre-production correction may require relaxation, compaction, pattern allowance or a different rib article, not simply a larger garment pattern.
22. Check Spirality and Seam Torque
Knit fabrics can rotate after laundering, moving side seams and sleeve underseams. Define how twist is measured and the acceptable visual limit. Relax fabric before cutting, control lay tension and maintain grain alignment. A soft hand achieved through unstable finishing can create unacceptable garment skew after customer washing.
23. Assess Pilling on Face and Inside
Specify the pilling method, cycles and minimum rating for the intended market. Grade the smooth outer face separately from brushed or looped inside surfaces. Test color variants when yarn or dye route changes. Do not promise “anti-pill” without a method and threshold; use specific results for the approved material article.
24. Control Fleece Shedding
Review loose fiber after brushing, cutting, sewing, rubbing and laundering. Dark fleece shedding onto light shirts can trigger returns even when the sweatshirt remains warm. Define lint-cleaning steps and an acceptance reference. Excessive initial vacuuming should not disguise weak pile anchoring or uncontrolled brushing.
25. Verify Colorfastness and Shade
Approve color under named lighting, then test relevant laundering, rubbing and perspiration conditions for the destination market. Check body-to-rib and thread shade together. Heather colors require blend and melange consistency, not only a visual target. Retain lab dip, bulk lot standard and washed reference for reorders.
26. Choose Decoration Around the Fabric
Screen print, transfer, DTG, embroidery and appliqué interact differently with fleece face, polyester content and garment stretch. Approve a strike-off on production fabric, then wash and inspect it. Use the Bulk Promotional Apparel Guide for campaign allocation and the Custom Embroidery Guide for stitch-density principles.
27. Prevent Dye Migration During Heat Decoration
Dark polyester-containing fabrics can release dye under heat, affecting pale graphics. Test actual color, temperature, dwell time, pressure and decoration system after realistic conditioning. Use lower-temperature or blocker solutions only after validation. A passing white sweatshirt does not prove the same method will pass on dark navy or red.
28. Approve Embroidery Stabilization
Match backing, needle, thread, stitch density and hoop tension to the fabric. Heavy embroidery can pucker a soft face or distort the neckline. Inspect front, reverse and worn drape after laundering. Record design version and embroidery file with the sample so bulk cannot substitute a denser digitization.
29. Build a Wholesale Assortment
| Decision | Data input | Common mistake | Control |
|---|---|---|---|
| Size ratio | Channel and historical demand | Equal units per size | Base/replenishment split |
| Color depth | Core versus seasonal demand | Too many low-volume SKUs | Core palette plus test colors |
| Decoration | Channel artwork plan | One treatment for every color | Color-specific strike-offs |
| Reorder | Lead time and fabric continuity | No reserved material route | Named mill article |
30. Set Size Ratios From Demand
Use channel, region, wearer and historical sales data to set the initial ratio. Separate base order from replenishment. Extended sizes may require different marker yield and price, but hiding that until purchase order stage damages planning. Keep size-level production and inspection quantities visible in the assortment sheet.
31. Control Color SKU Proliferation
Start with core colors that justify fabric minimums and repeatability, then test seasonal colors in controlled quantities. Every extra shade creates lab dips, rib matching, decoration trials, packing labels and leftover-material risk. Decide whether minor shades share body and rib articles or require independent approval and minimums.
32. Plan MOQ at the Correct Level
Ask whether MOQ applies per style, fabric, dye lot, color, size or decoration. A total of 1,000 pieces split across ten colors may be commercially different from one color. Separate fabric minimum, cutting minimum and decoration setup. The custom product cost framework explains why identical unit prices without identical scope can mislead.
33. Freeze the Pre-Production Sample
Seal final fabric, rib, color, pattern, measurement chart, wash result, decoration, labels, fold and packing. Keep both new and washed references. The general sample approval framework applies here: every approval must identify version, date, reviewer and exceptions before bulk starts.
34. Inspect Fabric Before Cutting
Check article, composition records, finished GSM, width, shade, face defects, brushing, loop uniformity and roll relaxation. Shade-band rolls and keep body panels from one garment within the approved grouping. Quarantine failures before cutting; sewing cannot correct inconsistent pile, GSM or body-to-rib shade.
35. Use In-Line Garment Checks
Inspect neckline joining, seam stretch, shoulder symmetry, cuff orientation, hem feeding, measurement trend and surface damage early. Track results by line and lot. A collar issue found after packing affects the whole order; the same issue found in the first bundle can often be corrected through feeding, rib ratio or operator method.
36. Build the Final Inspection Plan
| Layer | Check | Evidence |
|---|---|---|
| Identity | Style, color, size, labels | PO and approved sample |
| Measurements | Critical points and tolerance | Signed measurement chart |
| Workmanship | Collar, seams, rib and decoration | Defect classification |
| Packing | Ratio, barcode, fold and carton | Packing list and carton sample |
37. Pack for Channel Accuracy
Specify folding board, neck protection, polybag or paper route, size sticker, barcode, assortment pack and carton quantity. Verify that compressed packing does not permanently crease fleece or distort collars. Reconcile size/color units to the packing list. Corporate programs can adapt allocation methods from the Corporate Uniform Supplier Guide.
38. Protect Reorder Continuity
Record mill article, yarn/blend, rib article, shade standard, finishing route, pattern version and decoration file. Ask how long the fabric remains available and whether raw material can be reserved. A reorder that uses a similar fabric but different shrinkage or face yarn may not match inventory already in the market.
39. Audit Supplier Capability and Red Flags
A capable supplier explains fabric and rib sourcing, relaxation, shade segregation, collar-ratio control, wash testing and size grading. Red flags include no washed sample, one tolerance for every measurement, rib chosen after body approval, unverified “anti-pill” claims and inability to name the mill article. Use the Custom Apparel Working Framework for coordination across programs.
Document continuity
Confirm that quotations, tech pack, lab dips, test reports, samples and packing records use the same style version. A strong sample cannot protect bulk when the purchase order references an older fabric or measurement chart.
Change control
Require written approval for fabric, rib, dye lot route, pattern, decoration, label and packing changes. Record impact on cost, lead time and tests. “Equivalent” substitutions need evidence before production, not explanation after shipment.
Corrective action
Ask for root cause, affected quantity, containment, correction and prevention when a failure occurs. Re-inspection alone does not prevent recurrence. The quality inspection checklist provides a transferable evidence structure.
40. Send a Crewneck-Ready RFQ
Send use case, target wearer, fit block, size range, fabric structure/composition/GSM, rib article, color count, decoration, wash requirements, pilling and dimensional-change thresholds, labels, assortment, quantity and delivery market. Request sample stages, fabric continuity and bulk-QC plan. Link commercial milestones to the sample-to-delivery process and supplier checks to the manufacturer selection checklist.
Request a Wholesale Crewneck Quote
Send target fabric, fit, size/color ratio, decoration, labels, quantity, packing and delivery market. LUCKYSTAR can map the sample and bulk evidence needed for your program. Compare the current custom hoodie range. For the complete OEM/ODM framework, return to the core Custom Bag Manufacturer pillar guide.