How to Improve Drawstring Bag Shoulder Comfort
Last reviewed: September 28, 2026
Shoulder comfort is easy to describe but difficult to specify. A buyer may ask for “softer strings,” yet the finished bag still feels sharp, slips outward, hangs too low, or bounces against the back. That happens because comfort is not controlled by one trim choice. It emerges from the entire carrying system: the intended load, effective contact width, cord surface, routing, adjustment range, anchor position, bag dimensions, and the way the contents settle during movement.
The practical solution is to convert a subjective request into a project-specific design and wear-test plan. Begin with the real use case, build samples that change one important variable at a time, test them with representative contents and users, and preserve the approved geometry in the production specification. Use LUCKYSTAR's custom drawstring bag options as a product-development starting point, then document the shoulder-comfort brief below.
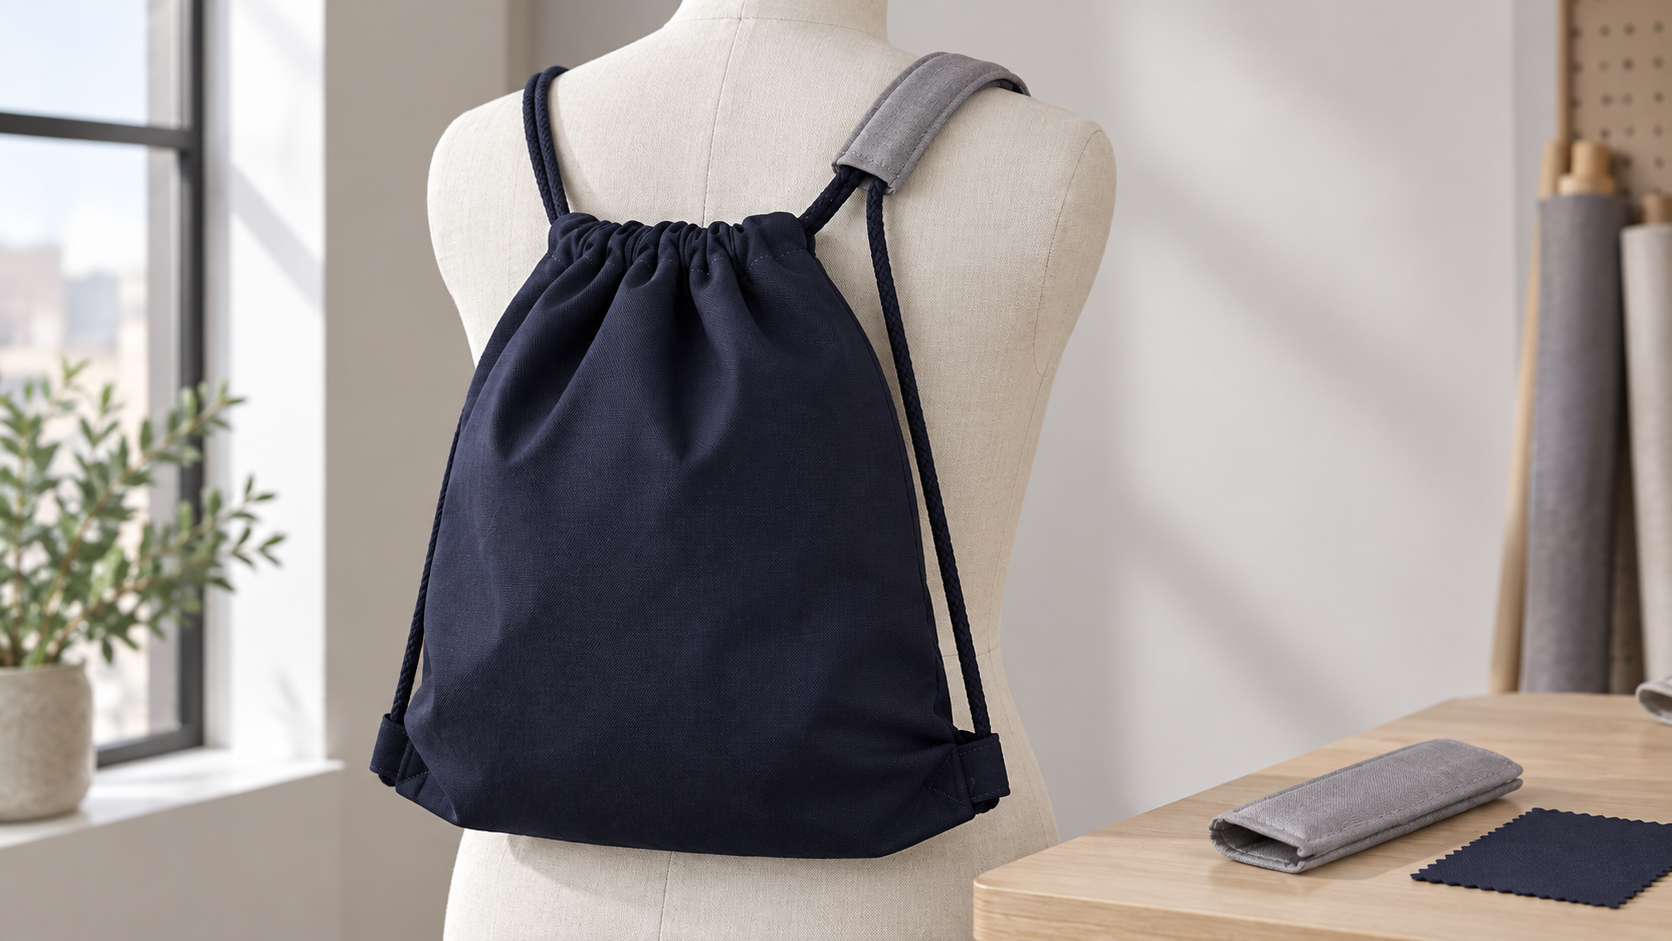
Visual disclosure: this reference-guided AI image uses unbranded product references to inform believable fabric, stitching, gathered-top and cord-anchor construction. It illustrates a shoulder-sleeve development concept, not a current SKU, customer order, factory photograph, fixed specification, or verified comfort result.
The Short Answer
To improve drawstring bag shoulder comfort, first reduce unnecessary load and keep the contents stable near the user's back. Then increase the cord's effective contact area, soften or round the contact edges, prevent twisting, balance the left and right routes, and set a usable length or adjustment range. If a narrow cord must remain for visual or closure reasons, add a fixed or sliding sleeve that spreads contact without blocking the top channel.
Do not approve the design from a tabletop photo. Test a production-equivalent sample while loaded, closed, lifted, walked with, put on, and removed. Record fit, pressure concentration, slipping, bounce, heat, abrasion, closure behavior, and any movement at the lower anchors. “Comfortable” should remain a project-level, evidence-supported description—not a universal health, safety, or weight-bearing guarantee.
| Design lever | What it may improve | Tradeoff to examine in the sample |
|---|---|---|
| Lower or better-positioned load | Less strap force and less bag movement | The bag still needs enough useful capacity |
| Greater effective contact width | Spreads force over a broader area | Wider parts can add bulk or change the visual language |
| Softer edge and surface | Reduces a cutting or abrasive sensation | Very soft trim may roll, stretch, absorb moisture, or close less cleanly |
| Balanced routing | Helps both sides share the load | Unequal channel friction or anchor geometry can defeat symmetry |
| Correct carry length | Controls ride height and bounce | One fixed length will not fit every body or clothing layer |
| Shoulder sleeve or pad | Preserves a narrow closing cord while widening contact | Sleeve migration, seam placement, packing volume, and added operations |
| Stabilized contents | Limits hard objects pressing through the back panel | Divider, lining, or pocket changes weight, cost, and usable volume |
Treat Comfort as a System, Not a Cord Specification
A round cord can feel acceptable on a light event bag and uncomfortable on a dense retail kit. A flat tape can spread load well but fold into a narrow ridge. A broad webbing can still rub if its edge is hard, its route pulls outward, or its adjustment lets the bag swing. Nominal diameter or width is therefore only a starting measurement.
The shoulder experiences a combination of forces and sensations:
- tension: the share of the loaded bag carried by each side;
- contact pressure: force distributed over the area actually touching the body;
- edge concentration: localized force along a cord, fold, seam, or sleeve edge;
- motion: sliding, bounce, or repeated micro-movement during walking;
- surface interaction: friction against clothing or skin-adjacent apparel;
- thermal and moisture effects: heat or dampness that changes perceived comfort;
- fit: the relationship between spacing, length, route, body shape, and clothing.
Research on other load-carriage systems supports this multi-variable view. In one controlled manikin experiment using a 20 kg backpack, both shoulder-strap width and load placement affected interface pressure (PubMed). That test does not establish a universal drawstring-bag width or a safe load. It does show why width should not be evaluated separately from where the load sits. Another study found that measured pressure distribution, strap force, and pack movement could help predict discomfort in the configurations tested (PMC). These findings are useful design signals, not ready-made pass/fail limits for promotional bags.
Start With the Carrying Mission
The same shell may be used for a race kit, school promotion, footwear package, sports giveaway, retail purchase, travel amenity, or lightweight merchandise. Each mission creates a different comfort problem. The development brief should describe the intended contents and wearing pattern before the trim is selected.
| Use scenario | Questions that define the comfort target | Likely development emphasis |
|---|---|---|
| Event giveaway | Will it hold only literature, or also bottles and merchandise? How long will it be worn? | Lightweight shell, smooth cords, fast donning, controlled cost |
| Gym or sports kit | Are shoes, bottles, or wet textiles included? Is walking continuous? | Load stability, abrasion, moisture management, reinforced anchors |
| Retail campaign | Is the bag a carrier, reusable promotional item, or both? | Brand surface, broad user fit, practical capacity, repeat-use construction |
| Footwear packaging | Does the bag become a backpack after purchase? | Dual-mode function, back-panel feel, cord length and corner reinforcement |
| School or youth promotion | What age and product-safety requirements apply in the market? | Project-specific risk assessment; avoid universal safety or weight claims |
| Travel or amenity kit | Will it be packed flat, worn briefly, or stored inside luggage? | Low bulk, soft contact, wrinkle recovery, simple adjustment |
| Product bundle | Are hard or angular items concentrated in one area? | Interior organization, cushioning, ride-height and movement control |
Record the maximum packed envelope and representative mass, but do not turn a sample load into a general capacity promise. If future contents are uncertain, define several test packs—light, typical, and upper project case—and identify the one used for approval.
Reduce Load Before Adding Padding
Padding can mask a poorly balanced product without solving it. Review what the bag itself contributes: shell weight, lining, printed coating, bottom insert, hardware, pockets, cord locks, decorative panels, and packaging retained during use. Remove components that do not serve the mission or brand.
Then inspect the contents. A bottle, power bank, catalogue, or boxed product can create a dense point load. Positioning that item high and close to the back may feel different from letting it fall to a deep lower corner. A bottom gusset can help the bag stand, yet it may also allow heavy items to settle farther from the body. The correct geometry must be evaluated with the intended pack, not inferred from flat dimensions alone.
If capacity is driving accidental overloading, a smaller pattern may improve the actual user experience more reliably than thicker trim. Use the drawstring bag size and capacity guide to translate contents into finished dimensions, fill behavior, and measurement points.
Increase Effective Contact Area
Contact width is the portion that remains against the shoulder under load. It may be much smaller than the trim's stated width. A flat cord can twist. A webbing can curl. A padded sleeve can migrate away from the pressure zone. A round cord's diameter does not describe the full shape formed when it compresses.
During sampling, mark the strap orientation, load the bag, and photograph the shoulder route from front, side, and rear. Look for a narrow ridge, turned edge, rolled tape, doubled-over cord, or sleeve seam positioned against the body. Measure the part as worn rather than relying only on the supplier's flat trim data.
The detailed differences among profiles are covered in Round Cord vs Flat Cord vs Webbing Straps. For comfort development, the key question is not which category is “best”; it is which construction maintains the approved contact shape throughout the real carrying cycle.
Decide Whether the Closing Cord Should Also Carry the Bag
Traditional backpack-style drawstring bags use the same cord to gather the top and form both shoulder routes. That economy is attractive, but it links closure friction, cord length, shoulder feel, and anchor load. Changing the cord to improve one function can alter the others.
A thicker or broader cord may feel better on the shoulder but travel poorly through a narrow channel. A low-friction cord may close smoothly but slip on clothing. A highly flexible cord may knot or twist. Before increasing any dimension, verify channel clearance, exit finishing, gathered bulk, knot security, and how the bag opens after wear.
For a deeper closure decision, see Single-Cord vs Double-Cord Drawstring Bags. If the project requires materially better carry comfort than a simple cord can provide, consider separating the functions: keep a smaller drawcord at the top and add distinct webbing straps, a yoke, or engineered shoulder sleeves.
Use Shoulder Sleeves When the Cord Must Stay Narrow
A sleeve converts a short section of cord into a broader contact surface. It can be a low-bulk woven tube, a folded fabric channel, a padded wrap, or a shaped component. The choice depends on whether it should slide, stay fixed, detach, or visually blend with the bag.
Fixed Sleeve
A fixed sleeve stays in the intended shoulder zone. It is less likely to migrate, but its position must work across the expected user range. Fixing it with stitching can create a hard transition and may prevent cord replacement. If the main cord moves through the closure, make sure the fixation does not shorten the usable travel.
Sliding Sleeve
A sliding sleeve lets the user center the broad section. It supports more body sizes and clothing layers, yet it can drift toward the top or lower anchor. Define its internal clearance, anti-roll construction, edge shape, and adjustment friction. Test it after repeated donning rather than approving its initial position.
Wraparound Pad
A removable wrap can be attached after sewing and replaced if damaged. Hook-and-loop, snaps, or other closures add thickness and a possible hard contact point. Place that closure away from the main body-facing surface, control exposed hook material, and evaluate snagging in packing and use.
Split Cord or Short Webbing Bridge
A narrow cord may transition into a broader shoulder segment, then return to cord near the lower anchor. This preserves the drawstring appearance while creating a wider wear zone. The transition must distribute tension smoothly; a small folded join or exposed hardware can become the new pressure point.
| Sleeve concept | Position control | Bulk | Main sample checks |
|---|---|---|---|
| Sewn fixed tube | High | Low to medium | Correct location, seam orientation, cord movement, transition stiffness |
| Free-sliding fabric sleeve | User-adjustable | Low | Migration, twisting, internal friction, reach and reset |
| Lightly padded sleeve | Fixed or sliding | Medium | Compression recovery, edge feel, moisture, packing thickness |
| Removable wrap | User-adjustable | Medium | Closure contact, snagging, detachment, wash/care behavior |
| Webbing shoulder bridge | High when anchored | Medium | Join strength, edge finish, width stability, visual integration |
Engineer the Edge, Not Just the Center
Users often feel the edge of a component before they feel its middle. Stiff heat-cut webbing edges, thick binding, a raised seam allowance, a rough cord splice, or a folded sleeve lip can concentrate contact. The technical drawing should show the cross-section and identify which face sits against the body.
Sample alternatives such as folded edges, turned-and-topstitched sleeves, soft binding, knit tubes, or buried seam allowances. Avoid assuming that more foam means better comfort: a thick pad with a rigid edge may create a pronounced step. Compress the part under the intended load and inspect whether the edge turns inward.
Control Twist, Roll and Cord Memory
Trim can arrive wound on rolls, folded in cartons, or heat set into a curved form. Once threaded, that memory may rotate the shoulder section. A flat element that turns 90 degrees can present its edge to the user; paired cords can cross and behave like a narrower bundle.
Specify orientation at the exits and lower anchors. Use route marks on development samples, then cycle the closure and put the bag on repeatedly. If a sleeve is fitted, confirm that it stays on the intended face. Twist should be assessed after conditioning and packing, not only immediately after assembly.
The drawstring cord, eyelet and reinforcement guide explains how trim, exits, and anchors interact. Comfort testing should be added after those structural details are stable.
Balance Surface Friction
Too much friction can pull clothing, create heat, and make the bag awkward to put on. Too little friction can let the routes slide outward or let the bag bounce. Texture must therefore be judged against intended clothing, wear duration, and movement.
Test at least the garments that matter commercially: a lightweight shirt, a smooth jacket, and a thicker layer if seasonal use is expected. Look for pilling, dye transfer, finish abrasion, cord fuzzing, snagging, and persistent marks on delicate surfaces. If direct skin contact is reasonably foreseeable, the project may require additional material and safety review; never convert a casual touch test into a dermatological claim.
Account for Heat and Moisture
A broad padded component can spread load while trapping more warmth. Open-cell foam, spacer mesh, brushed fabric, cotton, polyester, and coated textiles behave differently when damp and under compression. Consider drying time, odor retention, care, colorfastness, and whether the material remains soft after the agreed cleaning process.
“Breathable,” “moisture-wicking,” and “antimicrobial” are claims that require defined evidence. A mesh appearance does not prove a quantified airflow benefit, and a fiber name does not establish moisture management. State construction facts that can be verified, or commission the appropriate order-level test before using performance language.
Set the Top Spacing and Lower Anchor Geometry Together
Shoulder-route spacing is not simply “wider is more comfortable.” The top exits determine where the cords begin; lower anchors determine their angle around the torso. Bag width, route length, body size, clothing, and packed shape then change the actual position.
A small laboratory study on backpack strap spacing found that the tested wider spacing was not automatically more comfortable for every region or response (PMC). The study population and backpack setup limit direct application to drawstring bags. Its useful lesson is methodological: verify spacing on representative users instead of selecting it from a generic rule.
Mark the top exits and lower anchor centers on the pattern. In a sample fitting, observe whether the routes sit on the shoulder, pull toward the neck, drift outward, or cross. Also check whether the lower corners fold into the user's side. If the anchor design itself is unresolved, compare metal eyelets and fabric-reinforced corners before conducting the final comfort trial.
Tune Ride Height and Adjustment Range
A bag worn too low may swing, pull backward, and place the lower contents farther from the torso. A bag worn very high may restrict access or cause the cords to approach the neck. The correct ride height depends on bag dimensions, contents, user group, outerwear, and route geometry.
Fixed-Length Routes
Fixed cords minimize hardware and assembly, but they encode one fit. State the finished exposed route length using defined measurement points and tolerance. Test the same sample on users near the expected small and large fit cases. A nominal cord cut length is insufficient because knots, channel travel, turnbacks, and anchor capture consume different amounts.
Adjustable Routes
Cord locks, sliders, buckles, knots, and webbing adjusters can broaden the fit range. They also add hard parts, loose ends, operating steps, and potential slippage. Define the usable adjustment range, adjustment force, retained length, hardware orientation, and whether the user can change it while wearing the bag.
Clothing Allowance
A route approved over a T-shirt can become short over a coat. Conversely, a length chosen for outerwear may hang poorly over light clothing. If one product spans seasons, adjustment may be more important than optimizing a single fixed sample.
Stabilize the Bag Against the Back
Shoulder feel changes when the load moves. A large partly filled body allows contents to swing. An unstructured bottom may let hard objects gather at one corner. A smooth lining can allow dense items to migrate. Consider an internal divider, elastic bottle holder, light base support, foam-backed body panel, or restrained pocket—but add only what the use case justifies.
The guide to adding pockets and zippers explains how compartments affect load paths and assembly. Locate heavy pockets close to the body-facing panel and keep their attachment away from the cord channel and anchor reinforcement. Test whether filled pockets create new hard spots.
Preserve Closure Performance
A comfort change can make the bag harder to close. The sample must gather to the agreed opening condition without excessive force, cord jamming, sleeve interference, or asymmetric puckering. After carrying, the user should still be able to reopen the mouth without a knot or trim splice lodging at the exit.
Record closure travel and the position of every sleeve or adjuster in open and closed states. If a thicker trim needs a larger channel, confirm the resulting top silhouette, print clearance, and seam construction. Never enlarge an eyelet or cord exit without reviewing its local reinforcement and pull direction.
Build Comfort Requirements Into the Tech Pack
“Use comfortable cords” cannot be inspected. A production specification should convert the approved sample into measurable components, routes, and test conditions. Use the overall framework in How to Prepare a Custom Drawstring Bag Tech Pack, then add the fields below.
| Specification block | What to record | Evidence for approval |
|---|---|---|
| Intended use | Contents, packed dimensions, representative mass, wear duration and clothing | Approved test-pack list and photographs |
| Trim | Material, construction, diameter/width/thickness, hand feel, color and physical reference | Sealed trim card plus supplier specification |
| Route | Top exit centers, lower anchor centers, finished exposed length, left/right orientation | Dimensioned drawing and measured sample |
| Contact component | Sleeve/pad construction, finished dimensions, cross-section, seam face, position | Golden sample and component section |
| Adjustment | Hardware, usable range, setting method, slippage criterion | Operation video or controlled inspection steps |
| Closure | Channel, exit, opening state, closing force or agreed functional check | Open/closed comparison on approved sample |
| Test pack | Item list, location and restraint | Numbered contents layout |
| Wear protocol | Participants, clothing, route, duration, activities, observations and rating scale | Signed project test record |
| Workmanship | Twist, symmetry, edge feel, loose ends, seam position, anchor appearance | Defect board and inspection photos |
| Claims | Exact wording, evidence owner, market and validity | Approved claim file or deletion from artwork |
Avoid subjective terms where a reference can be used. A sealed sample, trim card, dimensioned photograph, and route diagram communicate better than “medium-soft cord.” If the sample changes, update the bill of materials and revision record; do not rely on chat history.
Develop Samples in Controlled Rounds
Changing cord, sleeve, bag size, anchors, and lining at the same time makes the result difficult to diagnose. A controlled sequence is faster in the long run.
Round 1: Geometry Mock-Up
Use the intended body size and approximate load to evaluate top spacing, lower anchors, route length, ride height, and closure. Temporary adjustable routes are useful here. Appearance is secondary; the goal is to remove fit errors before investing in finished decoration.
Round 2: Contact-System Comparison
Keep the geometry stable and compare a small number of credible alternatives, such as the selected cord alone, the same cord with a sliding sleeve, and a short webbing bridge. Use the same contents, participants, and activity sequence.
Round 3: Production-Equivalent Prototype
Apply final shell, lining, trim source, reinforcement, print, thread, and construction. Recheck comfort because surface finishes, seam bulk, printing, and packing can change the feel.
Round 4: Preproduction Confirmation
Confirm that bulk materials and production routing reproduce the approved sample. Review first-article dimensions, left/right symmetry, sleeve orientation, anchor appearance, closure, and loaded wear before authorizing volume production.
LUCKYSTAR's sample-development process can help buyers structure comments around measurable differences instead of accumulating unrelated sample changes.
Run a Repeatable Wear Test
A wear test does not need to imitate a medical laboratory, but it must be repeatable enough to compare prototypes. Use representative participants and obtain the appropriate consent. Do not ask production staff or informal reviewers to make health claims.
Prepare the Samples
Condition samples consistently if the project requires it. Load each with the same numbered contents in the same orientation. Set adjustable routes to recorded lengths. Conceal sample identity where practical so color or styling does not dominate the response.
Use a Defined Activity Sequence
Include putting on, closing, standing, walking, turning, bending as appropriate, removing, reopening, and repeating. The duration should reflect the product's intended use. If jogging or other higher-motion activity is reasonably expected, include it only under an agreed and safely managed protocol.
Separate Observations From Ratings
Observers can record twist, migration, bounce, asymmetry, hardware movement, garment snagging, and closure change. Participants can rate overall comfort and locations of pressure, rubbing, heat, instability, or restriction. Use the same clearly anchored scale for every prototype.
Retest After Cycling and Packing
Cycle the closure and routes, pack the sample using the proposed method, then repeat the trial. A sleeve that looks centered when new may migrate after repeated handling. A cord may flatten or fuzz. A packed-in crease may rotate a flat strap.
| Test phase | Controlled setup | What to record | Typical decision |
|---|---|---|---|
| Fit screening | Empty and representative pack; several intended users | Ride height, route position, donning, range remaining | Revise spacing, length, or adjuster range |
| Static loaded wear | Agreed standing period and test pack | Local pressure comments, edge sensation, asymmetry | Change contact profile or routing |
| Walking sequence | Fixed route, pace and duration appropriate to use | Bounce, slip, rub, heat, sleeve migration | Stabilize load or tune surface/length |
| Closure interaction | Open, gather, wear, remove and reopen | Force, jamming, unequal travel, final opening | Adjust channel/trim/sleeve geometry |
| Repetition | Agreed cycles followed by wear | Cord twist, fuzzing, stretching, anchor movement | Change trim, fixation or reinforcement |
| Packed-condition retest | Proposed folding and carton compression | Creases, rotated routes, deformed padding | Revise packing method or recovery step |
If instrumentation is warranted, pressure sensors, strap-force measurements, or motion tracking can supplement—not replace—user feedback and construction inspection. Any threshold must be agreed for the specific test method and project.
Translate Results Into an Approval Matrix
One person's comment should not silently become a universal design rule. Summarize every prototype against the same requirements and identify tradeoffs.
| Criterion | Sample A: cord only | Sample B: sliding sleeve | Sample C: webbing bridge | Project decision |
|---|---|---|---|---|
| Contact concentration | Record result | Record result | Record result | Select after representative wear test |
| Closure smoothness | Record result | Record result | Record result | Must meet approved function |
| Twist or migration | Record result | Record result | Record result | Define acceptable orientation |
| Adjustment coverage | Record result | Record result | Record result | Match intended user range |
| Added bulk | Record result | Record result | Record result | Check packing and freight effect |
| Brand appearance | Record result | Record result | Record result | Approve with filled product photos |
| Assembly risk | Record result | Record result | Record result | Confirm repeatable operation sequence |
| Cost implication | Quote by final specification | Quote by final specification | Quote by final specification | Decide total project value |
The matrix should contain actual observations, not marketing adjectives. Keep rejected samples or clear photographs so later teams do not reintroduce an unsuccessful option.
Inspect the Features That Control Comfort
Bulk inspection cannot prove that every user will be comfortable. It can verify whether production matches the approved design inputs. Add project-specific checkpoints to the normal bag inspection plan.
| Inspection stage | Comfort-related control | Example evidence |
|---|---|---|
| Incoming material | Trim construction, width/diameter, surface, color, stretch and sleeve material against approved reference | Material card, measurement log, lot identification |
| First article | Exit spacing, anchor spacing, exposed route length, adjustment range, sleeve position and seam face | Signed first-article record and photos |
| In-process | No twist, paired-route symmetry, correct threading, secure transitions, protected edges | Line patrol record and defect examples |
| Finished function | Open/close cycle, adjustment, equal travel, representative loaded lift and visual balance | Functional inspection sheet |
| Workmanship | No burrs, sharp edges, loose trim ends, hard seam ridges, exposed hook material or cord damage | Appearance and touch-point review |
| Packing | Routes arranged without hard creases, pads recover, hardware protected from imprinting | Approved packing photo and carton audit |
Structural and workmanship controls should also follow the broader custom bag quality inspection checklist. If a load or cycle test is required, the method, equipment, specimen count, conditioning, load, duration, cycle rate, pass criteria, and failure recording must be written into the order specification.
Diagnose Common Comfort Failures
| Symptom | Likely contributors | Corrective direction |
|---|---|---|
| Cord feels as if it cuts into the shoulder | High load, small effective area, rolled/twisted profile, hard edge | Reduce or reposition load; stabilize orientation; widen the contact segment |
| Bag pulls toward the neck | Top exits too close for the user, route angle, bag width, low ride position | Prototype spacing and route geometry on representative users |
| Routes fall outward | Low surface grip, excessive spacing, long routes, unstable load | Adjust spacing/length, stabilize contents, sample a different contact surface |
| One side carries more | Unequal route length, asymmetric threading, channel friction, shifted contents | Measure paired routes, inspect closure travel, balance the test pack |
| Shoulder sleeve will not stay centered | Too much clearance, poor fixation, smooth cord, incorrect sleeve length | Tune friction/position control or use a fixed design |
| Pad edge feels harder than cord | Rigid foam, bulky seam, edge turning inward | Change cross-section, seam face, edge taper, or material stack |
| Bag bounces while walking | Long routes, low center of mass, oversized body, mobile contents | Raise ride height, reduce excess volume, restrain dense items |
| Heat builds quickly | Broad dense pad, low-airflow stack, long wear period | Compare lower-bulk or ventilated constructions and verify any performance claim |
| Cord twists after unpacking | Roll memory, folding, assembly orientation, insufficient recovery | Change packing, precondition trim, add orientation control |
| Closure becomes difficult | Trim/channel mismatch, sleeve interference, crossing cords | Separate contact section from closure zone or revise channel clearance |
Correct the cause that produces the symptom. Adding foam to a bouncing, overloaded, low-hanging bag may increase heat and bulk without addressing movement.
Avoid These Design Shortcuts
- Choosing the widest option from a trim card. Width without route, flexibility, and edge control does not predict worn contact.
- Testing empty samples. Most comfort problems appear only after contents change tension and bag shape.
- Using one reviewer. Body size, clothing, sensitivity, and carrying habits vary.
- Copying a backpack dimension. Drawstring bags have different closure and load-path constraints.
- Adding a pad after the pattern is approved. The pad can affect cord travel, packing, logo balance, and route length.
- Treating softness as durability. A soft component may roll, stretch, fuzz, or abrade.
- Ignoring the lower anchors. Their position and stability shape the shoulder route.
- Approving by appearance alone. Photographs do not reveal concentrated pressure, slip, or heat.
- Using “ergonomic” as decoration. The word needs a defined design basis and substantiation appropriate to the market.
- Turning a sample test into a universal claim. Results apply to the tested construction, setup, and population.
Protect Print and Brand Visibility
Comfort components change the way the product is seen. Broad shoulder segments may cross a front logo when the bag is handled. A higher ride position changes how artwork appears on the body. Interior organization can curve the face. Padding and adjusters can also add colors or textures that compete with the campaign palette.
Approve artwork on the filled and worn prototype as well as the flat panel. Define a safe decoration field away from the top gathering band, lower reinforcement, seams, and any strap segment that may sweep across the surface. If comfort requires a visually prominent sleeve, treat it as an intentional brand component rather than a late add-on.
Consider Packing and Carton Recovery
Soft shoulder elements can be crushed, folded, or permanently creased if packed under hardware or dense bag stacks. Define how routes are laid, whether sleeves must be centered, whether adjusters need protection, and how long the product should recover after unpacking before inspection.
A broader or padded system can increase packed volume. Compare unit packing, carton count, gross mass, and dimensional effect before approving it. Avoid environmental claims based only on a lighter-looking material; the full product and logistics scenario matter.
Manage Cost, MOQ and Timing as Specification Variables
Comfort is not a fixed-price option. A new cord source, custom-dyed webbing, shaped pad, additional sewing operation, adjustment hardware, extra sample rounds, or order-level test can affect commercial terms. Price and production timing remain subject to final specification and written confirmation.
| Cost or schedule driver | Why it changes the project | Lower-complexity route to consider |
|---|---|---|
| Custom trim profile or color | Material sourcing and color approval | Use an available approved trim where brand requirements allow |
| Multi-layer padded sleeve | Cutting, assembly, alignment and inspection | Trial an unpadded broad woven sleeve |
| Adjustment hardware | Component purchase, threading, operation check | Validate a project-specific fixed length if the user range is narrow |
| Separate carrying straps | More parts and anchor operations | Use a cord-to-webbing shoulder bridge |
| Specialized testing | Method development, specimens, laboratory or equipment time | Begin with a controlled internal comparison, then commission only needed verification |
| Complex individual packing | More handling and greater pack volume | Design a simple route-folding template that prevents hard creases |
Use Custom Drawstring Bag MOQ and Production Time for planning and How Much Do Custom Drawstring Bags Cost? 2026 Pricing Guide to understand quotation inputs. Cost reduction should remove unnecessary complexity, not delete the approved load path, reinforcement, or verification plan; see How to Reduce Custom Drawstring Bag Costs Without Sacrificing Quality.
Use Ergonomics Guidance Carefully
ISO/TS 20646:2014 provides general guidance for optimizing musculoskeletal workload and was shown by ISO as current following review in 2026. It is not a drawstring-bag certification, a comfort test method, or permission to place an ISO claim on a product. Its systems approach—understand the task, assess relevant factors, apply controls, and evaluate the outcome—is useful for building a project protocol.
Likewise, backpack studies can inform hypotheses, but their loads, straps, populations, and activities differ from a promotional drawstring bag. Do not copy their dimensions or numerical results into a product promise. Where comfort, child use, occupational use, or extended carrying is commercially important, engage a qualified testing or ergonomics professional and agree the exact scope.
Keep Compliance and Claims Order-Specific
Materials, hardware, coatings, inks, foam, and surface treatments may be subject to chemical, labeling, flammability, product-safety, or other requirements in the destination market. The applicable controls depend on product construction, intended user, use, market, and buyer specification.
Do not describe a bag as “pain-free,” “injury-preventing,” “medically approved,” “safe at any weight,” or universally ergonomic. Do not extend a component report to the whole bag or one sample result to future orders. Certification and performance language should identify the exact subject, standard or protocol, report, issuing body, validity, and order scope. Any mention of GRS, GOTS, BSCI, ISO, REACH, RoHS, CE, or a comparable scheme must be supported by current evidence for the correct LUCKYSTAR entity, product, and order; these labels are not represented here as blanket company credentials.
Why Work With LUCKYSTAR
LUCKYSTAR has developed customized bag and packaging projects since 2015. For shoulder-comfort development, the useful advantage is coordinated specification work—not an unsupported claim that one standard strap suits everyone.
Depending on the project, the team can support:
- translating intended contents, users, wear pattern, artwork, and market requirements into a clearer product brief;
- comparing feasible body fabrics, cord profiles, webbing, sleeves, reinforcements, and adjustment concepts;
- coordinating OEM/ODM development from drawing and sample review through production follow-up;
- separating geometry trials from material and decoration approvals so feedback remains traceable;
- recording production-relevant measurements for exits, anchors, routes, sleeves, channels, and finished bag dimensions;
- aligning incoming-material, first-article, in-process, final-function, workmanship, and packing checks with the approved specification;
- discussing order-specific testing or documentation needs before commercial commitments are made.
Capabilities, materials, MOQ, price, sampling time, production schedule, test scope, and documentation are subject to the final design and written confirmation. The broader custom bag manufacturer guide explains how to qualify a supplier, while How to Choose a Custom Drawstring Bag Manufacturer focuses on this product category. Buyers sourcing internationally may also use How to Import Custom Drawstring Bags from China to organize specifications, samples, documents, inspection, and shipping responsibilities.
RFQ Checklist for a More Comfortable Drawstring Bag
Send the following information with your inquiry:
- intended use, destination market, and expected user group;
- exact contents, individual item dimensions, typical packed mass, and placement;
- target body size, material, lining, gusset, pockets, and reinforcement;
- whether the same cord closes and carries the bag;
- preferred cord, webbing, sleeve, padding, or adjustment references;
- desired fit range and representative clothing layers;
- top-exit and lower-anchor concept, if already defined;
- artwork files, print method, color references, and reserved logo area;
- wear-test scenario, participants, activities, duration, rating scale, and decision rule;
- any material, chemical, labeling, performance, or documentation requirements;
- quantity, packing, delivery destination, and target schedule;
- which dimensions, functions, and test results must be confirmed before production.
If you only have a visual reference, explain what you want to preserve and what problem you want to solve. A photo alone cannot define contact width, route length, material hand, packed load, or acceptable comfort.
Frequently Asked Questions
Are thicker drawstrings always more comfortable?
No. Thickness may increase contact area, but shape, compression, edge profile, twist, route, load, and closure compatibility all matter. Compare production-relevant samples under the same load.
Is webbing automatically better than round cord?
No. Webbing can create a broader contact surface, yet it may curl, twist, have hard edges, or interfere with the intended drawstring appearance. Its construction and routing must be tested.
Can a shoulder pad be added without changing the bag pattern?
Sometimes, but it can change route length, top closure, packing volume, artwork balance, and contact position. Treat it as a designed component and verify the whole system.
How wide should a drawstring bag shoulder strap be?
There is no universal width. The appropriate effective contact area depends on load, materials, body geometry, clothing, movement, and wear time. Prototype and test the intended project rather than copying a generic number.
Why does one shoulder feel more pressure than the other?
Possible causes include unequal route length, asymmetric threading, different channel friction, a twisted contact section, shifted contents, or anchor variation. Measure the assembled routes and repeat the loaded test with a controlled pack.
Should the bag ride high or low?
It should ride at the project-approved position with acceptable access, route placement, and movement. Very long routes can increase swing, while very short routes may place the cord poorly. User range and clothing matter.
What is the simplest comfort upgrade?
Often it is reducing or repositioning the load, correcting the carry length, and eliminating twist. If the narrow cord remains the limiting factor, a well-designed sleeve can increase effective contact area with moderate construction change.
Can LUCKYSTAR guarantee that every user will find a bag comfortable?
No responsible manufacturer should make that universal promise. LUCKYSTAR can help develop measurable specifications and coordinate project-specific samples, checks, and agreed testing; outcomes depend on the final design and use conditions.
Does a wear test replace strength testing?
No. Wear testing assesses fit and perceived experience in the defined scenario. Strength, durability, chemical, and other compliance checks have different methods and acceptance criteria.
When should comfort testing happen?
Screen geometry early, compare contact concepts after the route is stable, repeat with production-equivalent materials and printing, and confirm the preproduction article. Retest after any change that affects load, trim, spacing, length, anchors, packing, or contents.
Final Takeaway
A more comfortable drawstring bag begins with a better-defined carrying task. Manage the load, preserve a stable bag position, create sufficient effective contact area, control edges and twist, balance both routes, fit the intended user range, and verify the result through repeatable loaded wear trials. Then translate the winning sample into measurable production and inspection requirements.
LUCKYSTAR can help turn a comfort objective into a manufacturable custom-bag brief, with project-specific materials, sampling, production coordination, quality checks, and documentation discussed against the final specification. Explore custom drawstring bags or send the intended contents, artwork, quantity, destination, and wear scenario for review.
Email a prefilled shoulder-comfort brief