A print method is not a decoration selected after the bag has been engineered. It is part of the material and converting route. The same logo can require a flexographic plate on a paper web, a screen on a non-woven panel, a reverse-printed film before lamination, or a qualified ink system on clear TPU. Each route changes artwork limits, colour approval, minimum order quantity, lead time and the defects that must be checked.
This guide explains Custom Shopping Bag Printing Methods from a buyer’s perspective. It focuses on the decision that matters most: how to match the substrate, artwork and finished-bag geometry to a stable production sequence. It also covers white underbases, fold and gusset registration, proof hierarchy, ink durability and the questions that turn a vague print request into a comparable quotation.
Start by reviewing LUCKYSTAR’s custom shopping bag range. For supplier qualification, use the category-specific How to Choose a Custom Shopping Bag Manufacturer guide together with the broader Custom Bag Manufacturer pillar.
Planning an order? Send a print-route brief. Include bag construction and material, finished size, dieline revision, editable artwork, print sides and coverage, spot/process colors, physical color reference, white underbase, finish, quantity by version, rub/liquid/flex exposure, sample and approval stages, packing, destination and required date.
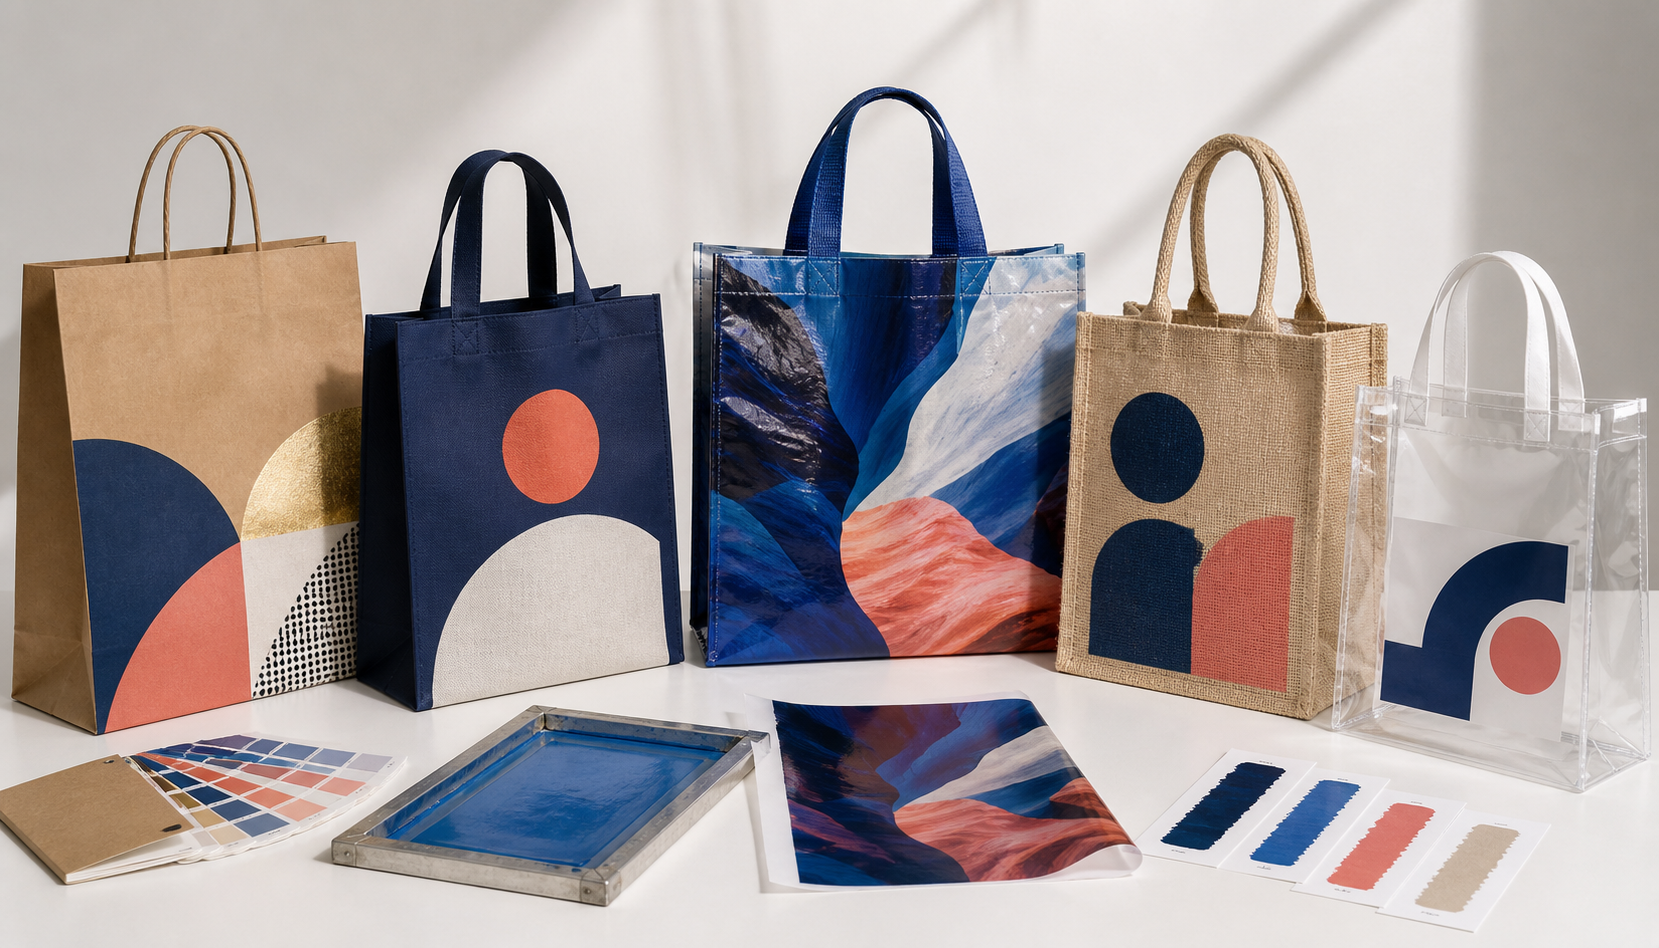
Paper, non-woven PP, laminated woven PP, natural textiles and clear plastics need different print-and-convert routes.
1. Select the route from the bag, not from a list of print names
Buyers often ask whether screen printing or heat transfer is “best.” The question is incomplete. A printing route must be evaluated against the bag’s substrate, surface treatment, colour, thickness, flexibility, finish, print area, order quantity and conversion sequence. A method that looks excellent on a flat swatch can fail when the material is folded, heat-sealed, stitched or rubbed during shipment.
Begin with the construction. Paper bags may be printed before folding and gluing. Non-woven polypropylene may be roll printed before ultrasonic conversion, printed as cut panels, or decorated after the bag is formed. A laminated woven PP carrier typically receives its graphics on film, which is then laminated to the reinforcing structure before cutting and sewing. Cotton, canvas, jute and mesh behave like textiles, but their fibre, weave, surface variation and care expectations change ink laydown. Clear PVC and TPU introduce adhesion, plasticizer, migration, blocking and opacity questions.
The intended visual result comes next. A one-colour event mark, a four-colour photograph, a metallic luxury detail and a wraparound retail design are four different briefs. Do not force them through one method merely because a supplier already owns that equipment.
| Method / route | Typical strength | Best-fit shopping bag situations | Main approval risk |
|---|---|---|---|
| Flexographic printing | Efficient repeat printing on suitable rolls; spot colours and process work are possible with the right press condition | Paper, selected films and roll-fed non-woven PP before conversion | Plate, anilox, substrate and press condition must match the approved proof |
| Sheet-fed offset | Fine detail and controlled process colour on suitable paper sheets | Premium paper bags made from printed sheets | The final fold, lamination, coating and glue route can change colour or damage risk |
| Digital printing | No conventional plates, useful versioning and short-run sampling | Selected paper, film or textile systems qualified by the converter | Unit economics, colour consistency, ink limits and compatibility vary by machine |
| Screen printing | Bold spot colour and useful opacity on many flat panels | Non-woven PP, cotton, canvas, jute and some qualified plastic panels | Fine detail, halftones, cure, underbase and rubbing performance |
| Printed film plus lamination | Full-coverage graphics protected below or within the laminated structure | Laminated woven PP and laminated non-woven retail carriers | Film direction, lamination bond, fold cracking and image registration during conversion |
| Heat-applied transfer | Useful detail and short-run flexibility on compatible materials | Selected textiles and promotional panels where heat will not distort the substrate | Edge lift, hand feel, scorching, dwell/pressure variation and flex durability |
| Sublimation | Vivid integrated colour on suitable polyester-rich surfaces | Light-coloured polyester shopping bags designed for the process | Not a universal route for cotton, PP, paper or dark substrates |
| Foil, embossing or spot finish | Tactile or reflective premium accent | Usually an additional operation on paper or other qualified surfaces | Registration, fold position, abrasion and interaction with coatings |
2. Match the substrate to a realistic print-and-convert sequence
“Full colour” is not a complete manufacturing instruction. On paper it may mean process printing on a sheet before die cutting. On a laminated woven PP bag it may mean reverse printing a film, laminating it to woven cloth, cutting the panels and then sewing the bag. Both results can look photographic, but the cost drivers and approval points are entirely different.
The surface is also more specific than the material family. Kraft paper, coated art paper and recycled-fibre paper do not reproduce colour identically. Spunbond non-woven PP needs a compatible surface and ink system. BOPP film may be reverse printed so the image is viewed through the film after lamination. Natural canvas absorbs differently from tight polyester. Clear PVC and TPU may look similar in photographs but behave differently under ink, heat and storage.
| Bag construction | Practical print route to evaluate | Where printing occurs | Engineering question before artwork release |
|---|---|---|---|
| Kraft paper carrier | Flexo, offset, screen or qualified digital route depending on volume and stock | Usually roll or sheet before folding and gluing | How much paper colour and fibre variation may show through? |
| Coated premium paper bag | Offset or qualified digital print, often followed by lamination, foil or embossing | Flat sheet before finishing and conversion | Will coating, film and crease sequence preserve colour and prevent cracking? |
| Unlaminated non-woven PP | Screen on panel or suitable flexo roll printing | Roll, cut panel or finished flat bag | Is the surface treated and is opacity acceptable over the base colour? |
| Laminated non-woven PP | Printed film or printed sheet laminated before conversion | Film/sheet before bonding to non-woven structure | Is the approved image viewed through film or printed on its outer face? |
| Laminated woven PP | Flexographic or gravure-compatible film route selected for design and volume | Film before lamination, cutting and sewing | What print direction, seam allowance and distortion compensation does conversion require? |
| Cotton, canvas, jute or mesh | Screen, qualified transfer/digital route, or sublimation only on suitable polyester | Usually flat panel before sewing; selected simple work may be applied to finished bags | How will texture, shrinkage, seams and care affect the mark? |
| Clear PVC or TPU | Qualified screen, digital, transfer or printed-film route | Flat sheet/panel before joining or selected finished surfaces | Has adhesion, white underbase, blocking and material compatibility been tested? |
For a deeper construction comparison, see Woven PP vs Non-Woven PP Shopping Bags and Laminated vs Unlaminated Non-Woven Shopping Bags. Natural-fibre projects also benefit from the separate Jute Shopping Bag Construction Guide, while transparent projects need the material distinctions in Clear PVC vs TPU Shopping Bags.
3. Decide when the artwork enters production
Print timing controls design freedom. Roll printing is fast and repeatable for the right construction, but the artwork must align with later cutting or sealing. Sheet printing supports premium paper finishing, but crease and glue maps must be correct before plates or finishing tools are made. Panel printing gives the printer a flat workpiece and helps keep seams away from the image. Finished-bag printing can suit some simple designs, yet handles, gussets and thickness changes restrict the print bed and may reduce repeatability.
Ask the manufacturer for a process map, not only a method name. The map should show material receipt, surface treatment where needed, printing, drying or curing, lamination/coating, slitting, cutting, handle preparation, bag conversion, inspection and packing. This reveals whether later heat, pressure, folding or solvents could change the approved result.
| Print timing | Advantage | Restriction | Registration control |
|---|---|---|---|
| Roll before conversion | Efficient repeated production and automated converting potential | Repeat length and web direction are fixed; later processes can shift the image | Printed marks, cut/seal reference and first converted-bag approval |
| Sheet before conversion | Good access for paper process colour and premium finishes | Artwork must anticipate die line, folds, turn-ins and glue areas | Approved dieline overlay and folded dummy |
| Cut panel before assembly | Flat, controllable print surface and clear seam allowances | Panel handling adds operations and the print must survive joining | Panel jig, orientation marks and signed sewn/sealed sample |
| Finished bag | Can suit simple local decoration and selected lower quantities | Handles, seams and gussets limit the printable zone and platen contact | Physical jig and approved placement tolerance on the finished bag |
| Printed film before lamination | Full graphics and surface protection when reverse printed | Lamination, stretch, cutting and fold geometry affect the final appearance | Film direction, repeat map, laminate sample and converted first-off |
4. Build artwork around folds, gussets and seams
A shopping bag is a three-dimensional package. Its front panel may look flat on screen, but the printed material later becomes a face, side gusset, bottom, turn-in and seam. Keep critical text, faces, barcodes and narrow borders away from fold variability unless the supplier has demonstrated the required control. Artwork intended to cross a gusset should be reviewed in at least three states: flat, opened and loaded.
Use the manufacturer’s current dieline. Do not scale an old dieline to a new bag size because fold ratios, seams, handle positions and tool constraints may change. The approved file should identify finished face, bleed, safe zone, fold/crease, cut, heat-seal or stitch line, glue lap, top turn, handle patch and print direction. If white ink is used on clear or coloured material, provide a separate underbase layer and specify whether it should be choked back to prevent a white halo.
For a structured specification, follow the Custom Shopping Bag Tech Pack guide. It turns the graphic into a controlled manufacturing input rather than a detached PDF.
| Artwork item | What the file should state | Why it matters | Approval evidence |
|---|---|---|---|
| Dieline version | Bag size, construction, revision date and print direction | Stops artwork being imposed on an obsolete structure | Supplier-confirmed locked dieline |
| Source art | Vector marks, linked high-resolution images, outlined or supplied fonts | Protects scale, edges and separations | Preflight report or marked file proof |
| Colour definition | Named spot colour, process build, target reference and viewing condition | Avoids treating a screen display as the only colour standard | Signed physical strike-off on production-like stock |
| White underbase | Separate layer, coverage, choke/trap and intentional transparent areas | Controls opacity on dark or clear substrates | Backlit and normal-light sample review |
| Bleed and safe zones | Cut/fold bleed plus limits for critical content | Protects against normal converting movement | Converted sample at nominal dimensions |
| Minimum feature | Smallest text, line, reverse gap, dot and halftone agreed for the route | Prevents fill-in, dropout and unreadable detail | Method-specific print sample |
| Separation / embellishment | Ink order, foil/varnish/emboss layer and trapping | Controls register and final stack of operations | Composite proof plus individual separation check |
5. Colour depends on ink, substrate and viewing condition
The same ink can appear different over brown kraft, white coated paper, navy non-woven PP and clear film. Porous paper may reduce saturation. A rough textile scatters light. A glossy laminate can increase apparent contrast. Clear material may require white ink behind selected artwork, while intentional transparency must remain unprinted.
Define a target and a comparison method. For important brand colours, agree whether the reference is a physical swatch, a printed master, spectral data or another signed sample. Also agree the illuminant or viewing booth, instrument geometry where measurement is used, substrate lot, gloss, backing and tolerance method. A single Delta E number without those conditions can create false confidence.
Do not treat a monitor proof as a colour guarantee. It is useful for content, placement, spelling, image crop and separations. A substrate strike-off shows ink interaction. A converted sample reveals folds, handle obstruction, laminate change and real presentation. Bulk still needs a first-off approval and periodic production checks.
| Approval stage | What it can approve | What it cannot prove | Release record |
|---|---|---|---|
| Digital file proof | Content, layout, orientation, layers and obvious preflight issues | Final colour, opacity, texture, adhesion or fold behaviour | Dated PDF/file revision with comments closed |
| Ink drawdown / strike-off | Colour direction, opacity and surface interaction on a representative substrate | Complete bag registration or production speed effects | Signed sample with ink, material and date |
| Printed panel | Detail, coverage, register and cure on the intended panel | Final seam, gusset, handle or loading appearance | Approved panel retained by both parties |
| Converted pre-production sample | Three-dimensional placement, fold transition and finished presentation | Long-run drift or every shipping abrasion condition | Golden sample with dimensional and visual notes |
| Bulk first-off | Actual press/converter setup before sustained production | Later variation unless checks continue | First-off sheet/bag, measurements and approval time |
| In-line / final audit | Drift, defects, count and lot conformity against the approved standard | A brief the buyer never defined | Lot-linked inspection report and defect evidence |
6. Control white ink, trapping and opacity
White is a functional colour on dark, metallic or transparent substrates. It can sit behind process graphics to preserve brightness, create an opaque logo or selectively block the contents of a clear bag. It also adds a separation, ink deposit and drying or curing demand. If the underbase is exactly the same size as the colour image, normal registration movement may reveal a white fringe. A controlled choke or trap can reduce the halo, but the value must be agreed for the print route.
Opacity must be judged in use. Inspect a clear bag against light and dark contents. View a dark non-woven panel under normal store lighting. Check whether a white layer changes flexibility or cracks at folds. If front and back graphics can be seen through a transparent bag, decide whether overlap is acceptable or whether the design needs repositioning.
7. Treat folds and gussets as moving print zones
Graphics across a fold experience more than placement variation. Paper coatings and heavy ink films can crack. Laminated structures may whiten or delaminate at a tight crease. A side-gusset image changes when the bag is closed, opened and filled. A logo close to the bottom may roll under the base after loading.
Make a full-size folded dummy before expensive tooling. Mark the intended viewing face and opening direction. Then produce a representative print on the actual construction and cycle the fold. If exact cross-panel continuity is critical, agree realistic tolerances and inspect multiple production samples rather than one hand-made prototype.
Bag engineering and print layout should be reviewed together. The Shopping Bag Gusset and Bottom Reinforcement Guide explains the load-bearing geometry that the artwork must respect.
8. Test the printed structure, not an isolated ink swatch
A visually correct sample can still fail in retail use. Printed bags rub against cartons, counters, clothing and each other. They may be folded flat for weeks, exposed to humidity, handled with damp hands or flexed at gussets. Define tests from the material, print process, sales channel and end use.
ISO 12647-6:2020 describes process-control requirements for flexographic printing, including packaging applications; it is useful only where that printing condition is relevant. ISO 12647-5:2015 covers process control for four-colour screen printing. These references do not replace a bag-specific specification.
For printed-material resistance, ISO 2836:2021 provides methods for assessing resistance of prints to selected liquid and solid agents across traditional and digital processes, but it does not cover food safety or release the whole bag. For coloured or printed textiles, ISO 105-X12:2016 addresses colour resistance to dry and wet rubbing. A transfer edge, laminate interface or plastic ink system may still need additional adhesion, flex and storage tests.
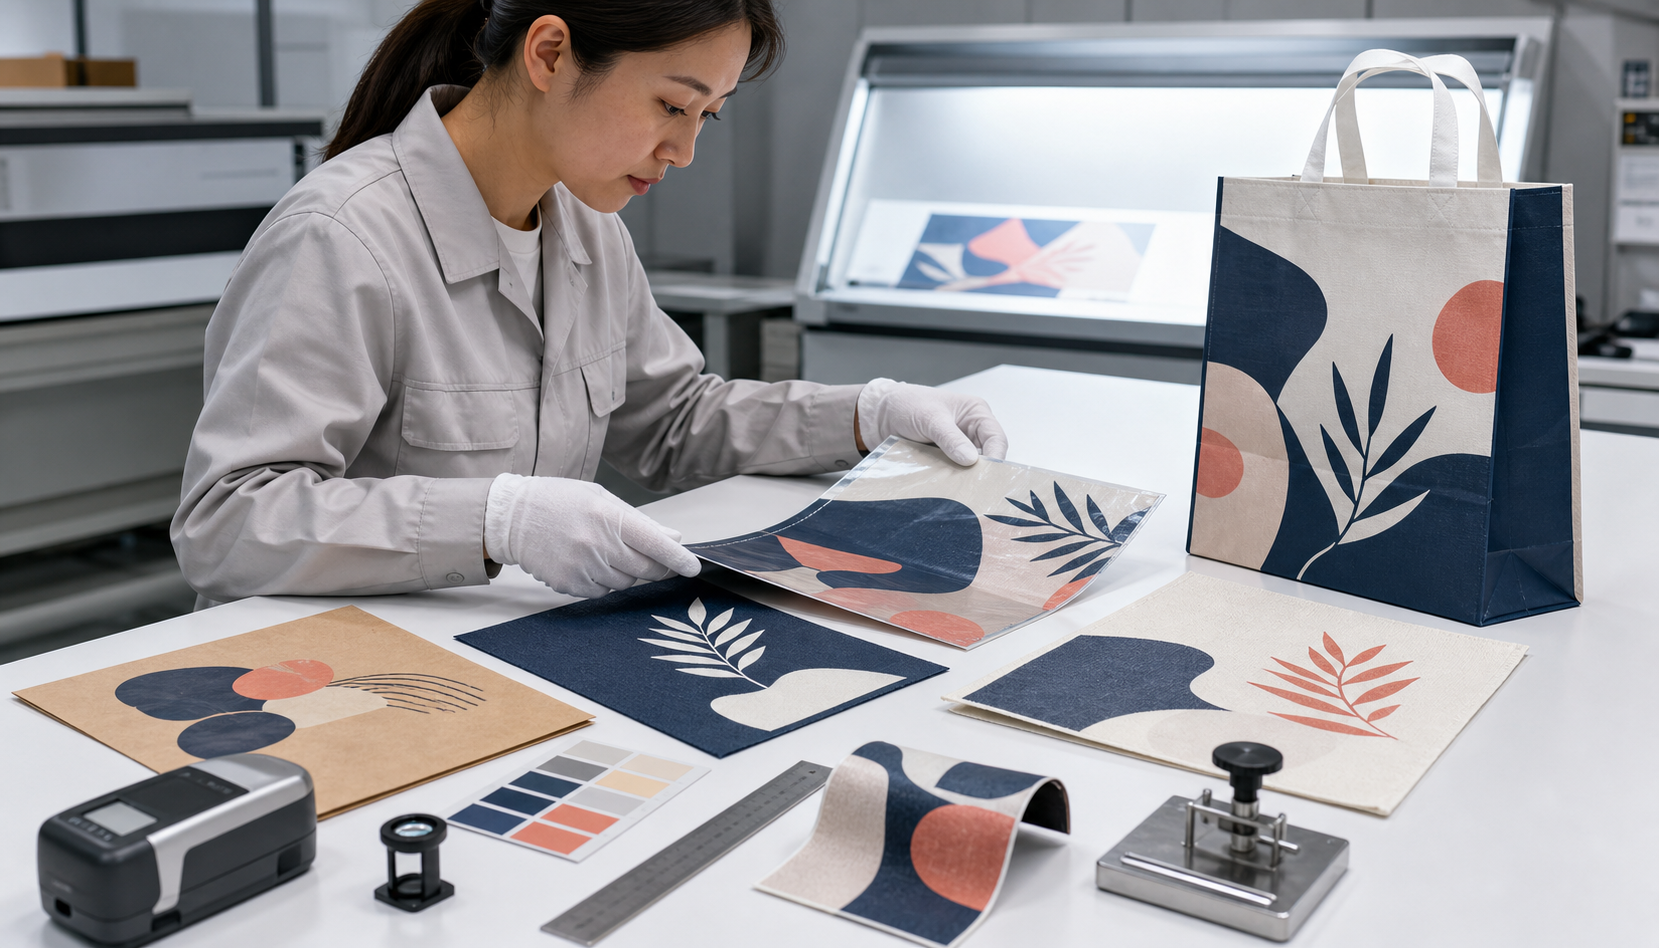
Approve colour and detail on the intended substrate, then challenge the print at folds, surfaces and interfaces that the finished bag will experience.
| Check | What it reveals | Sample condition | Buyer must define |
|---|---|---|---|
| Visual colour and register | Hue direction, density, misregister, pinholes, fill-in and missing detail | Production print under agreed lighting and backing | Reference, tolerance, critical zones and viewing method |
| Dry and wet rub | Colour transfer, surface wear and cure weakness | Representative printed substrate after defined conditioning | Method, cycles, load, wetting medium and acceptance |
| Scuff / abrasion | Damage from bag-to-bag, carton or counter contact | Printed and finished surface, including laminate or coating | Contact material, pressure/cycles and visual grade |
| Tape or cross-cut adhesion where suitable | Weak ink or coating bond to a flat surface | Exact ink, treatment and substrate combination | Procedure and relevance to the particular material |
| Fold / flex cycle | Cracking, whitening, edge lift or laminate separation | Printed construction folded at production crease or gusset | Radius, cycles, conditioning and accepted appearance |
| Blocking / offset storage | Print transfer or sticking in compressed bundles | Stacked bags under defined time, pressure and temperature | Packing configuration and storage simulation |
| Converted-bag registration | Logo shift, fold crossing, crooked image and handle obstruction | Finished bags sampled through the run | Datums, location tolerance and critical artwork |
| Use / load trial | Print appearance after opening, filling, carrying and packing | Finished bag with representative retail contents | Load, route, duration and appearance threshold |
Connect print checks to the complete Custom Shopping Bag Quality Control Checklist. A bag should not pass because the print is attractive while handles, seams, dimensions or load performance fail.
9. Diagnose defects by process stage
Weak or dirty colour may come from an unsuitable substrate colour, insufficient white underbase, ink deposit, surface contamination or a colour target built for a different material. Pinholes and incomplete coverage can be linked to rough texture, low ink deposit, contamination or poor wetting. Filled small text may reflect artwork below the method’s capability, excessive deposit or screen/plate condition.
Misregistration may occur at the press or later when printed material stretches, shifts during lamination, or enters cutting and conversion incorrectly. Fold cracking can involve ink film, paper coating, laminate, crease geometry or conditioning. Blocking may result from incomplete drying/cure, pressure, heat or packaging too soon. Edge lift on a transfer points to the transfer system, surface preparation or application conditions rather than the artwork alone.
Require the supplier to separate containment from correction. First identify the affected lot and stop mixing. Then confirm the defect against the signed reference, examine retain samples and production records, test likely causes, and document corrective action. Reprinting without a verified cause can reproduce the same failure.
10. Understand what changes print cost and MOQ
Print price contains more than ink. Conventional methods may require screens, plates or cylinders, colour separations, setup sheets, wash-up and make-ready time. Full coverage increases consumption and drying demand. A white underbase adds a colour. Metallic or specialty effects add materials and operations. A laminated photographic design includes film, printing, lamination and conversion—not a single decoration charge.
Order architecture matters. Ten artwork versions of one bag are not automatically one efficient run. Different languages, store names, colours or barcodes may split setup and MOQ even if size and material stay constant. Ask for the MOQ per material, size, base colour, artwork and print version, plus any combined-order rule.
Reduce cost by simplifying deliberately. Protect the parts customers notice: readable brand marks, consistent main colour and stable placement. Consider fewer spot colours, a smaller but stronger print zone, a shared master artwork with controlled variable areas, or a material whose natural appearance supports the brand. Do not remove the sample, cure or adhesion check that protects a high-risk print system. For broader price planning, use the Custom Shopping Bag Pricing Guide.
11. Sustainability claims need evidence beyond the print method
No print method makes a bag sustainable by itself. Consider material source, bag mass, durability, reuse pattern, ink and coating system, lamination, trim waste, manufacturing loss, packaging and the end-of-life pathway available in the target market. A coating or laminate may improve presentation and reuse while complicating recycling; the trade-off should be evaluated for the actual programme.
Avoid unsupported statements such as “eco ink,” “non-toxic,” “plastic-free,” “biodegradable” or “recyclable.” Ask which component the claim describes, the applicable market and test or certification evidence. A water-based ink description is not proof that the complete printed bag is recyclable, harmless in every use or suitable for food contact.
Company-claim boundary: LUCKYSTAR statements in this section are publisher self-description, not third-party verification, a print-house accreditation, laboratory result, color guarantee, food-contact or environmental proof, or assurance of adhesion, rub resistance, minimum order quantity, price or delivery. Confirm the contracting entity, assigned production and printing sites and subcontracting; exact substrate, ink/film, coating/laminate and construction; artwork and color references; production samples; test methods and limits; claim evidence; packing; and release terms for each order.
12. How LUCKYSTAR describes its printed-bag review
LUCKYSTAR states that its project team can review the bag construction and proposed print route together, subject to specification and written confirmation. The review can connect the production sequence, dieline, artwork separations, color reference, proof and strike-off stages, converted sample, performance checks and bulk inspection points.
- Construction first: identify the actual substrate, color, surface treatment, coating/laminate, gusset, seams, handles, patches and print timing.
- Artwork control: lock the dieline revision, editable source, sides, coverage, spot/process builds, white underbase, bleed, safe zones, minimum features and variable versions.
- Physical approval: define the production-like substrate, viewing condition, signed color reference, proof limitations, strike-off and converted-sample sequence.
- Use validation: select rub, flex, fold, adhesion, blocking, storage or agent-resistance checks for the actual sales and packing conditions.
- Bulk controls: record print direction, register, density/appearance limits, defects, sampling, retained references, substitution controls and corrective-action route.
- Commercial comparison: compare the same material, construction, coverage, colors, tooling, variants, sample basis and pack-out before evaluating MOQ, price or schedule.
Review the public custom printed shopping bag options. Teams still qualifying suppliers can use the shopping bag manufacturer selection framework and custom bag manufacturing guide. Then send the construction, artwork and print-approval requirements for a project-specific review.
13. Send an RFQ that manufacturers can price accurately
Attach the current dieline and editable artwork, not only a rendered mock-up. State whether artwork is provisional or approved. If the supplier is expected to recommend the route, provide the commercial target and allow alternatives, but require each quote to identify its material, print process, print timing, colours, finish, tooling, MOQ and sample basis.
| RFQ field | Minimum useful detail | Why suppliers need it | Requested return |
|---|---|---|---|
| Bag construction | Finished size, material, weight/thickness, laminate/coating, gusset, handles and joining route | Defines the printable surface and converting sequence | Construction confirmation and proposed print timing |
| Artwork | Editable file, dieline, coverage, sides, colours, imagery and variable versions | Controls separation, setup, repeats and tooling | Preflight comments and method-specific limitations |
| Colour target | Physical reference or colour data, substrate and tolerance method | Makes colour approval comparable | Strike-off route, proof stages and retained reference |
| Quantity architecture | Units per size, colour, artwork, language, store and delivery wave | Reveals actual MOQ and setup splits | MOQ per variant, tooling, unit price and over/under tolerance |
| Performance | Retail use, representative load, rubbing/scuff exposure, fold and storage conditions | Allows the correct ink/finish and test plan | Proposed tests, methods, sample count and acceptance criteria |
| Sample route | Prototype need, colour criticality and required production likeness | A digital mock-up and production strike-off have different costs and value | Sample types, lead times, charges and limitations |
| Delivery and packing | Destination, target date, flat-fold/bundle/carton needs and storage assumptions | Packing pressure and schedule can affect printed surfaces | Production plan, packing method and carton data |
The full manufacturing sequence in Custom Shopping Bag Manufacturing: From Design to Delivery helps place these print approvals in the wider schedule. A production-representative trial can then be managed through the Custom Shopping Bag Sample Development Process.
Frequently asked questions
What is the best printing method for custom shopping bags?
There is no universal best method. The correct route depends on the bag substrate, surface, construction, artwork, quantity, finish, durability target and when printing occurs in conversion. Compare finished production-like samples, not method names alone.
Is flexographic printing suitable for shopping bags?
It can be efficient for compatible roll-fed paper, film and selected non-woven constructions, especially in repeat production. Plate, ink, anilox, web treatment, colour target and converting registration must be engineered together.
When should I use screen printing?
Screen printing is often considered for bold spot colours on flat non-woven, textile or qualified plastic panels. Confirm its practical detail, halftone, opacity, cure and rub limits on the actual substrate.
How are full-colour woven PP shopping bags printed?
Many are produced by printing a film through a suitable flexographic or gravure route, laminating it to the woven structure, and then converting the material into bags. The exact system, print side and laminate structure must be stated in the specification.
Why does my brand colour look different on kraft paper?
Kraft colour, fibre variation, porosity, ink deposit and finish influence the result. Approve a strike-off on the intended paper lot or a representative production stock, and define whether a white base or adjusted ink is acceptable.
Do clear shopping bags require white ink?
Not always. White may be used selectively to create opacity or to support process colour. Intentional transparent areas should remain clear. The underbase layer, trap and viewing condition must be defined in the artwork.
Can artwork cross a shopping bag gusset?
Yes, but the appearance changes between flat, opened and filled states, and conversion variation can break continuity. Use a full-size folded dummy, approve a converted sample and set practical registration tolerances.
What print tests should be requested?
Common checks include colour and register, dry/wet rub, scuff, appropriate adhesion, fold/flex, blocking and converted-bag placement. The test plan must be selected for the exact substrate, ink, finish, market and use case.
Does more print coverage increase cost?
Usually it can increase ink, drying, setup, waste or lamination demands. The effect depends on the process. Number of colours, white underbase, tooling, artwork variants and finishing operations also affect cost and MOQ.
What should I approve before bulk printing?
Approve the locked artwork and dieline, colour reference, material, print construction, production-like strike-off or panel, converted sample, test criteria, tolerances and packing. Bulk should have a first-off check and retained golden sample.
Conclusion
Reliable shopping bag printing begins by connecting the graphic to the bag’s material and manufacturing sequence. Map the artwork onto the converted geometry, qualify the ink or film on the intended substrate, control colour with physical evidence, test the stresses the bag will face, and preserve those decisions in the RFQ, sample and quality plan.
If you are comparing paper, non-woven, woven, textile or clear constructions, review LUCKYSTAR’s custom printed shopping bag options and the linked shopping bag manufacturer selection framework. The wider custom bag manufacturing guide can support supplier due diligence across product categories.

Request a construction-specific print proposal
Lock the bag construction, artwork inputs, physical color reference, production-like sample route and use exposures before comparing print names or unit price.
Review LUCKYSTAR custom printed shopping bag options, then send your project details through the contact form or Email a project brief. The email link opens a draft for your review before sending.
Factory/print-site assignment, substrate, ink/film, color, coverage, adhesion, resistance, claim evidence, samples, testing, inspection, price, MOQ, packing, schedule and release terms are subject to due diligence, specification and written confirmation.