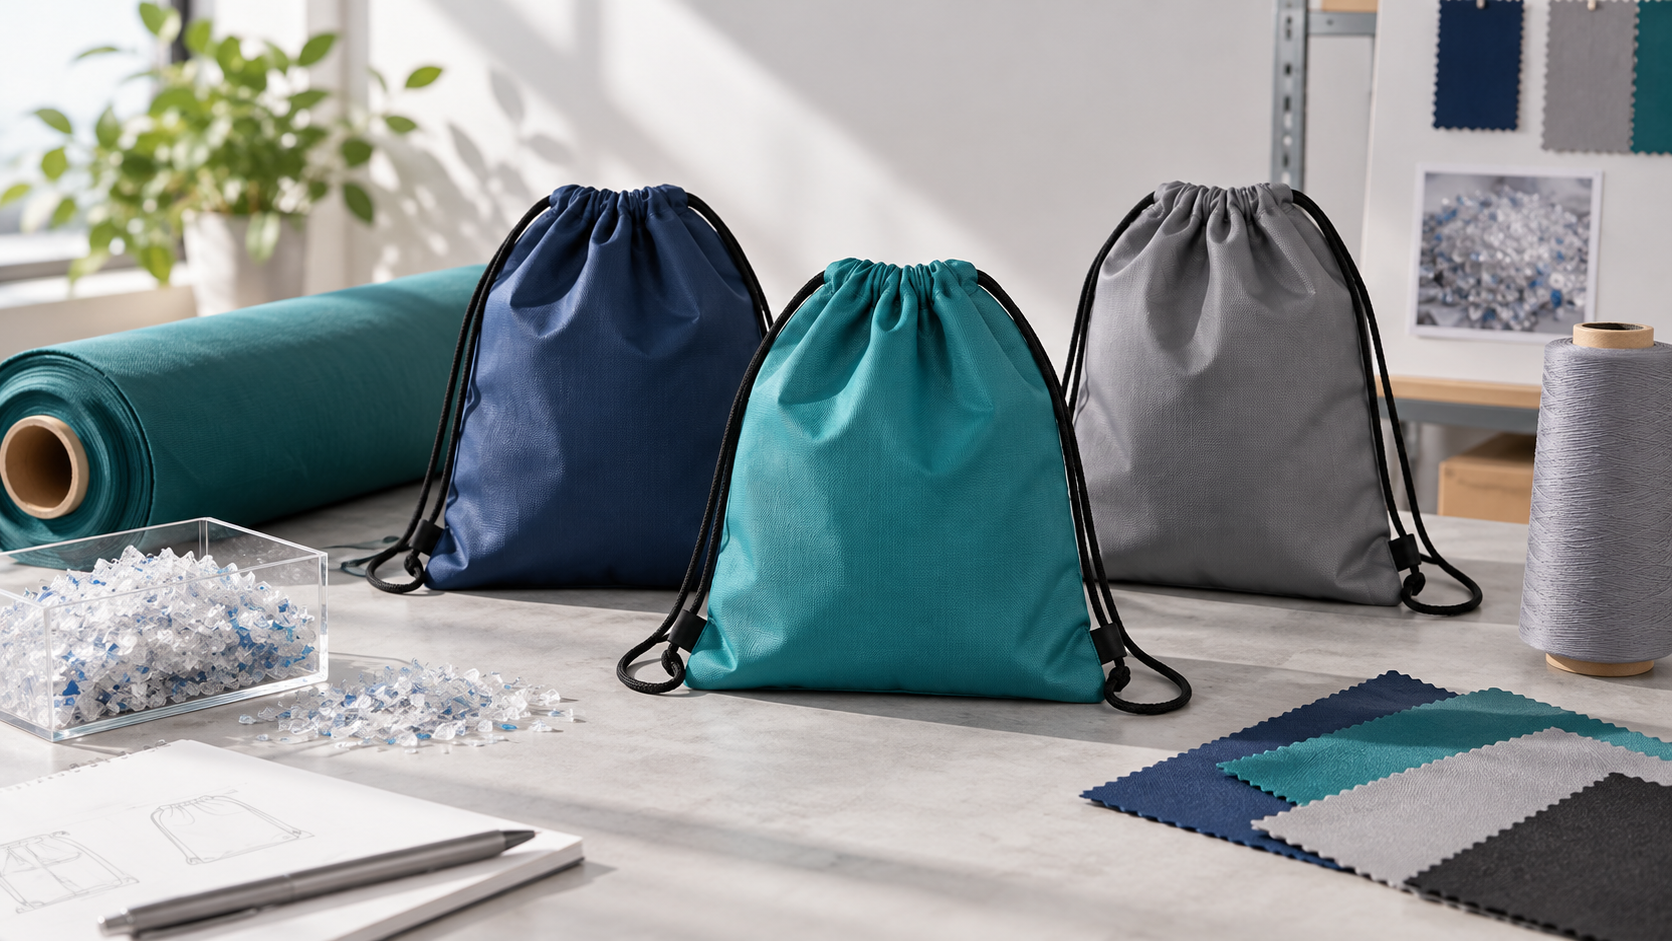
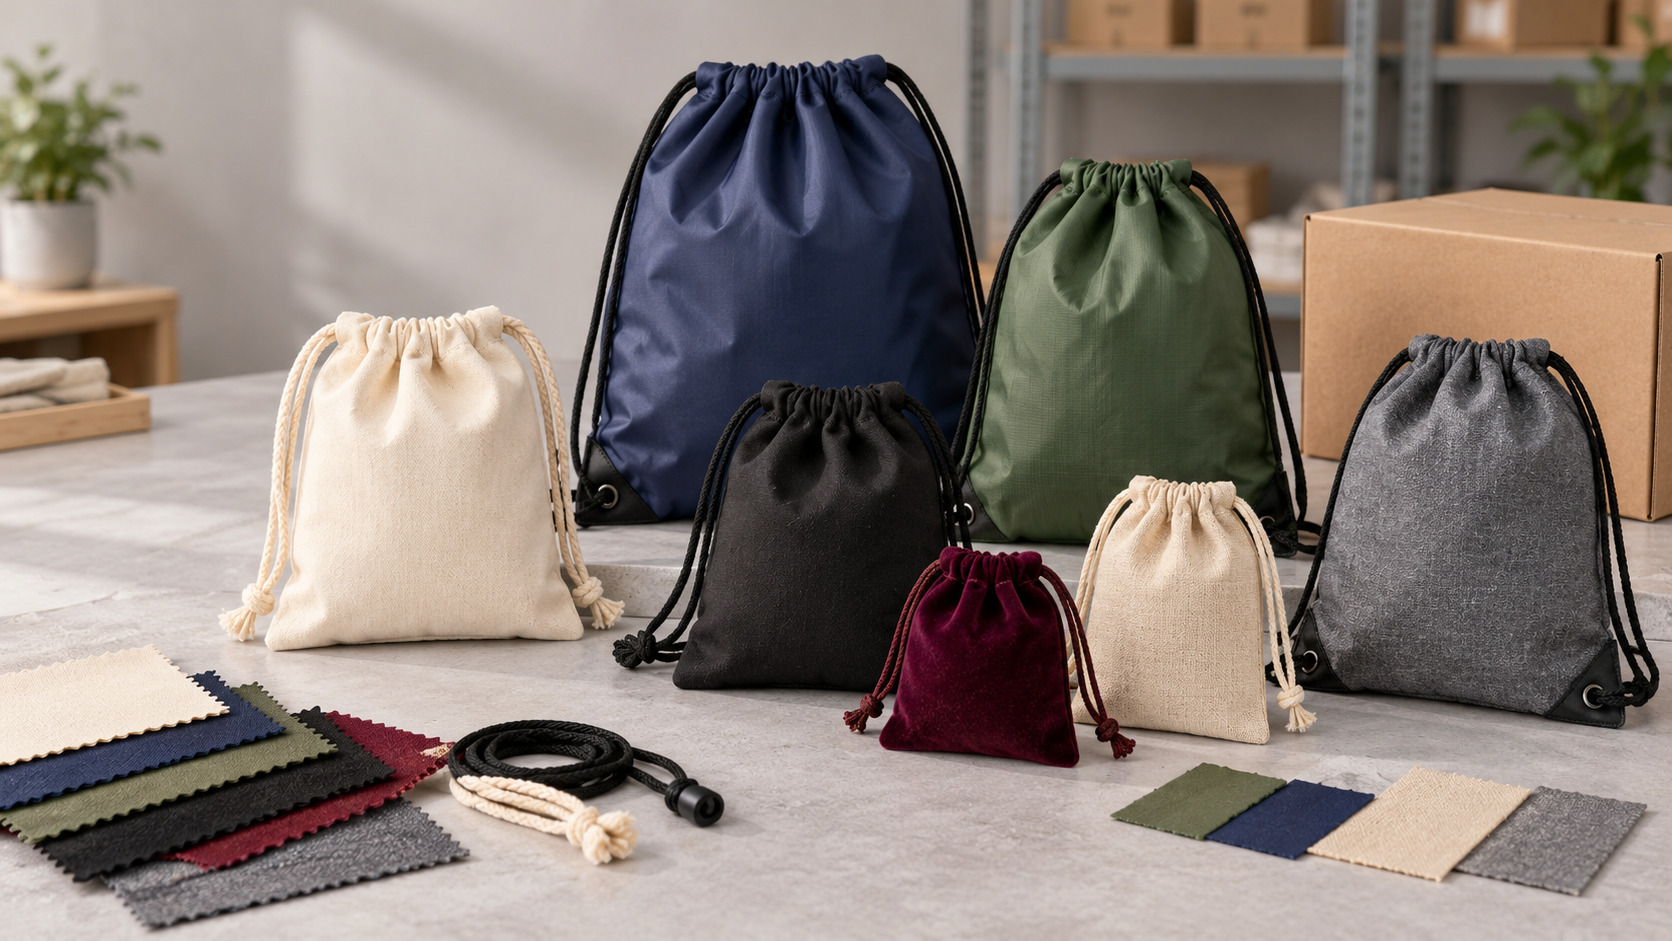
A logo can be mathematically centred on a shopping bag and still look too low, too small or unbalanced. Handles occupy visual space above the body, gussets change the front-panel width when the bag is filled, bottom folds hide part of the artwork in a stack, and seams or heat-seal zones restrict where a press can print. The useful question is therefore not “How large is the bag?” but “What is the stable, visible and printable panel after construction exclusions?”
This Shopping Bag Logo Placement guide provides a practical method for defining that panel, scaling artwork, preserving clear space and controlling position in bulk. It concentrates on placement and physical print dimensions. For overall dimensions and product capacity, use the retailer size-and-capacity guide; for file layers and dielines, use the shopping-bag artwork preparation guide.
Match the visual brief to the constructions in LUCKYSTAR’s online shopping-bag collection. The Shopping Bags sourcing pillar covers category-specific supplier selection, while the main custom bag manufacturer pillar covers broader OEM/ODM due diligence.
Planning an order? Send a placement-ready artwork brief. Include finished bag size and construction drawing, hems/seams/gussets/folds/handles/reinforcement, preferred logo size and viewing intent, artwork aspect ratio and clear-space rule, front/back/gusset views, print route, quantity by SKU, sample gate, coordinate origin, nominal position and inspection tolerance.
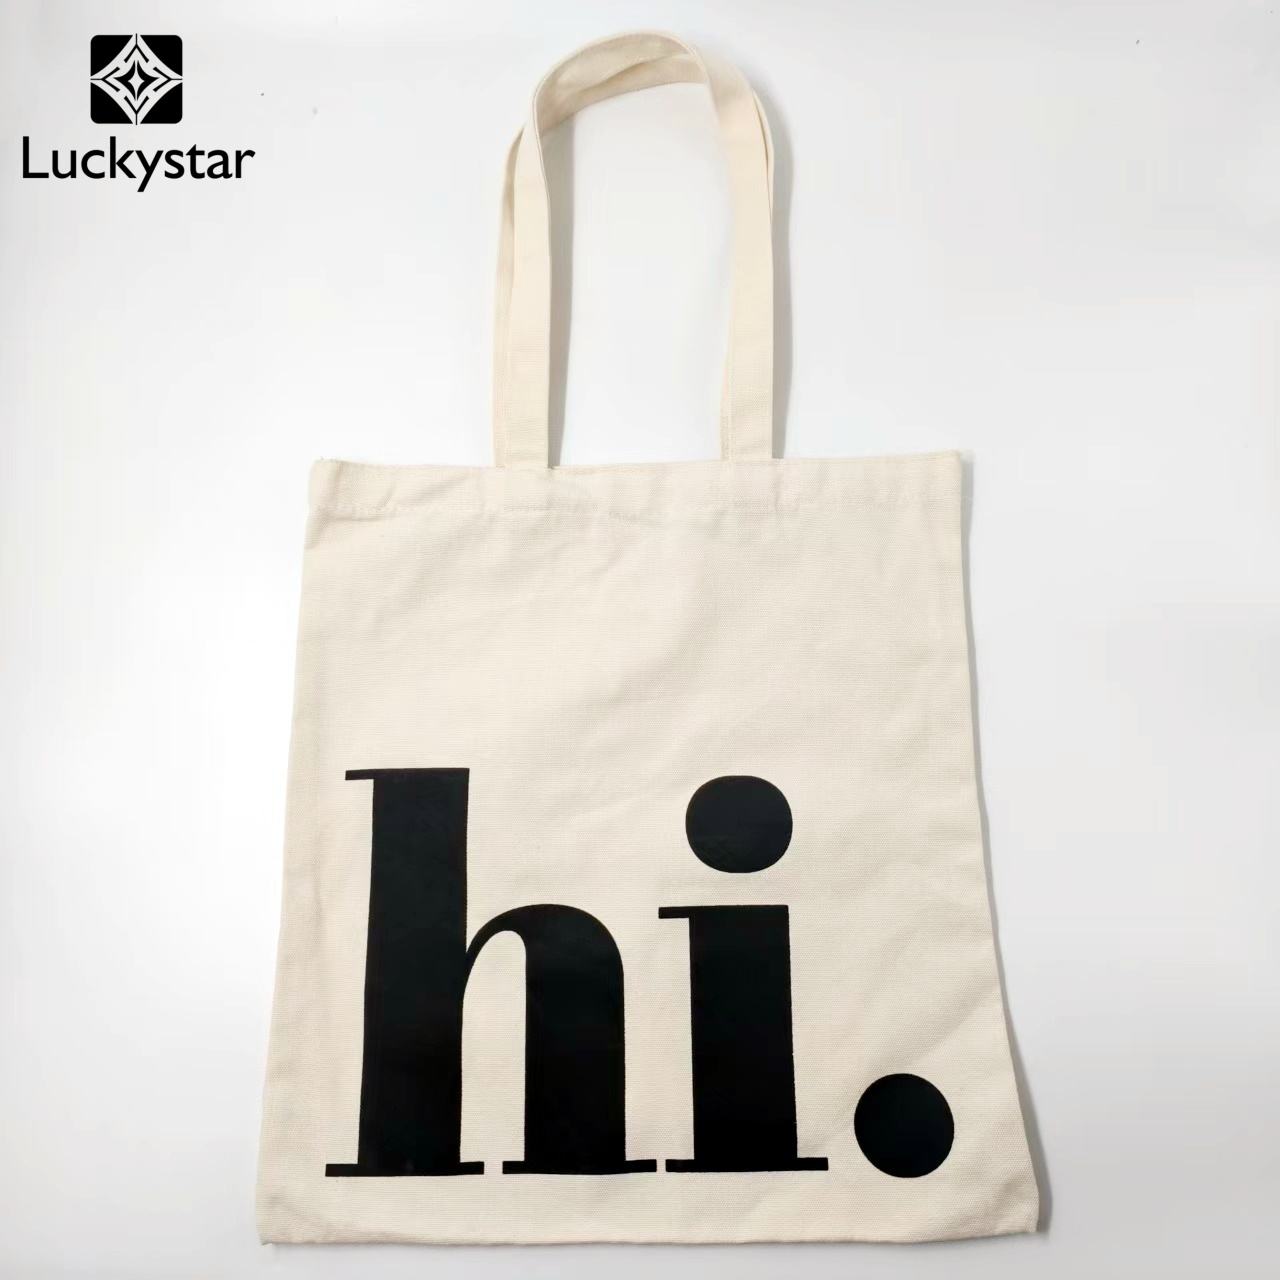
A real LUCKYSTAR shopping/tote bag from the company’s independent-site product range. Its intentionally oversized, lower-panel artwork demonstrates that visual centring is a design choice—not the same as geometric centring.
1. Separate bag size, visible panel and printable panel
Finished bag size is the outside dimension measured by the agreed method. Visible panel is the area a shopper normally sees when the bag hangs or is carried. Printable panel is the area that the manufacturing route can decorate without entering seams, folds, handle patches or machine limitations. Recommended artwork box is usually smaller again because it includes aesthetic clear space and production variation.
A 400 × 350 mm tote does not automatically accept a 400 × 350 mm print. If the side seams consume 15 mm per side, the top handle/hem band occupies 55 mm, the bottom fold needs 25 mm and the brand wants another 15 mm of breathing room, the considered artwork box is much smaller. Record both the finished dimension and every exclusion rather than stating one “maximum print size.”
| Measurement field | Definition | Who confirms it | Evidence |
|---|---|---|---|
| Finished body width/height | Agreed outside bag dimensions under a stated flat measurement method | Buyer and bag factory | Tech pack plus signed sample measurement |
| Construction exclusion | Hem, seam, gusset, bottom, closure, reinforcement and handle zones | Pattern/conversion team | Production pattern or bag dieline |
| Machine print limit | Maximum image dimensions and accessible platen/web area for the named route | Assigned printer | Process-specific print specification |
| Usable print panel | Intersection of visible area, construction-safe area and machine capability | Factory engineering/prepress | Dimensioned returned artwork template |
| Artwork box | Approved logo/graphic dimensions and coordinates inside the usable panel | Brand and factory | Signed layout plus golden bag |
2. Calculate the usable print rectangle
Use a coordinate system on the finished flat bag. Set an origin—commonly the upper-left corner of the front body or the centre of the finished panel—and never switch origins between the artwork file, factory template and inspection sheet.
Usable width = finished front-panel width − left exclusion − right exclusion.
Usable height = finished body height − top exclusion − bottom exclusion.
If a machine maximum is smaller, use the lower of the construction-safe area and press limit. For a proportional logo, logo height = approved logo width × original logo aspect ratio. Do not stretch artwork independently in two directions to fill the box.
| Illustrative calculation | Input | Result | Interpretation |
|---|---|---|---|
| Soft tote usable width | 380 mm front − 25 mm left − 25 mm right | 330 mm | Artwork must stay within the approved 330 mm panel before aesthetics |
| Soft tote usable height | 420 mm body − 70 mm top − 35 mm bottom | 315 mm | Top handle/hem and base fold are not included in the image box |
| Conventional logo width | 330 mm usable width × 50% planning ratio | 165 mm | A layout starting point, subject to full-size visual approval |
| Landscape logo height | 165 mm width × 0.42 original height/width ratio | 69.3 mm | Scale remains proportional; factory rounds only with brand approval |
| Press-limited design | 330 × 315 mm safe panel; press maximum 280 × 300 mm | 280 × 300 mm ceiling | The smaller machine window controls the artwork |
3. Use optical centring, not only geometric centring
Geometric centring puts the artwork box at the mathematical centre of the usable rectangle. Optical centring adjusts that position so the complete bag—including handles, closure and visual weight—looks balanced. A tall handle makes the whole object feel top-heavy, so a logo perfectly centred on the fabric panel can appear low. A heavy bottom gusset or dark base can create the opposite effect.
Assess the design at full scale with the handle in its normal carried position. For retail display, also review the bag standing with a realistic product load. A logo close to the bottom may be dramatic while the bag is flat but can wrap under the base when filled. A high logo may be partially covered by a hand, handle drop or tissue fold.
| Placement strategy | Typical brand effect | Main risk | Approval view |
|---|---|---|---|
| Geometric centre | Orderly, conventional and easy to specify | May look low/high when handles or base dominate | Flat and carried bag side by side |
| Optically raised | Logo reads sooner on a hanging bag | Handle patch, top hem or closure interference | Held bag with hand/handle shadow |
| Lower poster placement | Fashion/editorial impact and strong negative space | Bottom fold, gusset wrap or shelf obstruction | Filled and folded/packed states |
| Corner signature | Quiet premium or secondary-brand treatment | Position variation becomes more visible near edges | Edge-distance measurement on multiple units |
| Full-panel artwork | Maximum campaign visibility | Seam/register, colour, coverage and method constraints | Opened bag and all converted faces |
4. Build safe zones from actual construction features
Safe zones should be tied to construction rather than copied from a generic template. Start with the physical feature width, then add the printer’s handling or registration buffer. A seam allowance may be hidden inside a sewn tote yet still creates thickness that disrupts screen contact. An ultrasonic bond line on non-woven material may be visible and must remain clear. A laminated woven bag may need artwork to continue across a gusset, which changes the problem from “avoid the fold” to “control register through the fold.”
For early planning, brands can show provisional buffers—for example, the physical seam/hem band plus another 10–15 mm, or the handle attachment zone plus a similar visual buffer. The factory must replace provisional values with process-specific numbers before tooling. For structural details, consult the shopping bag handle guide and gusset and bottom reinforcement guide.
| Construction feature | Where to measure from | Why artwork needs clearance | Factory confirmation |
|---|---|---|---|
| Top hem / turnover | Finished top edge to lower edge of hem/turnover | Layers and stitching/bonding disturb print contact and visibility | Hem depth plus process buffer |
| Handle attachment | Outer edge of patch, stitch box, rivet or heat-bond area | Attachment covers artwork and creates uneven thickness | Attachment footprint and allowed overlap |
| Side seam | Finished seam or weld/bond line on each side | Image can be cropped, distorted or affected by pressure | Seam allowance, fold direction and tolerance |
| Gusset fold | Fold/score lines in the flat and opened bag | Artwork may hide or split differently when filled | Avoidance rule or cross-gusset register plan |
| Bottom fold / base board | Finished lower fold and board/reinforcement footprint | Low graphics can wrap under or distort around the base | Fold depth, insert location and visual buffer |
| Closure / zipper | Visible hardware, tape, flap or magnetic patch | Heat, pressure and hardware can interrupt the image | No-print area on the returned dieline |
5. Choose logo scale by communication objective
A small premium mark, a standard retail identity and a promotional poster graphic solve different jobs. Define which one the bag should perform. “Make the logo as large as possible” can create awkward proximity to seams and reduce readability when the bag curves. “Use 10 cm” ignores whether the bag is a small cosmetic carrier or a large grocery tote.
Use percentage of the usable panel for early composition, then convert the approved ratio into millimetres. A restrained mark may occupy approximately 25–40% of usable width; a standard identity 40–60%; a bold campaign graphic 60–80%. These are visual planning bands, not production guarantees. The minimum and maximum depend on artwork detail, print method and bag surface.
6. Starting print-size ranges by shopping bag type
The table below gives planning logic rather than fixed factory limits. It helps a brand prepare an RFQ and ask the right question. LUCKYSTAR returns an exact artwork window after the material, pattern and process are selected.
| Bag family | Useful placement starting point | Size constraint to check first | Common mistake |
|---|---|---|---|
| Canvas/cotton tote | Centre or optically raised on the flat front panel | Side/bottom seams, handle stitch boxes and platen access | Measuring from cut panel rather than finished bag |
| Non-woven PP | Centre within bond-safe face; keep clear of ultrasonic lines | Finished-bag jig, side bonds, gusset and surface texture | Ignoring bond-point texture and bag thickness |
| Laminated woven PP | Local front logo or engineered full-panel/gusset wrap | Film repeat, lamination and print-to-conversion register | Approving flat film without reviewing the converted bag |
| Paper retail bag | Optical centre below handle holes/patches and top turnover | Turnover, side gusset, bottom fold, rope/ribbon hardware | Placing artwork where handle shadows cover it |
| Foldable polyester/nylon | Compact mark away from pouch fold and stitch congestion | Fold map, heat sensitivity and transfer/screen access | Logo disappears or creases when packed into the pouch |
| PVC/TPU clear bag | Use negative space and position relative to visible contents | Seams, handle welding, transparency and reverse-side show-through | Design becomes unreadable over products inside |
| Mesh/net bag | Apply branding to a solid patch, label or reinforced panel | Patch size, stitch area and net stretch | Expecting fine direct print on an open structure |
7. Landscape, square and vertical logos need different boxes
A landscape wordmark reaches the side clearances before it reaches the top or bottom. A square monogram can grow larger while preserving edge space. A vertical mark may fit a bottle bag or narrow gusseted carrier but can appear undersized on a wide grocery tote. Define the artwork by both width and height; do not give only one dimension.
Keep the original aspect ratio and include the brand-mandated clear-space unit—often based on a letter height or symbol element—inside the approved composition. The clear space is not necessarily the same as the factory no-print buffer. The final file therefore has at least three nested boundaries: print-process safe area, brand clear space and actual logo shape.
8. Plan front, back and gusset artwork as separate views
A two-sided bag can use the same logo, a logo plus campaign message, or different regional artwork. Mark every panel as FRONT, BACK, LEFT GUSSET, RIGHT GUSSET and BOTTOM. If the back has a barcode, web address, compliance mark or care text, specify its own coordinates and minimum readable size rather than mirroring the front automatically.
On sewn or bonded bags, the front and back may be processed separately and assembled later. Version control is essential. Use a SKU code on the work order and, where acceptable, a hidden panel identifier outside the visible brand area. For continuous film printing, specify the exact repeat and orientation so left/right gusset graphics do not reverse unexpectedly.
9. Relate maximum print size to the printing method
The bag’s safe panel may be larger than the press can decorate. A screen frame, platen, transfer press or digital bed has physical limits. Web flexography and gravure can cover broad areas but must align the repeat with later cutting and conversion. The correct maximum is the smallest limit in the chain.
| Process | What usually limits image size | Placement issue | Required confirmation |
|---|---|---|---|
| Screen printing | Frame/image area, platen, squeegee travel and bag thickness | Finished seams/handles prevent flat contact near edges | Image dimensions on the actual bag or panel jig |
| Heat transfer | Platen area, even pressure and heat-safe surface | Patch, seam or gusset creates pressure variation | Press size plus temperature/time test on production material |
| Direct digital | Bed width, head clearance, white/base coverage and cure | Bag must remain flat and repeatably located | Printable bed map and production jig coordinates |
| Web flexography | Web width, plate repeat, anilox/ink and material handling | Print repeat must match cut, gusset and seam | Web/repeat drawing and converted first-off |
| Gravure film + lamination | Cylinder circumference/face, film web and lamination width | Film-to-fabric and image-to-bag register accumulate | Cylinder/repeat plan and full converted laminate sample |
For process selection, compare the routes in the shopping-bag printing overview and the material-specific guides in the same cluster.
10. Protect minimum type, line and clear space
A large logo may still contain tiny registered symbols, hairlines or reversed taglines. Enlargement solves some detail issues; reduction makes them worse. Ask the printer for minimum positive and reverse type, rule width, gap, trap and tonal range for the selected substrate/process. Do not copy limits from coated paper to canvas, non-woven or textured jute.
FTA’s FIRST 7.0 Design Guide explains that minimum type and rule capability is print-system dependent and should be confirmed with the print provider. The principle applies beyond flexo: specify the intended output method, then simplify or separate fine elements before bulk tooling.
11. Control the relationship between body colour and logo size
Large coverage magnifies colour and opacity variation. A 60 mm white mark on a dark tote may look acceptable with one pass, while a 280 mm solid exposes pinholes, texture and banding. Dark materials may require an opaque ink or white underbase. Laminated film may use a white separation behind process colour. Each extra layer can change trap, hand, cure and cost.
Do not approve logo scale independently of colour. Review both on the final body shade. The colour sign-off reference shows how body material, printed trial and initial production sample should be connected.
12. Review logo size at real viewing distance
A buyer often sees artwork on a 27-inch monitor at high zoom. A shopper sees the bag from one to several metres, moving, folding and partially covered. Print a full-size paper placement mock-up, attach it to a blank bag and review it at shelf, counter and walking distance. Photograph the bag with realistic contents and handles held naturally.
For e-commerce, also test the bag at thumbnail size. A complex logo that looks beautiful at full scale may collapse in a product tile. Conversely, an oversized mark built for social media may feel too aggressive in a premium store. Decide the primary viewing situation before making the logo larger.
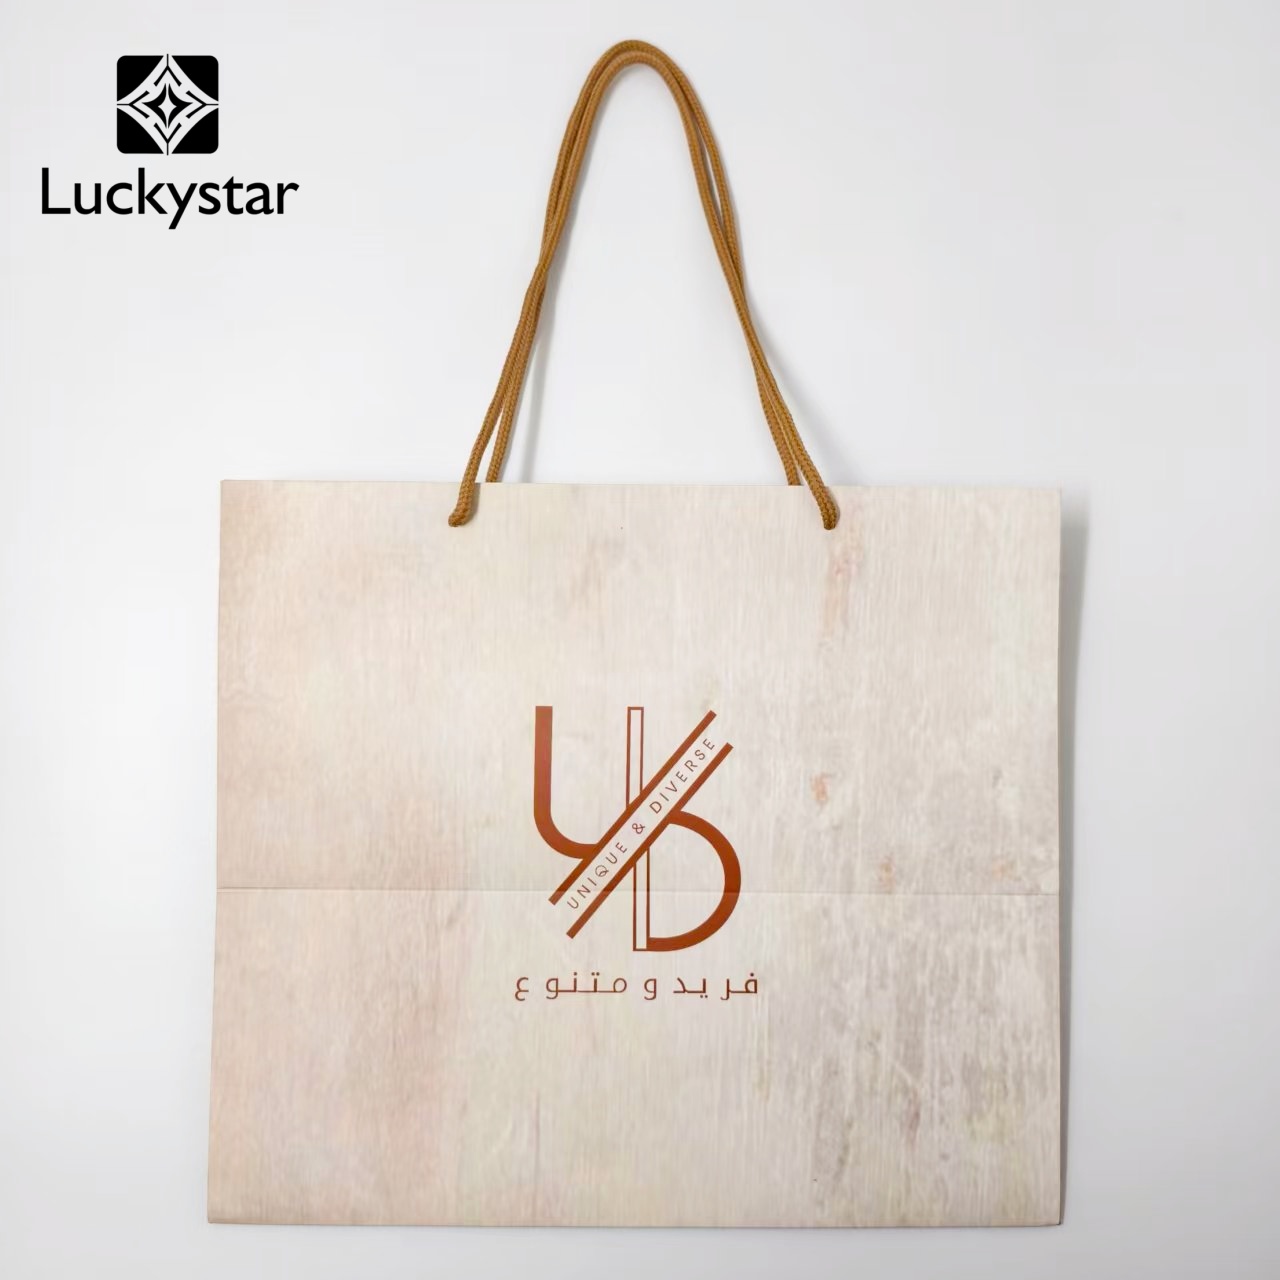
A real LUCKYSTAR rope-handle retail bag with a smaller centred logo. Compared with the oversized tote above, it shows how generous negative space can create a quieter premium presentation.
13. Build an approval ladder from template to bulk first-off
A dimensioned layout confirms coordinates but not how the bag hangs. A paper mock-up confirms scale but not print opacity. A production-process sample confirms ink and placement on one sample but not bulk drift. Approve each risk in sequence.
| Approval gate | Question answered | Required record | Release action |
|---|---|---|---|
| Dimensioned digital layout | Is the correct logo, size, side and coordinate specified? | Revision-controlled PDF plus source file | Freeze content and nominal position |
| Full-size paper mock-up | Does the composition look balanced at real scale? | Photographs on the approved blank bag | Approve optical position and size |
| Production-process sample | Can the named process reproduce detail, colour and area? | Print setting/tool ID and material article | Freeze the process condition |
| Golden finished bag | How does artwork interact with handles, seams, gussets and load? | Signed sample with measured coordinates | Create the visual/measurement master |
| Bulk first-off | Does actual production match the approved master? | Date, line, roll/lot, operator and measured results | Release or correct before continued production |
The shopping-bag sample workflow helps distinguish a visual mock-up from a production-representative sample.
14. Specify placement tolerance with one coordinate system
“Centred” is not a measurable bulk tolerance. State the nominal X and Y coordinates and allowed variation, measured from agreed finished references. For a centred logo, specify the centre of the artwork box relative to the centre of the approved panel. For a corner logo, use edge-to-art distances. Also state the bag measurement condition: flat, unfilled, smoothed without stretching, and after an agreed conditioning period.
Soft goods are not machined plates. Fabric stretch, cut variation, sewing, bonding, handle attachment and printing jigs contribute to position variation. A realistic tolerance should follow a process-capability review; the article does not impose one universal millimetre value. Ask LUCKYSTAR to measure a pilot run and confirm achievable control before the brand sets a very tight specification.
15. Inspect logo size and placement in bulk
| Inspection item | Measurement method | Failure example | Traceability |
|---|---|---|---|
| Artwork width/height | Outer approved artwork box; define whether ink spread counts | Logo scaled or distorted beyond approval | Sample number, print tool/file revision |
| Horizontal coordinate | Left/right edge distance or centre offset from panel centre | Logo drifts toward seam or differs front/back | Line, jig, lane/roll and time |
| Vertical coordinate | Top-of-body or panel-centre reference to artwork box | Print moves into handle/hem or bottom fold | Bundle/carton and operator |
| Rotation / skew | Compare artwork baseline to agreed finished edge or centreline | Logo looks tilted on hanging bag | Panel orientation and conversion batch |
| Front/back relationship | Compare sides using the same origin and measurement condition | Back art inverted, mirrored or at a different height | SKU/version and assembly bundle |
| Construction interference | Open, fill, carry and fold the inspected bag | Gusset hides copy or handle covers logo | Finished functional sample and carton |
Combine coordinate checks with LUCKYSTAR’s finished-bag QC framework so placement is not accepted while seam, load or print adhesion fails.
16. Diagnose common placement and scale failures
Logo is consistently too low: verify whether the origin changed from cut panel to finished body, whether the bottom fold was excluded and whether geometric centring was mistaken for optical approval. Only some bags drift: check jig stops, panel feeding, fabric stretch, bundle orientation and whether several bag sizes share one fixture.
Print size is correct but looks small: inspect the usable panel ratio, logo aspect, excessive brand clear space and full-bag viewing distance. Print looks large on the flat bag but disappears when filled: examine gusset expansion and curvature. Front is correct and back is inverted: investigate panel orientation, screen/transfer setup, roll repeat or assembly version control.
Artwork crosses a handle patch: compare the final construction pattern with the artwork template revision. A late change in handle width or attachment position should trigger artwork reapproval, not an informal shop-floor adjustment.
Company-claim boundary: LUCKYSTAR statements in this section are publisher self-description, not third-party verification, brand-design approval, printer certification, press capability report, laboratory result or assurance of a particular image size, tolerance, MOQ, price, colour, durability or delivery date. Confirm the contracting entity, assigned bag and printing sites, subcontracting, returned dieline/template, equipment window, samples, measurement method, inspection and release terms for the order.
17. How LUCKYSTAR describes its logo-placement review
LUCKYSTAR states that its project team can connect finished-bag construction, artwork intent, a named print route and bulk inspection around one dimensioned coordinate system, subject to specification and written confirmation.
- Lock the bag: record finished measurement method, front/back/gusset views, hem, seam, fold, closure, handle and reinforcement footprints before drawing a printable panel.
- Separate the boxes: show finished panel, visible panel, construction exclusions, machine image area, approved safe area and final artwork box as distinct layers.
- Return process limits: have the assigned printer state maximum image dimensions, minimum positive/reverse detail, trap, tonal range, platen/web/repeat restrictions and jig or register basis.
- Approve composition: review the logo at full size, expected carrying shape, intended viewing distance and thumbnail size; record any optical offset separately from geometric centre.
- Use one coordinate system: define view, origin, horizontal/vertical nominal coordinates, measurement points, sample method and tolerance without switching reference edges.
- Release physical evidence: separate digital layout, printed material/panel, converted golden bag and bulk first-off, then inspect by SKU, lane/roll/time or agreed sampling plan.
Review the public custom shopping bag structures, the artwork-and-dieline guide and the handle-clearance guide. Then send the bag drawing, artwork, placement intent and SKU matrix for a dimensioned proposal.
18. Send a placement-ready RFQ
| RFQ block | Information to provide | Factory response required |
|---|---|---|
| Bag | Finished dimensions, material, gusset, bottom, closure, handle and reinforcement | Construction drawing with exclusion zones |
| Artwork | Vector logo, aspect ratio, clear-space rule, colours, sides and version | Preflight result and minimum-detail exceptions |
| Composition | Centred/raised/lower/corner/full-panel intent and viewing scenario | Dimensioned proposed placement |
| Print size | Preferred artwork width/height or usable-panel coverage ratio | Confirmed maximum and recommended production size |
| Process | Preferred method or artwork/volume data for route recommendation | Named process, tooling and image-area limitation |
| Control | Nominal coordinates, tolerance goal, sample level and inspection needs | Achievable pilot tolerance and measurement plan |
| SKU matrix | Quantity by size, material, body colour, artwork, printed side and destination | Tool/changeover plan and per-version MOQ |
Frequently asked questions
How large should a shopping bag logo be?
There is no single best size. Calculate the usable print panel first, then select a scale that matches the brand objective. A standard identity often begins around 40–60% of usable width for visual review, but the printer must confirm production limits.
Should a shopping bag logo be centred?
Centred placement is reliable, but optical balance may require a small vertical adjustment because handles and bottom construction change visual weight. Approve the full bag at actual scale rather than using coordinates alone.
How far should a logo be from the top of a tote bag?
Measure the top hem and handle attachment first, add the printer’s required buffer and then assess visual clear space. A universal distance is unsafe because handle and hem construction vary.
Can a logo print over a gusset?
Yes when artwork, repeat, lamination and conversion are engineered for a cross-gusset graphic. Otherwise, keep critical text and logo elements inside the front-panel safe area.
How do I calculate proportional logo height?
Multiply the approved logo width by the original artwork height-to-width ratio. Keep the aspect ratio locked and do not stretch the logo independently to fill a preset box.
What is the difference between printable area and safe area?
The printable area is what the machine can physically decorate. The safe area also excludes construction risk and may include registration buffer. The brand artwork box can be smaller again for aesthetic clear space.
Should front and back logos use the same coordinates?
Only if the construction and design intent are symmetrical. Document each side independently because closures, pockets, seams or secondary copy can change the usable panel.
How is logo placement measured during inspection?
Use the approved artwork box and fixed finished-bag references. Measure width/height, horizontal and vertical coordinates and rotation under a defined flat, unfilled and conditioned state.
Can the logo reach the edge of a shopping bag?
Edge-to-edge graphics are possible with selected web or film-printing routes, but they require bleed, repeat-to-cut control and conversion planning. Finished-bag screen or transfer methods usually need more clearance.
What should be approved before bulk printing?
Sign off the dimensioned layout, full-scale positioning mock-up, actual-process print, completed reference bag and initial production units. Record the final artwork revision, material, process, dimensions and coordinates.
Conclusion
A reliable Shopping Bag Print Size begins with a finished construction drawing, not a blank rectangle. Subtract handles, seams, gussets, bottom folds and machine limits to find the usable panel. Then apply brand clear space, preserve aspect ratio and approve the result at full size in carried and filled states. For consistent Logo Placement on Shopping Bags, translate the golden sample into one coordinate system and measurable bulk controls.
Review suitable custom shopping bag structures. Use the Shopping Bags supplier-selection framework for category sourcing and the broader factory evaluation guide for manufacturer due diligence.

Send LUCKYSTAR your bag dimensions, logo file, preferred position and quantity matrix for a placement-ready quotation.
Request a dimensioned logo-placement proposal
Use one bag drawing, artwork package, coordinate system and SKU matrix so the printer can return real image limits and an inspectable position.
Review LUCKYSTAR custom shopping bag options, then send your project details through the contact form or Email a project brief. The email link opens a draft for your review before sending.
Site assignment, construction exclusions, image area, process capability, artwork minimums, samples, tolerance, inspection, price, MOQ, packing, schedule and release terms are subject to due diligence, specification and written confirmation.