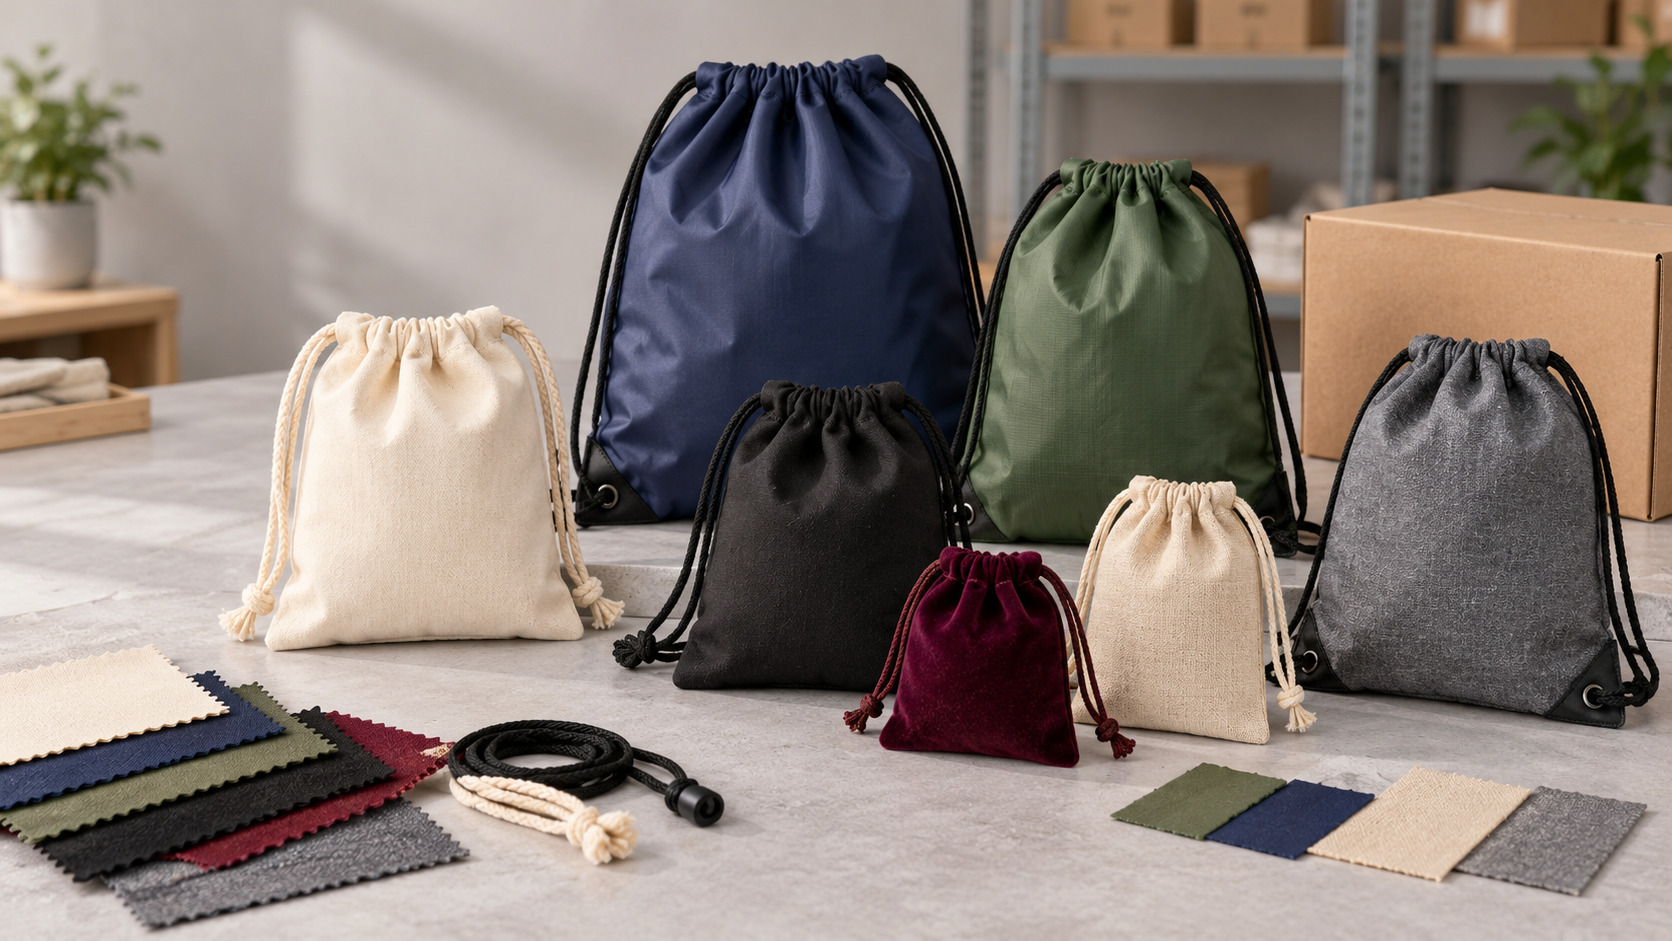
A shopping bag graphic can look perfect on a rectangular artboard and still fail after the material is cut, folded, sewn, heat-sealed or glued. A logo may disappear into a side gusset. A barcode may sit across a crease. A white plate may be missing from clear film. A printer may receive an attractive PDF but no reliable distinction between printable artwork and nonprinting cut lines.
This guide explains How to Prepare Shopping Bag Artwork and Dielines as a production handoff. It focuses on the flat-to-three-dimensional map, technical layers, scale, bleed, safe zones, colour channels, special finishes, preflight, proofing and version control. It does not replace the broader Custom Shopping Bag Tech Pack, which also controls materials, measurements, construction, tolerances, packing and quality criteria.
In practical terms, shopping bag artwork preparation produces three connected records: current shopping bag dielines, editable source artwork and approved shopping bag prepress files. All three must carry the same structure and revision.
First identify a suitable construction in LUCKYSTAR’s custom shopping bag range. Use the shopping bag manufacturer selection guide to qualify the converting and prepress workflow, and the custom bag manufacturer pillar for broader supplier due diligence.
Planning an order? Send an artwork-handoff brief. Include approved bag construction and size, manufacturer dieline ID/revision, scale/origin, editable source and linked assets, print PDF requirement, layers/separations/white/finishes, bleed/safe/exclusion values, barcode or QR data and intended use, version matrix, proof/sample gates, packing, destination and required date.
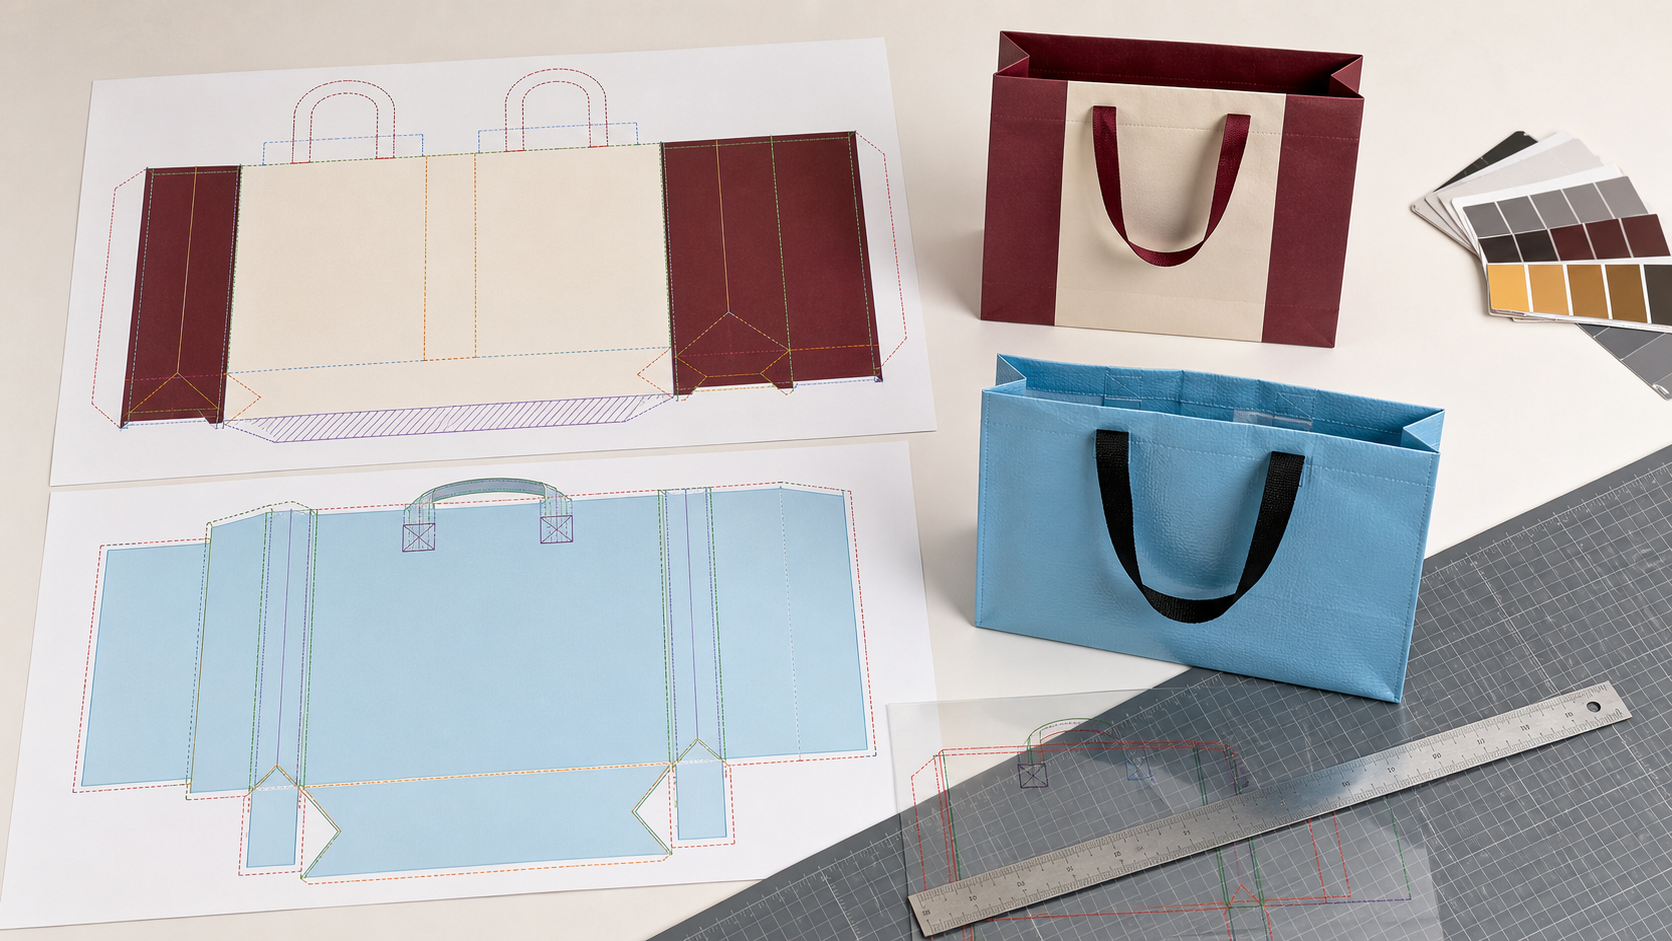
Production artwork starts with the manufacturer’s locked structure: every front, back, gusset, bottom, seam, flap and handle zone must map to the finished carrier.
1. Lock the construction before graphic design begins
A dieline is not a decorative template. It is generated from a particular bag size, material, conversion method and machine route. Paper bags may need a top turn, side gussets, bottom folds and a glue lap. Non-woven or textile carriers use cut panels, seam allowances, binding, handle attachment zones and sometimes a separate base. Laminated woven polypropylene may be printed as a web before cutting and sewing, so repeat length, web direction and seam wrap matter. A clear PVC or TPU bag may use heat-seal paths and rounded panel corners.
Confirm finished width, height and gusset depth; material and thickness or weight; top, side and bottom construction; handle type and attachment; printing route; finish; closure; reinforcement; and packing state. If any of those changes, ask the manufacturer whether the dieline revision must change. Never stretch an old dieline to a new size or borrow a competitor’s template. Scaling can alter glue, seam and fold allowances that were engineered for a different machine.
The shopping bag gusset and bottom guide explains how opening geometry changes usable space, while the handle specification guide shows why artwork must respect attachment and reinforcement zones.
2. Understand the difference between a dieline and artwork
The dieline describes how a flat substrate becomes a bag. Artwork describes what the customer should see. A production file may contain both, but the two data types must remain distinguishable. Cut, crease, glue, seam and measurement objects are instructions; they usually must not appear on the printed product. Graphics, images, legal copy and colour patches are printable content unless clearly marked otherwise.
Good handoff files preserve this distinction all the way into the exported PDF. ISO 19593-1:2018 defines a method for associating processing-step data with PDF content, including packaging information for cutting, folding, glueing, dimensions, intended graphic positions, printed white and varnish. A file does not become production-ready merely because it follows a data convention, but a clear processing-step structure makes automated and manual preflight safer.
3. Read every technical line before placing art
There is no universal colour code for dielines. One supplier may use red for cut and another for crease. The authoritative legend is the one attached to the current approved template. Ask which lines are nonprinting, which represent the final visible edge, whether line centre or outside edge controls, and which zones are advisory rather than tooling paths.
| Typical layer or line | Production meaning | Artwork response | Question to confirm |
|---|---|---|---|
| Cut / trim | Final blank boundary or tool path | Extend backgrounds past it to approved bleed; keep critical details away | Is the path centred on the cut and is tolerance already considered? |
| Crease / fold | Material bends or reverses direction | Treat as a visual transition and scuff/distortion risk | Which way does it fold and which panel becomes visible? |
| Gusset fold | Side or bottom collapses inward and opens in use | Check graphics both flat and fully opened; avoid accidental half-images | What portion is visible when empty, carried and displayed? |
| Glue lap | Paper or film overlap receives adhesive | Keep critical print out; verify whether ink is prohibited for bond strength | Which face is glued and what is the no-ink zone? |
| Seam / heat seal | Panels join by sewing, welding or sealing | Allow for hidden area, thread/seal coverage and positional variation | Is artwork permitted to wrap through the join? |
| Top turn / hem | Top edge folds inward or is bound | Decide whether inside printing continues into the return | What is visible outside, inside and at the lip? |
| Handle / reinforcement | Hole, patch, stitch box, weld or fastener zone | Protect logos and small text from obstruction or puncture | Which dimensions locate the finished attachment? |
| Bleed / safe guide | Graphic extension and critical-content boundary | Follow supplier values for the chosen print/conversion route | Are different margins needed near seams, folds and handles? |
4. Map the flat file onto the finished bag
Before designing, build a simple paper dummy or ask for a 3D folding preview. Number the panels on the flat template, fold it, and write the same numbers on the finished faces. Mark the top, bottom, reading direction and outward-facing side. This quick exercise prevents mirrored rear panels, upside-down gusset copy and artwork placed on an interior flap.
Show the designer at least three states: the flattened blank, the empty closed bag and the bag opened to its intended capacity. A centred logo on a flat front panel may appear low when the bottom opens. A pattern that looks continuous across a collapsed gusset can split when filled. Legal copy near a seam can move behind the side wall.
| Bag route | Flat artwork map | Critical 3D check | Common mapping error |
|---|---|---|---|
| Twisted-handle paper bag | Front, side, back, side, glue lap, top turn and bottom folds on one blank | Logo position after bottom formation and top turn | Copy crosses the glue lap or disappears into a bottom fold |
| Luxury paper bag | Outer wrap plus turn-ins, base card, eyelet and rope zones | Registration around top reinforcement, holes and fold edges | Foil or emboss enters a crease or hole area |
| Non-woven sewn bag | Body panels, side/bottom gusset, seam allowances and handle patches | Visible area after seams, binding and handle stitching | Important art is covered by stitching or side seam |
| Laminated woven PP bag | Printed-film repeat mapped to cut panels and sewing/fold route | Web direction, repeat, seam overlap and laminate alignment | Front and back drift because repeat and cut register were not defined |
| Cotton or canvas carrier | Individual cut panels with seam, hem and print-location guides | Print position after sewing and natural fabric relaxation | Artwork is centred on the cut panel, not the sewn bag |
| Clear PVC / TPU bag | Transparent panels, weld paths, binding and hardware zones | Front/back viewing, contents, white ink and overlapping transparency | Reverse image, missing white or doubled art through two clear faces |
5. Set scale, origin and dimensions deliberately
Prepare artwork at full production size whenever practical. If a large-format workflow requires a reduced scale, state the ratio in the filename, artboard, job ticket and exported proof. Include at least one check dimension that the printer can measure after import. Do not rely on page size alone, because software can rescale a file during placement or export.
Keep the dieline at the origin and avoid moving it to suit the composition. Use one agreed coordinate reference, one unit system and one revision. Do not mix millimetres and inches in unlabelled callouts. If the file contains several SKU sizes, use separate clearly named artboards or files unless the supplier explicitly approves a combined production layout.
Remove unused objects outside the artboard, hidden experiments, duplicate paths and stray points. A nearly invisible duplicate cut path can be more dangerous than a visible design error because it may be interpreted by a tooling or cutting workflow.
6. Build a layer hierarchy that survives handoff
Named layers let the printer isolate manufacturing instructions from live graphics. Keep the factory’s technical layer names if they are part of an automated workflow. Do not rename spot colours casually; a white plate named “White,” “Opaque White” and “WHITE_INK” in three files may create separate separations.
| Layer group | Recommended contents | Print status | Handoff control |
|---|---|---|---|
| READ ME / job information | SKU, size, side, scale, revision, colour route and contact | Nonprinting | Match purchase order, tech pack and filename |
| Dimensions / notes | Key dimensions and approved explanatory callouts | Nonprinting | Keep legible but separate from production art |
| Cut / crease / fold | Manufacturer-issued structural paths | Nonprinting processing data | Locked against accidental movement; never rasterised |
| Glue / seam / handle / safe guides | Construction exclusions and positional zones | Nonprinting | Visible in working and marked-proof versions |
| CMYK / process art | Images, gradients and process-colour graphics | Printing | Use the supplier’s accepted output condition |
| Spot colours | One consistently named layer/channel per actual spot separation | Printing | Map names to ink targets and proof legend |
| Opaque white | White underprint, flood or selective backing | Printing | Show choke/spread intent and viewing side |
| Varnish / foil / emboss / window | Separate vector masks for every finishing operation | Process-specific | Confirm positive/negative interpretation and tool naming |
7. Prepare vectors, raster images and fonts correctly
Keep logos, small type, keylines, barcodes, QR codes, dielines and finish masks as vectors. Vector geometry scales cleanly and supports separation and trapping. Use raster images for photographs and textured effects, but evaluate effective resolution at final placed size—not the number displayed before the image is enlarged.
Ask the printer for required effective resolution, minimum positive and reversed line widths, minimum type size and any tonal limits for the chosen process. These values change with substrate texture, ink deposit, screen mesh, plate or cylinder, press condition and viewing distance. A specification copied from coated paper can fail on coarse jute; a limit for screen print may be unnecessarily restrictive for high-resolution offset work.
Outline final display fonts if licensing allows, and retain an editable internal source with live type. Alternatively, package the authorised fonts under the applicable licence. Check that outlined text has not gained stray points or lost counters. Search the final PDF for missing glyphs, substituted characters, unsupported transparency and unintended rich-black small text.
8. Separate colour, opaque white and finishing plates
State whether each brand colour is a true spot ink, a process simulation, a material colour or a combination. Do not leave unused RGB swatches, duplicate spot names or alternate colourways in the production document. If RGB or colour-managed data is intentionally retained in a PDF/X-4 workflow, the printer still needs the agreed output condition and proofing method.
Opaque white is a functional printing plate on transparent, metallic, dark or strongly coloured materials. Show where white sits behind colour, where transparency must remain, and whether white should choke or spread. A white separation can affect colour, opacity and registration; it should not be treated as an invisible designer note.
Foil, varnish, emboss, deboss, laser cut and windows need independent vector masks. Mark whether the mask represents the finished effect or the tool face. Check minimum gaps from folds, seams, holes and cut edges with the converter. Overprint, knockout and trapping decisions must be inspected in separation preview and confirmed by the printer; do not guess them from how a design application happens to display the composite.
For a deeper colour approval chain, see Pantone, ink drawdown and bulk approval for shopping bags.
9. Adapt artwork to the print and conversion route
The custom shopping bag printing-method guide explains how the material and order determine the viable process. Artwork preparation should follow that decision. A designer should not build a photographic wrap first and ask later whether a two-colour screen print can reproduce it.
| Print / conversion route | Artwork preparation focus | Supplier-specific data to obtain | Approval object |
|---|---|---|---|
| Screen print on formed or cut panels | Spot separations, underbase, minimum feature, print location and colour order | Mesh/ink capability, printable area, registration and cure constraints | Production-material strike-off plus converted bag |
| Flexographic paper or film web | Repeat, web direction, plate distortion, trap and continuous patterns | Cylinder/plate repeat, anilox, colour sequence and press profile | Contract/press proof and converted first-off |
| Gravure printed laminate | Reverse-reading order, cylinders, white backing, repeat and seam/cut register | Cylinder circumference, web width, laydown order and lamination stack | Printed film, laminate and finished bag |
| Offset paper sheet | Imposition-aware trim/crease zones, process/spot colour, coating and fold risk | Stock, output condition, sheet layout and post-print finish | Colour proof, printed sheet and converted sample |
| Digital paper, film or transfer | Device profile, transparency, variable data and raster quality | Accepted PDF standard, gamut, white/clear channels and RIP settings | Device/material proof at final size |
| Heat transfer on textile | Transfer orientation, carrier boundary, colour management and edge behaviour | Transfer type, press conditions and material compatibility | Applied sample after relevant handling tests |
For the most common high-level comparison, the screen printing versus gravure guide explains why direct panel printing and high-volume printed-laminate programmes require different separations, tooling and proofs.
10. Treat bleed and safe zones as route-specific controls
Bleed is artwork intentionally extended beyond a cut or trim boundary so small positional variation does not reveal an unprinted edge. A safe zone keeps important content away from trim, folds, seams, glue, seals, top turns, handle attachments and other variable areas. They solve different problems.
Do not apply one universal bleed number to every shopping bag. Paper-sheet cutting, web printing, laminated cut-and-sew, textile panel printing and heat sealing have different positional capability. Ask the manufacturer to provide bleed and exclusion values for the actual route, then record them in both the working file and approval proof.
Background colours and images normally extend to the approved bleed boundary. Logos, small type, barcodes, regulatory copy and key design edges stay within the relevant safe zones. Patterns that intentionally cross a gusset or seam need a defined visual priority: exact alignment, acceptable continuation or deliberately interrupted design. Exact matching across a physical join may require added cost and still have an agreed tolerance.
11. Position barcodes and QR codes as functional elements
Do not treat a barcode as an ordinary black rectangle. Identify the required symbology, encoded data, target market, point-of-sale or logistics use, minimum and target size, quiet zone, orientation, placement and verification grade. Preserve the code as vector or approved high-resolution output, avoid scaling it non-proportionally, and keep it away from folds, seams, handles, glare and strong surface distortion.
GS1’s barcode implementation guidance explains that GS1 symbols need light, unprinted quiet zones and appropriate bar/background contrast. GS1’s 1D barcode verification guideline also treats quiet zones, symbol height, human-readable data and location as verification items. Apply the correct standard for the actual code; do not copy one symbol’s margin rule to another.
A screen proof cannot guarantee scanning on the final carrier. Verify codes on production-representative material after printing, coating or lamination and after the bag is converted. For QR codes used in campaigns, confirm the destination URL, tracking parameters, mobile landing page and ownership before plates or cylinders are released.
12. Preflight the file before the supplier receives it
Export both a clean production PDF and a marked reference proof. The clean PDF contains the approved print data and the technical processing layers requested by the supplier. The marked proof displays panel names, dieline legend, side, orientation, dimensions, colour/finish key and revision so the reviewer can see intent without interpreting hidden layers.
ISO 15930-7:2010 specifies PDF/X-4 and PDF/X-4p exchange using PDF 1.6 and supports colour-managed CMYK, grey, RGB, spot colour, transparency and optional content. PDF/X-4 can make exchange more predictable, but it does not validate the bag geometry, correct artwork placement, print feasibility or visual approval. Use the supplier’s requested PDF standard and preflight profile.
| Preflight area | Check | Failure prevented | Evidence to retain |
|---|---|---|---|
| Identity | SKU, bag size, side, language, scale, revision and dieline ID match | Correct art on wrong structure | Release checklist and filename |
| Geometry | Dieline unchanged; artboards and check dimension correct | Scaled bags, moved cut paths and bad panel mapping | Overlay comparison against issued dieline |
| Graphics | Bleed complete; critical art inside approved zones; no hidden or stray objects | White edges, cropped marks and accidental print | Marked composite proof |
| Images and type | Effective resolution, links, fonts, glyphs and transparency pass | Pixelation, substitution and missing assets | Automated preflight report |
| Separations | CMYK/spot/white/finish plates named and previewed; unused colours removed | Extra tooling, missing white or wrong knockout | Separation screenshots or report |
| Functional codes | Data, size, quiet zone, contrast and position checked | Wrong destination or unscannable bulk | Code data sheet and verification plan |
| Output | Correct PDF preset/profile, trim boxes, overprint and file integrity | RIP differences and incomplete exchange | Final PDF checksum and preflight report |
13. Use an approval ladder, not one “looks good” message
Different proofs answer different questions. A folded white dummy validates structure and panel mapping but not colour. A marked digital proof validates content, position and separations but may not predict the final substrate. An ink drawdown evaluates a spot-colour direction but not conversion. A production-process sample checks print transfer, while a converted sample reveals folds, seams, handles and final viewing.
The Custom Shopping Bag Sample Development Process shows how to separate appearance samples from production-representative approvals. Define who may approve each gate, the response deadline, whether approval is signed or electronic, and what changes require reapproval.
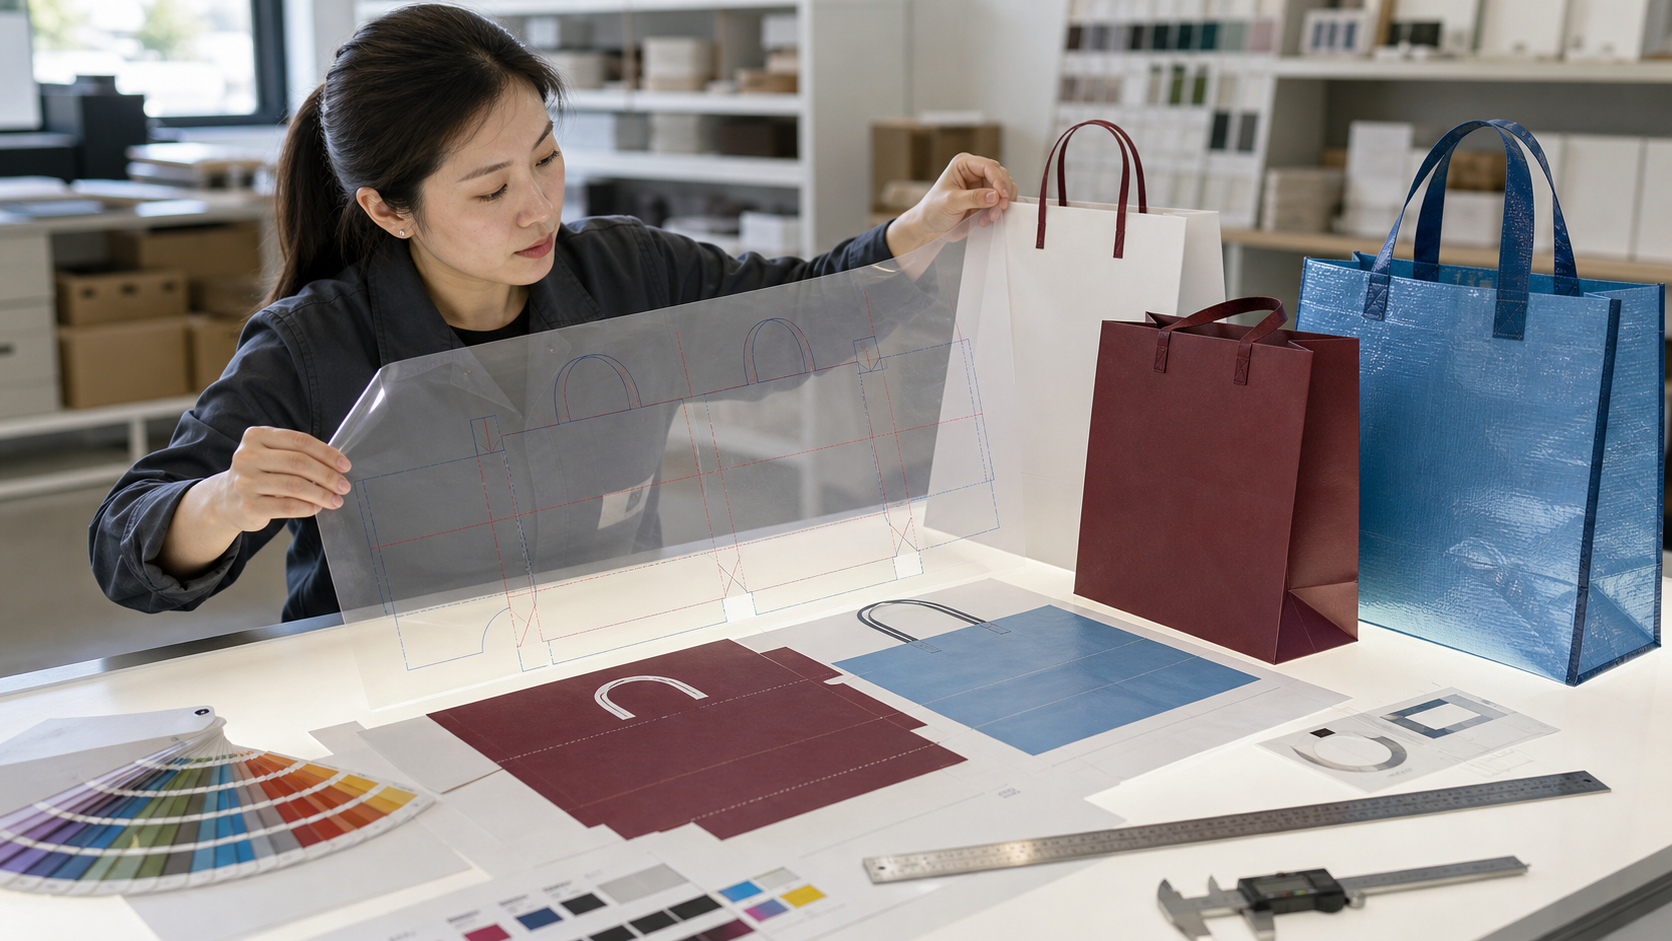
A physical overlay links the issued dieline, print separations and finished sample, making panel, fold, seam and handle-position errors visible before bulk production.
| Approval gate | Question answered | Minimum review | What it does not authorise |
|---|---|---|---|
| Issued dieline | Is this the correct, current production structure? | ID, revision, size, material route and orientation | Graphic or colour approval |
| Structural white dummy | Do panels, gussets, opening and handles behave correctly? | Fold, fill, carry and mark visible faces | Print quality or substrate colour |
| Marked digital proof | Are content, spelling, mapping, plates and finishes correct? | Composite plus individual separations at final size | Exact material appearance |
| Colour / finish proof | Is the chosen colour and surface direction acceptable? | Exact or representative substrate stack and limitations | Bulk press consistency |
| Production-process print | Can the intended press and tooling reproduce the file? | Register, detail, colour, white, trap and finish | Final conversion placement |
| Converted pre-production bag | Does the printed structure work as a finished carrier? | All visible states, seams, folds, handles and codes | Unmonitored bulk drift |
| Bulk first-off | Does the actual run start inside approved limits? | Bulk materials, tooling, machine, conversion and records | Later changes without continued inspection |
14. Control versions and supplier changes
Use filenames that identify customer, project, SKU, size, language, artwork revision, dieline revision, scale and release status. A simple date is not enough when several people save files on the same day. Mark only one package as “released for proof” or “released for production”; archive superseded versions so they cannot be mistaken for current art.
Create a change log with requester, date, old state, new state, reason, affected SKUs and required reapproval. If the printer adjusts trapping, distortion, step-and-repeat, colour separations or white spread, require a returned production PDF or marked proof. The supplier should not silently edit customer artwork and then rely on an old approval.
Record a file checksum or at least the exact filename, byte size and release timestamp in the approval message. Tie the file to the purchase order, signed sample, tooling IDs and colour masters. For reorders, do not assume stored tooling is unchanged; verify artwork, material, printing condition, regulations and digital links again.
15. Diagnose common artwork and dieline failures
Logo shifts after the bag opens: the designer centred it on the flat panel, not the loaded front face. Review the folded dummy at target fill. Pattern breaks at the side: the design assumed exact seam or gusset registration. Define an acceptable join, simplify the transition or budget for tighter control. White edge appears at trim: background art stopped at the cut line or the bleed did not match route capability.
Technical lines print on the bag: the dieline objects were placed on a printing plate or flattened into art. Separate them as nonprinting processing data and inspect separations. Ink weakens glue or seal: artwork entered an exclusion zone. Obtain the converter’s true bonding area. Handle covers the logo: the artwork ignored attachment, patch, fastener or natural handle fall.
Unexpected extra plate or cylinder: duplicate spot names, unused swatches or RGB conversions created extra separations. Clear bag art disappears: opaque white or viewing side was not defined. Barcode scans on screen but not on the bag: final size, contrast, quiet zone, gloss, curvature or conversion was not verified on production material.
When failures reach bulk, use the Custom Shopping Bag Quality Control Checklist to connect print defects with material, conversion and lot traceability rather than inspecting artwork in isolation.
Company-claim boundary: LUCKYSTAR statements in this section are publisher self-description, not third-party verification, prepress accreditation, barcode certification, or a guarantee that a dieline, PDF/X file, barcode/QR, color, print, sample, price, MOQ or schedule is production-ready. Confirm the contracting entity, assigned production/printing sites and subcontracting; locked construction and tooling; supplier-issued dieline; artwork rights/assets; print/RIP settings; functional-code rules and verification; approval samples; packing; and release terms for each order.
16. How LUCKYSTAR describes its artwork-handoff review
LUCKYSTAR states that its project team can connect artwork files to the proposed bag construction and print-and-convert route, subject to specification and written confirmation. The review can align the dieline revision, panel mapping, separations, technical layers, proofs, converted samples and final release trail.
- Structure first: record bag style, material, finished dimensions, gusset/base/handles, seams/folds, tooling and the current manufacturer-issued dieline ID/revision.
- File control: specify scale/origin, editable source, linked images, font rights or outlines, color spaces/profiles, PDF standard, layers, version name and checksum.
- Production layers: separate print art, spot/process channels, opaque white, varnish/foil/emboss/window and nonprinting cut/fold/glue/dimension/information objects.
- Route limits: return supplier-specific bleed, safe zones, exclusions, minimum positive/reverse features, resolution, repeat, web direction, distortion and RIP/output settings.
- Functional codes: identify owner-issued data, symbology, market/use, size, quiet zone, contrast, orientation, placement and production-sample verification.
- Approval and change: define marked proof, production-like color object, converted sample, first-off, approvers, retained references and reapproval triggers.
Review the public custom shopping bag manufacturing options. Teams qualifying suppliers can use the shopping bag sourcing framework and complete custom bag manufacturer guide. Then send the structure, dieline and artwork package for a project-specific handoff review.
17. Send a complete artwork handoff package
The handoff should let a manufacturer reproduce the intended result without guessing. Send the latest tech pack and purchase details with the artwork package. Identify the final decision owner and ask the supplier to return a feasibility response, revised production proof and list of any prepress changes before tooling is released.
| Handoff item | Buyer / designer sends | Manufacturer returns | Release evidence |
|---|---|---|---|
| Job identity | Project, SKU, size, language, quantity, market and target date | Job number, assigned route and schedule | Matched PO and job ticket |
| Structure | Approved bag specification and current dieline ID/revision | Confirmed machine route, dimensions and technical legend | Signed structural dummy or drawing |
| Editable source | Packaged native file, linked images, authorised fonts and swatches | Missing-asset and editability report | Archived source package |
| Print PDF | Requested PDF standard, scale, colour profile and processing layers | Preflight result and imposed/production proof | Approved PDF checksum/version |
| Colour and finishes | Targets, spot names, white, varnish, foil and effect masks | Separations, limitations, tooling count and proof route | Signed physical and separation proofs |
| Functional elements | Barcode/QR data, legal copy, position and applicable requirements | Production verification method | Verified converted sample |
| Change control | Approver, response window and reapproval rules | Marked list of every supplier-side change | Final production release and retained sample |
Frequently asked questions
Who should create the final shopping bag dieline?
The manufacturer or converter responsible for the production route should issue or formally approve it. A designer can create a concept layout, but the production dieline must reflect actual tooling, material, machine allowances and construction.
Can I reuse a dieline from a previous shopping bag?
Only if the manufacturer confirms that size, material, construction, tooling and process remain valid. Do not stretch or scale an old template. Even a small structural change may alter folds, seams, glue, handle zones or repeat.
How much bleed should shopping bag artwork have?
There is no universal value. Obtain the requirement for the specific paper, film, textile, print and conversion route. Background art should reach that approved boundary, while critical content remains inside the relevant safe zones.
Should dieline lines be included in the print PDF?
Follow the supplier’s workflow. They may require technical paths as separate nonprinting processing layers or a separate file. Never let them merge silently into printable colour separations. Also provide a marked reference proof.
Should fonts be outlined?
Final display text is often outlined to prevent substitution, but retain an editable source and respect font licences. Some workflows accept packaged fonts. In either case, inspect glyphs, spacing and small type in the exported PDF.
What is the difference between a print area and a safe area?
The print area describes where the process can apply ink. A safe area is a more conservative zone for logos, small text and functional content, away from cut, fold, seam, glue, handle and registration variation. They are not interchangeable.
Can artwork cross a shopping bag gusset?
Yes, when the design is intentional and the manufacturer confirms the route. Review the bag flat, collapsed and fully opened. Agree whether alignment must be exact, directionally continuous or deliberately interrupted.
What files should I send to a shopping bag manufacturer?
Send the packaged editable source, final linked images or authorised fonts, the supplier-requested production PDF, a marked composite proof, colour and finish references, barcode data, current tech pack and approval/change-control instructions.
Is PDF/X-4 automatically production-ready?
No. It supports a defined print-data exchange, but it cannot prove that the dieline is current, panels are mapped correctly, art is manufacturable, codes scan or the finished bag has been approved. Run job-specific preflight and physical proofing.
When must artwork be reapproved?
Reapprove when size, dieline, material, print route, colour separation, finish, white plate, tooling, regulatory copy, barcode data or supplier-side prepress treatment changes. Define these triggers before production.
Conclusion
Production-ready shopping bag artwork begins with a locked structure, not a blank rectangle. Use the current manufacturer-issued dieline, map every panel onto the finished carrier, preserve nonprinting technical layers, separate colour and finishing plates, apply route-specific bleed and safe zones, run preflight and move through an explicit proof ladder. Version control then connects the approved file to the tooling, physical sample and bulk first-off.
For the next project, compare LUCKYSTAR’s custom shopping bag manufacturing options, the shopping bag sourcing framework and the complete custom bag manufacturer guide. The design-to-delivery manufacturing process shows where artwork approval sits in the full production schedule.

Request a production artwork-handoff review
Lock the bag structure and supplier-issued dieline, then connect every printable, technical, finishing and functional-code object to explicit approval gates.
Review LUCKYSTAR custom shopping bag options, then send your project details through the contact form or Email a project brief. The email link opens a draft for your review before sending.
Factory/print-site assignment, structure, dieline, artwork rights/assets, color, barcodes/QR, proofs, samples, testing, inspection, price, MOQ, packing, schedule and release terms are subject to due diligence, specification and written confirmation.