How to Test Drawstring Bag Load Capacity
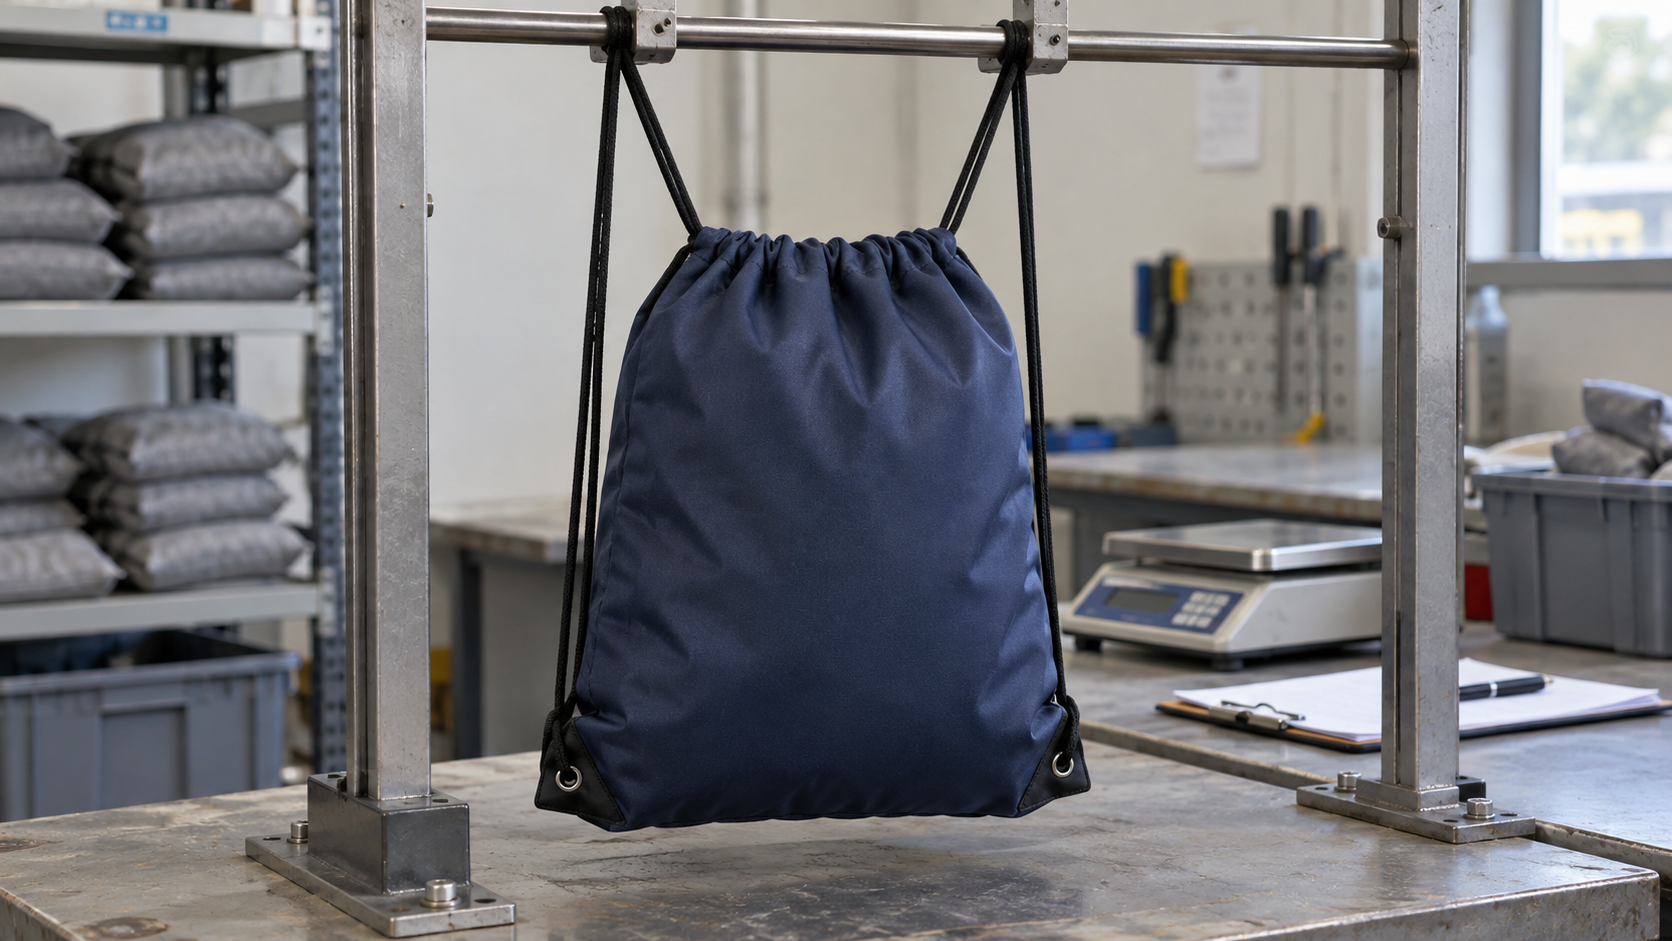
The short answer: test the finished bag—not just its fabric or cord—using a defined production-intent sample, controlled test fill, realistic loading direction, static hold, repeated lift cycles, and any use-specific impact or carry simulation. Record deformation and the first failure location as well as whether the bag still functions. A defensible capacity statement is valid only for the exact material, dimensions, seams, cord system, reinforcement, test method and acceptance rule evaluated.
That distinction matters. A cord can have a high breaking force while the lower corner tears first. Strong fabric can still fail at a narrow seam allowance. A bag that survives one careful lift may deteriorate after repeated loading. “Holds 10 kg” means very little unless the supplier and buyer agree on how the 10 kg is distributed, how long it is held, how often it is lifted, and what counts as failure.
This guide gives brand, sourcing and quality teams a practical framework for specifying a full-bag test. It complements our separate guides to drawstring cord strength and pull testing, drawstring bag quality control and the wider question of which tests custom drawstring bags should pass.
Important: There is no single universal kilogram rating for all drawstring bags. Test loads, durations, cycles, sample quantities and pass criteria should be set from the intended contents, risk, market and written specification. Commercial values remain subject to specification and written confirmation.
A Practical Six-Step Test Sequence
For most retail, event, sports and promotional programs, the following sequence is a useful starting framework. It is a specification template, not a universal standard.
| Step | What to control | What the test reveals | Decision output |
|---|---|---|---|
| 1. Define use | Intended contents, working load, carry time and misuse risks | What the bag must actually do | Proposed working-load claim |
| 2. Lock the sample | Fabric, dimensions, seam, cord, eyelet and reinforcement | Whether results apply to production | Approved construction revision |
| 3. Standardize fill | Total mass, unit shape, distribution and sharpness | Whether samples receive comparable stress | Written loading map |
| 4. Apply loads | Static hold, controlled proof lift and repeated cycles | Immediate and progressive weakness | Test observations and measurements |
| 5. Inspect function | Seams, fabric, anchors, closure, symmetry and residual stretch | Whether the bag remains usable | Pass/fail by agreed criteria |
| 6. Document scope | Sample IDs, method, equipment, results and deviations | Whether a claim is repeatable and traceable | Qualified capacity statement |
A useful sequence moves from less damaging to more demanding work. First inspect and measure the bag. Next perform the agreed static or working-load test. Then run cyclic handling. Reserve destructive margin testing for separate specimens, because a bag taken to rupture cannot represent a saleable unit.
1. Define What “Load Capacity” Means
Capacity can describe volume, mass, or both. A 15-liter bag is not automatically suitable for 15 kilograms. Volume describes the space available; load capacity concerns the stresses created by the contents and the way the user carries them. See our drawstring bag size and capacity guide for dimensional planning.
Four load terms should not be mixed:
| Term | Practical meaning | Appropriate use | Common mistake |
|---|---|---|---|
| Intended working load | The maximum mass the buyer expects in ordinary use | Product specification and test basis | Treating it as a fabric-only property |
| Proof load | A controlled load above or otherwise more demanding than ordinary use | Demonstrating agreed margin without rupture testing | Advertising the proof load as the user rating |
| Ultimate load | Load at which the complete assembly fails under a defined method | Engineering comparison and failure analysis | Presenting a single destructive result as guaranteed capacity |
| Cyclic load | Repeated application and removal of a working or specified load | Evaluating fatigue and progressive damage | Assuming one static hold represents repeated use |
The buyer should state the intended working load first. The test protocol can then define an appropriate proof condition or cycle count. Any multiplier is a project decision; it should not be copied from an unrelated bag, backpack or packaging test without technical justification.
2. Map the Whole-Bag Load Path
When a loaded drawstring backpack is lifted, force travels through the contents, bottom panel or fold, side seams, lower cord anchors or eyelets, cords, top channel and the carrier’s shoulders or hands. The weakest link determines the usable assembly capacity.
Components that usually deserve inspection
- body fabric, coating or lamination;
- bottom fold, gusset or separate bottom panel;
- side and bottom seams, including stitch density and seam allowance;
- cord channel and its end finishing;
- cord diameter, construction and surface;
- metal eyelets, stitched tabs, fabric loops or reinforced corner patches;
- bartacks, backstitches and other reinforcement;
- pockets, zipper openings or decorative panels that interrupt the body.
The drawstring cord, eyelet and reinforcement guide explains these junctions in more detail. For bottom geometry, consult the gusset and bottom construction guide. A test report should identify which junction began to deform first—even when the bag technically passes.
3. Test a Production-Intent Sample
A result is only as representative as the sample. Prototype fabric with temporary cords cannot qualify a production bag that later uses a different coating, seam, eyelet or reinforcement. Before testing, freeze the bill of materials and construction details that affect the load path.
| Sample-control item | Record before testing | Why it matters |
|---|---|---|
| Body material | Fiber, weave or nonwoven type, nominal weight, coating and lot | Changes tear behavior, stretch and seam holding |
| Dimensions | Finished width, height and gusset | Alters leverage, fill distribution and seam length |
| Seams | Seam type, allowance, stitch density and thread | Controls opening, slippage and progressive damage |
| Cord system | Material, diameter or width, routing and end finish | Affects load sharing and abrasion |
| Anchor | Eyelet, loop or fabric corner; reinforcement layers; stitch pattern | Concentrates force at the lower corner |
| Decoration | Print, transfer, embroidery or applied label | May alter flexibility or introduce needle holes |
| Revision | Sample ID, tech-pack revision, date and production lot | Preserves traceability |
Use the same control discipline described in our drawstring bag tech-pack guide. If a material or construction change is introduced after approval, decide whether partial verification or a complete retest is required.
4. Select a Representative Test Fill
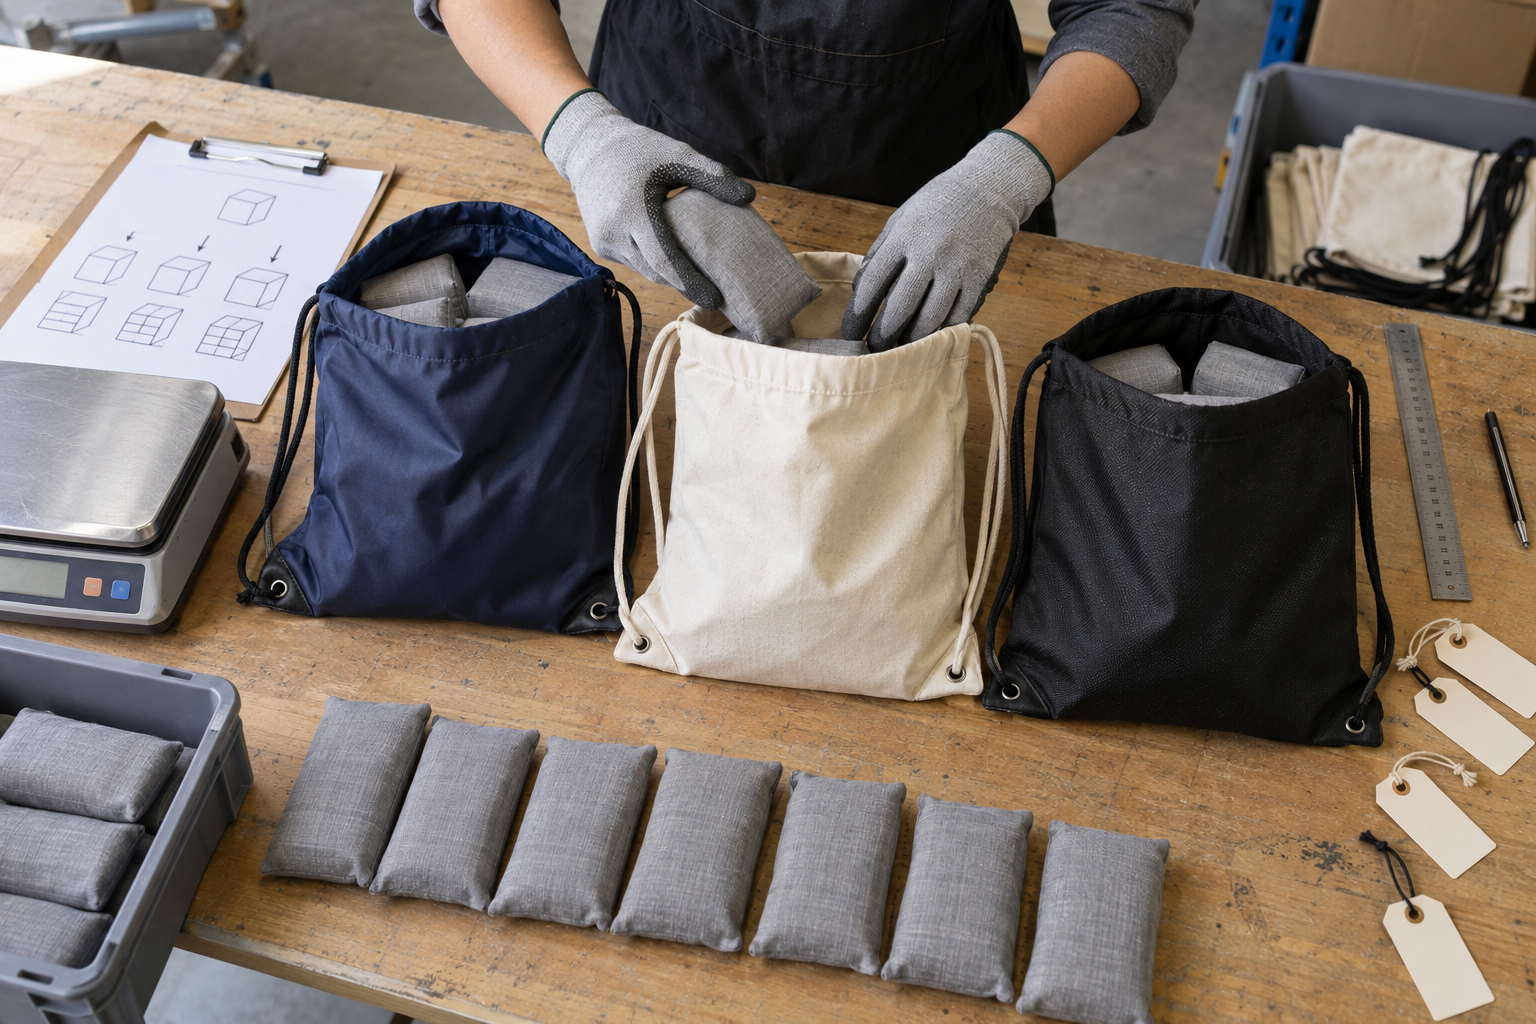
Two bags with the same total mass can experience very different stress. One dense metal block at the bottom creates concentrated pressure and impact; several soft, equal packets spread the load. For comparison testing, the fill must therefore be repeatable.
Choose fill by intended use
| Use case | Useful laboratory representation | Additional concern |
|---|---|---|
| Event giveaway | Multiple soft, uniform packets | Repeated handout and short carries |
| Gym or sports kit | Distributed soft fill plus realistic shoe/bottle geometry | Moisture, movement and shoulder comfort |
| Retail merchandise | Mixed but controlled packages with protected edges | Local pressure and uneven placement |
| Laundry or travel | Bulky low-density textile fill | Volume and closure more than mass |
| School or club use | Book-like blocks with rounded protective sleeves | Flat edges, repeated daily lifting and impact |
| Bottle or hardware use | Purpose-specific surrogate shapes | Point loading, abrasion and dynamic shock |
Write down the number of fill units, individual mass, dimensions, protective wrapping, position and total verified mass. Use a calibrated or checked scale suitable for the range. If actual contents have corners, controlled surrogate blocks may reproduce them more honestly than loose weights, but their edges should be specified so that one operator does not use sharper pieces than another.
Control distribution, not only total mass
Create a simple loading map. Place units symmetrically unless real use is intentionally asymmetric. Close the bag in the same way each time and settle the contents using a defined procedure. Do not push weights into a corner by hand on one sample and distribute them carefully in another.
For flexible bags, a small change in fill height can shift force from the base into the side seams or top channel. Photograph the filled sample before the test so a later reviewer can understand the setup.
5. Condition and Measure the Bag
At minimum, keep samples in a stable environment long enough to avoid testing one immediately after a cold, humid or compressed shipment while another has relaxed. If humidity or temperature is important to the intended market or material, specify conditioning and testing conditions explicitly rather than relying on “room temperature.”
Record initial dimensions at fixed landmarks:
- finished width and height;
- cord length on each side;
- eyelet or anchor position;
- bottom and corner shape;
- opening and closure function;
- any wrinkles, skipped stitches, coating cracks or visible damage.
Pre-test measurements support residual-deformation limits. They also help distinguish a manufacturing defect from damage caused by the test.
6. Run the Static Hold Test
The static hold test asks whether the complete bag can support a defined load for a defined time in a controlled orientation. It is more informative than briefly lifting the bag by hand, but it still does not represent repeated use.
Suggested procedure framework
- Verify the empty bag and test-fill masses.
- Load the bag according to the written map.
- Close and route the cords as an end user would.
- Support the bag by both cords or straps using a fixture that avoids cutting or pinching them.
- Raise the load smoothly; avoid a jerk unless impact is part of the method.
- Hold for the specified duration.
- Observe the bag during the hold without touching or redistributing the fill.
- Lower it smoothly, unload it and allow the agreed recovery time.
- Reinspect dimensions, seams, fabric, anchors and closure.
| Control variable | State it in the protocol | Why omission causes disagreement |
|---|---|---|
| Load | Exact total mass and tolerance | “About 10 kg” is not repeatable |
| Duration | Start and stop rule | A brief lift and an hour-long hold are different tests |
| Suspension | Both cords, one cord, handles or other orientation | Force distribution changes substantially |
| Fixture contact | Diameter, width and surface | A narrow hook may cut the cord |
| Loading rate | Smooth lift or defined machine speed | Jerking adds dynamic force |
| Recovery time | Time before final measurement | Flexible materials may partly recover |
| Acceptance | Functional and dimensional limits | “No break” ignores serious damage |
Do not hang the cord over a sharp metal hook. The fixture should represent the intended contact or use a broad, smooth interface that does not introduce an artificial cutting failure.
7. Add a Controlled Proof-Load Check
A proof-load check may use a more demanding load, duration or orientation than ordinary use. Its purpose is to verify a specified margin on non-destructive samples—not to discover the breaking point. The buyer and supplier should agree on the proof condition after reviewing the intended contents, variability and consequence of failure.
The proof result should be reported separately from the working load. A bag that passes a higher laboratory proof load should not automatically be marketed at that value. Likewise, a supplier should not promise a universal “safety factor” without defining the construction and test method behind it.
Stop the test if a safety hazard develops. Heavy suspended loads require exclusion zones, secure fixtures and procedures appropriate to the equipment. Operator safety takes priority over observing a rupture at close range.
8. Test Repeated Lifting and Carrying
Most real bags are loaded and lifted many times. Cyclic testing can reveal stitch loosening, eyelet rotation, fabric creep, cord abrasion and progressive seam opening that a static hold misses.
| Cycle parameter | Possible protocol choice | Record in the report |
|---|---|---|
| Test load | Intended working load or another agreed value | Mass and tolerance |
| Movement | Vertical lift, carry simulation, alternating support or controlled swing | Stroke, path and orientation |
| Cycle rate | Slow enough to avoid uncontrolled shock unless intended | Cycles per minute |
| Travel | Defined lift height or machine displacement | Start and end positions |
| Total cycles | Based on intended reuse and risk | Planned and completed cycles |
| Inspection interval | Periodic stops | Observed damage and cycle number |
| End condition | Completion, functional failure or safety stop | Exact reason for termination |
Why cycle shape matters
A machine that moves vertically by a few centimeters creates different stresses from a person walking with the bag on two shoulders. If shoulder comfort is important, pair mechanical durability work with the fit principles in our drawstring bag shoulder-comfort guide. If the bag will often be carried by one cord, include that foreseeable orientation as a separate, justified test rather than silently substituting it for the normal two-cord condition.
Inspect at planned intervals. A photo series at zero, intermediate and final cycles makes progressive changes easier to evaluate than a single end photograph.
9. Use Impact and Drop Tests Only When Relevant
A loaded bag set down gently and a loaded bag dropped onto a hard floor experience different peak forces. If the product will hold books, sports equipment or dense retail goods, a controlled drop or repeated set-down simulation may be relevant.
Define drop height, orientation, surface, fill geometry, number of drops and acceptance criteria. Use a protected area because dense test masses can become hazardous if the bag opens.
Do not cite a transport-package standard as though it were automatically a consumer drawstring-bag capacity standard. For example, ISO 2248 addresses vertical impact testing of complete, filled transport packages. It can inform laboratory thinking about controlled impact, but it does not by itself establish a drawstring bag’s working-load claim. The method must fit the product and intended use.
10. Set Acceptance Criteria Before Testing
“No catastrophic break” is too weak for most quality plans. A bag may remain suspended while its eyelets rotate, seams open, cords slip, fabric permanently stretches or the closure stops working. Define pass/fail criteria before anyone sees the result.
| Failure or change | Suggested observation | Possible acceptance approach |
|---|---|---|
| Seam opening | Gap length, thread breakage, stitch pullout | No opening beyond agreed limit; no progressive failure |
| Fabric tear | Tear length and location | No tear or puncture affecting function |
| Anchor distortion | Eyelet rotation, pull-through, tab elongation | No detachment; deformation within agreed limit |
| Cord damage | Fraying, glazing, flattening, slippage | No break; no functional or specified visual damage |
| Residual stretch | Change at fixed dimensions after recovery | Within stated dimensional tolerance |
| Closure performance | Ability to open, close and remain closed | Full function retained |
| Load imbalance | Side-to-side distortion or unequal cord extension | Within specified symmetry limit |
| Decoration damage | Cracking, delamination or abrasion | Separate cosmetic criterion if relevant |
When appearance matters, separate functional and cosmetic grades. A promotional bag may remain functional with minor wrinkling, while a premium retail pouch may have tighter visual limits. That commercial distinction should be written into the approval sample and inspection plan.
11. Separate Component Tests from Full-Bag Capacity
Component standards can diagnose materials and seams, but they do not automatically rate the complete bag.
| Reference | What it covers | How to use it responsibly |
|---|---|---|
| ISO 13934-1:2013 | Maximum force and elongation of textile fabrics using the strip method | Compare applicable fabrics; note that scope limitations matter |
| ISO 13935-1:2014 | Maximum force to seam rupture using the strip method | Evaluate defined sewn seams under laboratory conditions |
| ASTM D1683/D1683M-22 | Failure in sewn seams of woven fabrics | Investigate seam strength; ASTM notes it does not predict actual wear performance |
| ISO 2307:2019 | Physical and mechanical properties of fibre ropes | Characterize applicable cord specimens under the standard’s conditions |
| ISO/IEC 17025 | Competence, impartiality and consistent operation of testing laboratories | Select a competent external lab when accredited testing is required |
ISO lists ISO 13934-1:2013 as current after a 2024 confirmation and ISO 13935-1:2014 as current after a 2025 confirmation. These references support disciplined component evaluation, but a complete-bag protocol still needs to define fill, suspension, duration, cycles and functional acceptance.
This is also why a supplier should not calculate finished-bag capacity by taking the cord breaking force and dividing it by an arbitrary number. Cord force, knot or end treatment, eyelet geometry, stitch pattern, fabric tear resistance and dynamic loading interact.
12. Choose Samples and Manage Variability
One sample can demonstrate that one specimen survived one setup. It cannot characterize normal production variation. Select sample quantity according to risk, order size, construction maturity and consequence of failure. Include specimens from more than one location in a production run when appropriate.
For destructive or demanding tests, state whether samples are pre-production, top-of-production, in-line or finished-lot units. Do not quietly replace a failed production sample with a hand-picked development sample.
A useful staged verification plan
| Stage | Sample purpose | Typical decision |
|---|---|---|
| Material development | Compare candidate fabrics, seams and anchors | Select construction |
| Prototype | Find weak links in complete assembly | Revise pattern or reinforcement |
| Approval sample | Confirm agreed appearance and function | Freeze specification |
| Pre-production | Verify factory setup before volume | Authorize production start |
| In-line | Detect drift while correction is possible | Continue, correct or hold |
| Finished lot | Confirm lot-level requirements | Release, rework or investigate |
| Reorder/change | Confirm continuity after material, source or process change | Approve or retest |
Attribute sampling plans can help select inspection quantities for agreed defects, but an AQL inspection level does not create a load-capacity claim. The performance method, sample plan and release rule all need to be written.
13. Diagnose the First Failure, Not Just Pass or Fail
The first failure location is valuable engineering information. Mark it in photographs and classify it consistently.
Common failure patterns
- fabric tear beside reinforcement: the reinforcement may be too stiff, too small or poorly graduated;
- eyelet pull-through: hole preparation, washer geometry, fabric layers or setting may be inadequate;
- stitch rupture: thread, stitch density, backtacking or load direction may need review;
- seam slippage: the fabric structure and seam allowance may be incompatible with the load;
- cord break at contact point: the fixture, eyelet edge, knot or abrasion surface may dominate;
- top-channel tearing: closure geometry may concentrate force near channel ends;
- bottom deformation: fill may be too concentrated or the bottom construction insufficient;
- unequal extension: cord length, routing or anchoring may be asymmetric.
Fix the root cause, then retest the revised construction. Adding a stronger cord will not solve a corner-tear problem and may transfer even more force into the fabric.
14. Write a Traceable Load-Test Report
A usable report lets another qualified person understand and repeat the work. Include:
| Report section | Minimum information |
|---|---|
| Identification | Product, sample ID, revision, lot and test date |
| Construction | Material, dimensions, seams, cord, anchors and reinforcements |
| Equipment | Fixture, scale or load device, identification and verification status |
| Environment | Conditioning and test conditions when relevant |
| Fill | Type, units, total mass, distribution map and photographs |
| Method | Suspension, loading rate, duration, cycles, travel and inspection intervals |
| Criteria | Functional, dimensional and cosmetic pass/fail rules |
| Results | Individual specimen results, deformation and first failure mode |
| Deviations | Anything that differed from the approved protocol |
| Conclusion | Scope-limited outcome; no broader claim than the evidence supports |
Retain the approved protocol and raw records, not only a “PASS” screenshot. For an external laboratory, confirm whether the relevant method falls within its accredited scope rather than assuming every test from an accredited company is itself accredited.
15. Turn Results into a Defensible Product Claim
A responsible statement identifies the tested construction and method. For example:
“The approved [construction code] samples met the agreed [working-load] static-hold and cyclic-lift protocol described in report [reference], subject to the stated sample size, conditions and acceptance criteria.”
Avoid statements such as “unbreakable,” “guaranteed for any load” or “tested to international standards” when no applicable standard and report scope are named. Do not extend a result from one polyester style to every custom drawstring bag, or from one sample batch to a permanently fixed universal claim.
If a retailer needs a consumer-facing capacity label, align the label, technical specification, test report and actual production construction. Recheck the claim after material substitution, altered dimensions, new eyelets, different cord routing or meaningful process changes.
16. How LUCKYSTAR Supports Load-Capacity Planning
LUCKYSTAR can help buyers translate an intended use into an order-specific construction and verification plan for custom drawstring bags. The practical value is not an unsupported universal kilogram promise. It is the ability to coordinate the variables that determine whether a particular bag is appropriate for a particular program.
Depending on the approved specification, that coordination can include:
- comparing material and construction options against intended contents;
- aligning dimensions, gusset, seams, cord routing and lower-corner reinforcement;
- developing and reviewing samples before volume production;
- defining inspection checkpoints and order-specific test requirements;
- recording approved artwork and construction details for reorder control;
- arranging third-party verification when the buyer, market or project requires it.
Our custom bag manufacturer guide explains the broader sourcing process. For supplier qualification specific to this format, read how to choose a custom drawstring bag manufacturer. Exact materials, quantities, sampling, testing, lead time and commercial terms remain subject to specification and written confirmation.
17. RFQ Checklist for a Load-Tested Drawstring Bag
Send enough detail for the supplier to quote the same product you expect to test.
| RFQ field | What to provide |
|---|---|
| Intended use | Contents, users, carry pattern and expected reuse |
| Working load | Target mass and whether it is a consumer claim or internal requirement |
| Size | Finished width, height, gusset and tolerances |
| Body | Material, nominal weight, color, coating or lining |
| Cord system | Round cord, flat cord or webbing; dimensions and routing |
| Anchors | Eyelet, tab or reinforced fabric corner; material and finish |
| Construction | Seam type, allowance, stitches and reinforcement locations |
| Decoration | Method, location, size and color reference |
| Test protocol | Fill, load, duration, cycles, orientations and acceptance criteria |
| Evidence | Sample report, production record or third-party report needed |
| Order | Quantity, destination and required delivery window |

Frequently Asked Questions
How much weight can a drawstring bag hold?
There is no universal answer. Capacity depends on the body material, dimensions, seam construction, cord, anchor, reinforcement, fill geometry and test method. Ask for a value tied to an exact specification and written protocol, not a generic material claim.
Is a static hanging test enough?
Usually not for a reusable bag. It can reveal immediate weakness and creep, but repeated lifting and realistic handling may expose progressive damage. Add cycle or impact work when the intended use justifies it.
Should the bag be tested by one cord or two?
Normal two-cord suspension is often the primary condition for a backpack-style bag. If users may lift it by one cord, specify that as a separate foreseeable-use or misuse condition. State the fixture and orientation for both.
Can fabric tensile strength predict finished-bag capacity?
No. It is useful component data, but the finished assembly can fail at a seam, eyelet, reinforcement transition, cord channel or bottom. Test the complete production-intent bag.
What is the difference between proof load and working load?
The working load represents intended ordinary use. A proof load is a separately defined, more demanding verification condition. Passing proof load does not mean the proof value should become the advertised user limit.
How should test weights be placed?
Use a documented loading map with repeatable units, positions and protective geometry. Distribution should represent the intended contents or a deliberate worst case. Record photos before testing.
How many samples should be tested?
Choose quantity by risk, order size, construction maturity and consequence of failure. One specimen is weak evidence for production consistency. State how samples were selected and report individual results.
When should a bag be retested?
Retest after changes that can affect the load path: material or coating, dimensions, seam, thread, cord, eyelet, reinforcement, supplier, tooling or process. Reorder verification should be based on controlled change, not only matching color and artwork.
Does an AQL inspection prove load capacity?
No. AQL-based inspection can support lot sampling for defined defects, but it does not define the performance method or capacity claim. The test protocol and acceptance rule must be specified separately.
When is third-party laboratory testing useful?
It is useful when a retailer, regulation, contract or risk profile requires independent evidence. Confirm the laboratory’s competence and applicable accredited scope, then provide the exact product specification and method.
Final Takeaway
Testing drawstring bag load capacity is a whole-assembly exercise. Define the intended working load, freeze the production construction, standardize the fill, apply controlled static and repeated loads, inspect function and deformation, and keep a traceable report. The result should support a narrowly worded claim for the tested configuration—not a universal promise.
To develop a bag around your actual contents and verification needs, review LUCKYSTAR’s custom drawstring bag options and contact our team for an order-specific quotation.
Technical References
- ISO 13934-1:2013 — Textile fabrics: maximum force and elongation using the strip method
- ISO 13935-1:2014 — Seam tensile properties using the strip method
- ISO 2307:2019 — Fibre ropes: determination of physical and mechanical properties
- ASTM D1683/D1683M-22 — Failure in sewn seams of woven fabrics
- ISO/IEC 17025 — Testing and calibration laboratory competence
- ISO 2248:1985 — Vertical impact test for complete, filled transport packages