A cosmetic bag can match its approved outside dimensions and still disappoint the customer. A tall serum bottle may not pass through the zipper opening. A palette may fit on the base but collide with a lid pocket. Padding, binding and dividers may consume the space that looked available in a drawing. For a beauty brand, choosing size is therefore a product-development decision, not a choice between “small,” “medium” and “large.”
Planning an order? Discuss the size and fit of your cosmetic bag. Start with the details you know; undecided specifications can be discussed.
This cosmetic bag size guide explains how to move from an intended assortment to practical bag dimensions, usable capacity and a sample test. It covers retail accessories, gift-with-purchase programs, skincare sets, travel kits and coordinated size families. The aim is not to present one universal chart. It is to help a brand define custom cosmetic bag dimensions that fit its products, customer routine, packaging and price position.
Explore LUCKYSTAR’s custom cosmetic bags for available construction directions. For supplier capability and communication, use How to Choose a Cosmetic Bag Manufacturer.The wider sourcing framework is covered in the Custom Bag Manufacturer Guide.
Quick answer: how should a beauty brand choose cosmetic bag size?
Begin with the products, not the bag. List every bottle, tube, jar, palette and tool that the bag must carry. Record the largest dimensions, preferred orientation and total loaded weight. Arrange physical products or dimensioned dummies in the desired order, then add access clearance, lining, padding, pockets and seam allowances. Select a construction, build a volume mock-up and finally test a sewn sample with the real assortment and its retail pack.
| Decision stage | Brand input | Output | Do not assume |
|---|---|---|---|
| 1.Define use | Retail, GWP, travel, subscription, kit packaging or professional use | Priority for portability, presentation, organization and cost | One size works across all programs |
| 2. Audit contents | Dimensions, orientation, quantity and loaded weight | Required product envelope and entry clearance | Outer bag volume equals usable volume |
| 3.Choose structure | Pouch, box bag, clamshell, train case or organizer | Shape, opening path and internal layout | Equal dimensions give equal access |
| 4.Create specification | POM chart, layers, pockets, closure and packing | Measurable development target | A photo communicates hidden dimensions |
| 5. Validate sample | Real contents, retail packaging and user sequence | Approved usable capacity and pack-out | An empty sample proves loaded performance |
There is no single standard cosmetic bag size
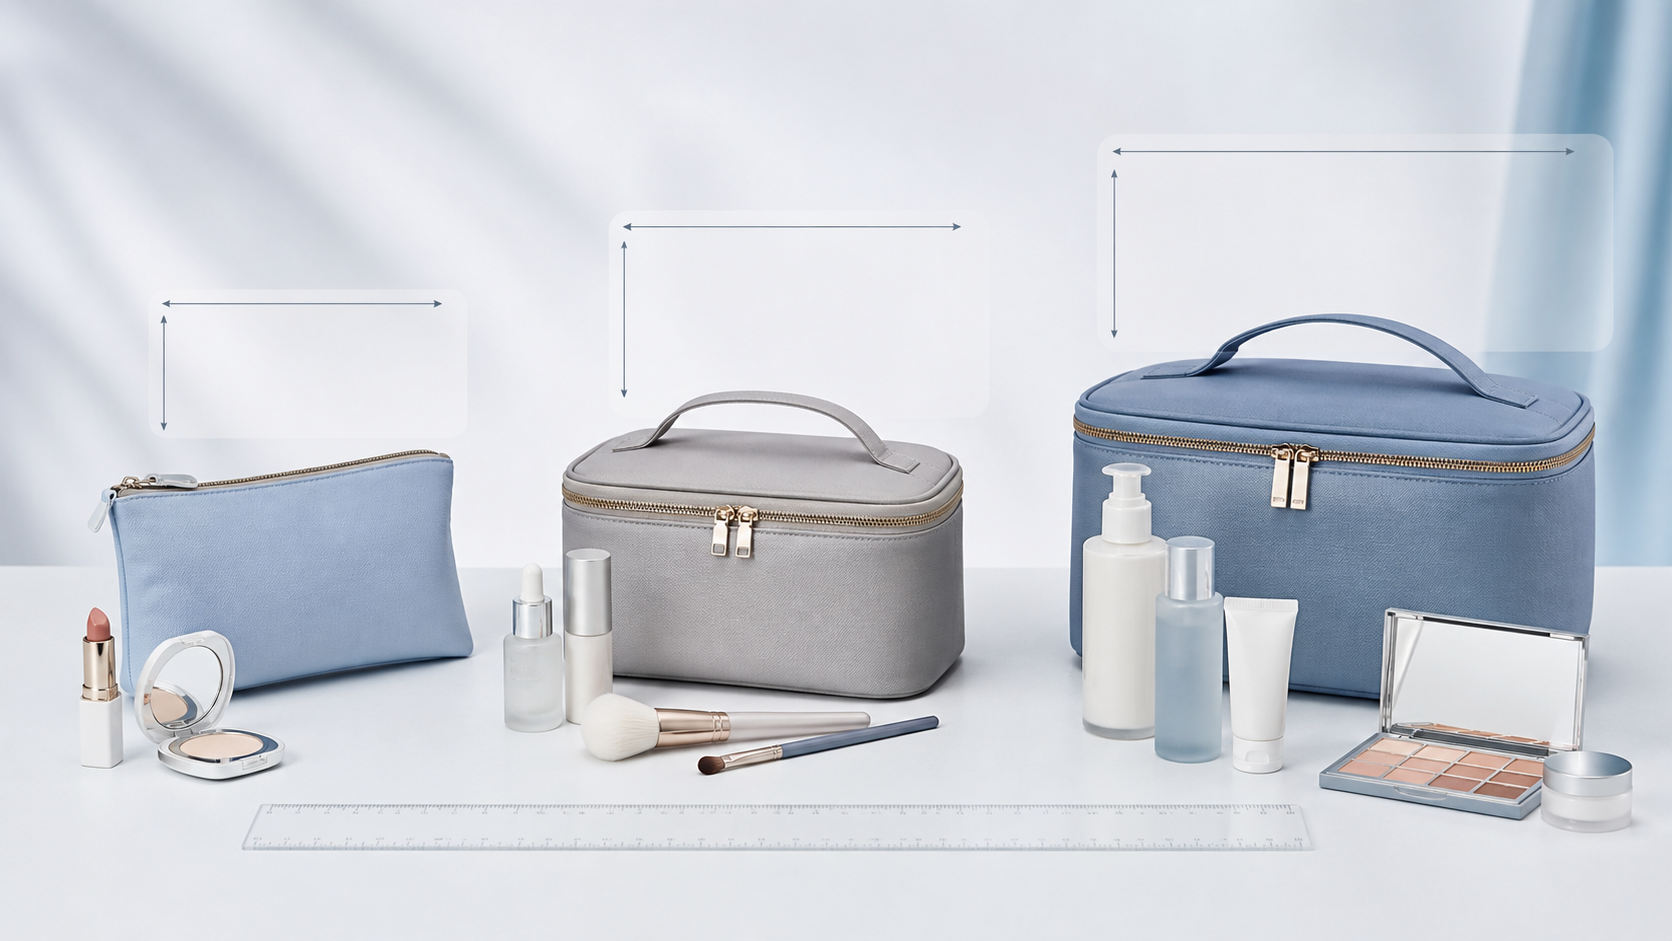
Terms such as mini, medium, large, vanity case and travel bag are commercial descriptions rather than universal dimensional standards. Two suppliers may call different products “medium.” Two bags with the same outside measurements may provide different capacity because one has a flat unlined construction and the other has foam, rounded corners, interior pockets and a bound clamshell opening.
Use size bands only as briefing shortcuts. A purchase specification should state finished dimensions, measurement methods, tolerances, clear opening and the intended contents. The ranges below are practical starting points for early development, not guaranteed standards or capacity claims.
| Planning band | Indicative outside range (L × H × D) | Possible program | Validate before adoption |
|---|---|---|---|
| Slim / mini | About 16–20 × 9–13 × 3–5 cm | Lip products, compact essentials, sample GWP or handbag pouch | Longest item, zipper clearance and whether the pouch expands |
| Everyday / medium | About 19–24 × 12–17 × 6–10 cm | Daily routine, curated beauty set or retail accessory | Bottle orientation,base width and pocket intrusion |
| Travel / large | About 23–29 × 16–21 × 9–14 cm | Skincare bottles, palettes, tools or weekend travel | Loaded weight, carry handle and closure clearance |
| Structured case | About 28–36 × 19–26 × 12–18 cm | Large collection, professional kit or premium travel case | Reinforcement, dividers, carton volume and handling |
Do not copy a range into an RFQ without checking it against the actual program. Even a few millimeters can matter when a rigid palette must lie flat or a pump bottle has to enter through a curved zipper.
1. Build a product-content inventory
Make a worksheet with one row for every intended item. Record overall length, width, height or diameter—including pumps, caps and brush heads—not the cosmetic fill volume printed on the package. A 100 ml bottle can be tall and slim or short and wide. The milliliter value does not tell a bag manufacturer what space it occupies.
Mark each item as mandatory, optional or representative.If the assortment changes seasonally, define the largest credible pack. Note which items must remain upright, which can lie flat and which need separation to prevent scratching or leakage. Add the total loaded weight, because a size decision can also change handle and reinforcement requirements.
| Content field | What to record | Why it changes the bag |
|---|---|---|
| Rigid footprint | Maximum length and width of palette, compact or jar | Sets base panel and corner requirements |
| Overall height | Bottle including pump,cap or overcap | Sets internal height and closure clearance |
| Entry dimension | Smallest orientation in which the item can pass through an opening | Sets clear zipper access |
| Quantity | Normal and maximum number of each item | Controls capacity and organization |
| Orientation | Upright, horizontal, either or separated | Changes bag height, footprint and pockets |
| Loaded weight | Combined item mass plus bag target | Affects handle, seams, structure and shipping |
2.Understand external dimensions, geometric volume and usable capacity
For a rectangular starting shape, multiplying length × height × depth gives a geometric envelope. Divide cubic centimeters by 1,000 to express that envelope in liters. For example, 24 × 16 × 10 cm describes 3,840 cm³, or 3.84 L, before construction losses. This calculation is useful for comparing early concepts, but it is not a promise that the finished bag holds 3.84 liters of products.
Cosmetic bag capacity is reduced by rounded corners, tapered sides, seam allowances, piping, padding, lining, internal pockets, dividers and the space required to operate the zipper. Soft materials may expand around irregular products; rigid structures may preserve shape but provide less forgiveness. Instead of applying a generic “usable percentage,” validate the intended contents in a physical mock-up and sewn sample.
| Capacity term | Meaning | Best use | Limitation |
|---|---|---|---|
| Outside dimensions | Finished external length, height and depth | Product listing, carton and size comparison | Does not show internal loss or access |
| Geometric envelope | L × H × D for a simplified rectangular form | Early concept comparison | Overstates a rounded or tapered bag |
| Usable internal envelope | Clear space after lining,padding and organizers | Product-arrangement planning | Still depends on item geometry |
| Loaded capacity | Named assortment that fits and allows closure | Approval and customer communication | Only valid for the tested items and arrangement |
| Pack-out volume | Space taken by the finished bag in its shipping condition | Packaging and logistics | May differ from open or filled form |
3. Choose dimensions by program, not by label
A GWP pouch must fit a defined promotional assortment and campaign economics. A retail cosmetic case needs a useful everyday proposition and a size that looks appropriate on the shelf. A subscription-box component has to fit inside a predetermined mailer. A travel case may prioritize access, vertical bottles and organization. Start with the commercial job, then determine the construction and measurements.
| Beauty-brand program | Primary size driver | Useful format | Frequent sizing mistake |
|---|---|---|---|
| Gift with purchase | Named sample assortment, threshold value and pack-out | Slim or expandable zipper pouch | Choosing a visual size before products are frozen |
| Beauty-set packaging | Exact bottles, jars, insert and presentation order | Box pouch,clear case or fitted organizer | Ignoring the largest cap or pump |
| Retail accessory | Customer routine, shelf position and target retail price | Everyday pouch or structured case | Making the bag larger without improving organization |
| Subscription box | Mailer internal size and changing monthly contents | Compressible pouch with flexible capacity | Forgetting the bag’s folded thickness |
| Travel kit | Duration, bottle height, brush length and suitcase footprint | Box case,clamshell or hanging organizer | Testing only with empty containers |
| Professional use | Tool count, access speed, cleaning and loaded mass | Large structured case with dividers | Under-specifying handle and reinforcement |
4. Let shape determine how space is used
The same outside measurements can behave differently across shapes. A flat pouch is easy to carry and pack but does not keep bottles upright. A box pouch uses depth efficiently, although the top opening may narrow near the ends. A clamshell case exposes the entire interior but loses some volume to the zipper track, binding and lid contents.
| Construction | Capacity behavior | Best suited to | Dimension to watch |
|---|---|---|---|
| Flat zipper pouch | Low empty volume; expands around small mixed contents | GWP,handbag essentials and mailer programs | Zipper length and lower expansion |
| Box pouch | Good base utilization and moderate structure | Daily beauty kits and short bottles | Top width versus base width |
| Dome/top-handle bag | Tall center zone with reduced corner height | Skincare and travel presentation | Usable height near side walls |
| Clamshell case | Excellent visibility; lid organization can enter base space | Palettes,brushes and organized travel | Closing clearance between lid and base |
| Train case | Large structured cavity with divider options | Premium or professional programs | Loaded weight and overall carton cube |
| Hanging organizer | Capacity distributed across multiple folded panels | Travel routines and visible organization | Folded thickness and hook clearance |
5. Treat the zipper opening as a separate dimension
A bag may have enough internal space while remaining impossible to load. Purchased zipper length includes ends that may be buried in seams, while a curved path can reduce the effective entry. Define the clear opening: the usable passage between stops when the zipper is fully open.
Test the largest rigid item in the orientation a customer would naturally use. Do not force the zipper or deform a pump. Also check hand access, particularly when the product is deep and the opening is narrow.A double zipper can improve access from either direction, but it does not automatically increase the clear opening.
| Opening check | Test method | Failure it reveals |
|---|---|---|
| Largest-item entry | Insert and remove the largest rigid product without force | Adequate cavity but restricted mouth |
| Corner passage | Move the item through the curved or narrowed end zone | Zipper radius blocks an otherwise suitable item |
| Hand access | Reach the base and side pockets with typical contents loaded | Products fit but are difficult to retrieve |
| Loaded closing | Close slowly without pressing down on contents | Cap, brush or lining interferes with chain |
| Repeated operation | Open and close through the intended path several times | Excessive resistance around padding or tight curves |
6. Account for pockets, dividers and brush panels
Organization does not create capacity; it reallocates it. Pockets and dividers help products remain visible and stable, but their materials, seams and contents occupy part of the main cavity. A lid brush panel can be valuable until loaded brush heads collide with bottles below. A thick removable divider can make a box case look premium while shrinking the space available for an oversized jar.
Give every organizer a job. Match pocket dimensions to named products, set brush-loop pitch by tool diameter and leave finger clearance for removal. Where a collection must serve changing routines, use removable or adjustable components selectively rather than filling every surface with fixed compartments.
| Interior feature | Capacity benefit | Space cost or risk | Best validation |
|---|---|---|---|
| Slip pocket | Separates flat items and samples | Loaded pocket pushes into main cavity | Fill both pocket and main area |
| Elastic brush loops | Keeps tools visible and ordered | Brush heads require closing clearance | Test smallest and largest target tools |
| Mesh pocket | Visible flexible storage | Stretch may allow contents to project | Carry and closing test under load |
| Fixed divider | Stable zones for defined products | Reduces flexibility for larger items | Trial exact assortment and alternatives |
| Removable divider | Configurable organization | Attachment and panel thickness consume space | Check both installed and removed layouts |
7. Include materials and structure in every capacity decision
A thin unlined polyester pouch can flex around its contents. A PU case with foam and wipe-clean lining holds a stronger silhouette but has a smaller internal envelope than its outside measurements suggest. Binding, piping and reinforcement add local bulk, especially at rounded corners and zipper ends.
Choose material after defining use and capacity priorities.If a bag must collapse into a subscription mailer, excessive structure may be counterproductive. If it must present upright skincare at retail, some reinforcement may be worth the volume and freight trade-off. Use Best Materials for Custom Cosmetic Bags to compare the functional role of outer, lining and structural layers.
| Construction choice | Effect on internal space | Possible benefit | Development question |
|---|---|---|---|
| Thin flexible shell | Low layer loss and adaptable shape | Compact packing and lower empty volume | Does it protect and present the contents sufficiently? |
| Foam or interlining | Reduces clear dimensions and adds corner bulk | Shape,hand feel and protection | Where should structure stop before seams? |
| Wipe-clean lining | Adds a layer; excess ease can occupy cavity | Interior maintenance and appearance | How is the lining attached and controlled? |
| Piping or binding | Adds local edge thickness | Definition, durability and clean finishing | Will the selected radius remain smooth? |
| Rigid base or panels | Fixes the envelope rather than stretching | Standing stability and presentation | Is the exact internal footprint sufficient? |
8.Plan a size family instead of scaling one pattern blindly
A coordinated mini, medium and large range can strengthen merchandising, but each size should solve a different customer job. Scaling every dimension by one percentage can produce an awkward mini opening, an oversized handle or a large case with shallow pockets. Begin with contents and use case for each SKU, then maintain shared visual cues such as corner radius, material, zipper pull and logo treatment.
The center size often carries the widest everyday use, but the correct architecture depends on the brand’s assortment and channel. A beauty brand might pair a slim GWP pouch with a medium retail organizer and a large travel case. Another may need two coordinated kit sizes shaped around exact skincare collections. Read How to Design a Cosmetic Bag Collection for range planning beyond dimensions.
| Range role | Distinct customer job | Keep consistent | Re-engineer by size |
|---|---|---|---|
| Entry / mini | Handbag essentials or promotional trial | Material story, puller and brand language | Opening,logo scale and smallest seam details |
| Core / medium | Daily routine or curated set | Silhouette and colorway family | Pocket mix and carry method |
| Travel / large | Extended routine and larger bottles | Visual identity and hardware finish | Structure, handle reinforcement and dividers |
9. Balance logo scale with the finished bag
Logo size should be evaluated on the finished, loaded silhouette. Artwork that looks balanced on a large front panel can overwhelm a mini pouch. The same nominal placement from a cut edge can shift after seam allowance, padding and binding are assembled. Define artwork dimensions and position from finished seam references for each SKU.
Avoid enlarging a bag only to create a bigger branding area. If visibility is the goal, material contrast, label placement, zipper pull design or retail sleeve may deliver a stronger result without creating unused volume. Approve actual-size strike-offs on the intended substrate.
| Branding check | Review on each size | Why one setting may fail |
|---|---|---|
| Logo width/height | Actual proportion against finished front panel | A scaled bag changes available visual field |
| Placement | Distance from finished seams and curved zones | Construction shifts the apparent center |
| Application method | Detail, opacity,texture and substrate response | Small artwork may need a different technique |
| Retail orientation | How logo faces when packed, hung or displayed | Folding or sleeve can hide branding |
10. Connect bag size to retail packaging and logistics
Bag dimensions affect more than the product. Confirm how it sits in a sleeve, box, insert, mailer, inner carton and master carton. A structured bag may require stuffing to protect its shape. A flexible pouch may fold compactly, but its zipper pull or logo surface may still need protection. Trial the exact pack-out rather than calculating from an uncompressed drawing.
A small dimensional increase can change the number of units per carton and therefore freight efficiency. A larger bag may also require more fabric width, reinforcement, longer zipper chain and different packaging. Review cost implications with How Much Do Custom Cosmetic Bags Cost? and presentation decisions with Custom Cosmetic Bag Packaging for Beauty Brands.
| Pack-out level | Size input | Test | Potential consequence |
|---|---|---|---|
| Unit presentation | Bag profile filled, empty or folded | Complete sleeve/box/insert trial | Creasing,hidden logo or loose presentation |
| Subscription mailer | Folded thickness with other box contents | Close and transit-simulation review | Bulging mailer or compressed components |
| Inner pack | Nested orientation and hardware protection | Pack/unpack sequence | Surface marks or slow packing |
| Master carton | Packed unit dimensions and quantity | Full-carton arrangement | Changed carton cube and freight efficiency |
11. Validate capacity with a physical fit test
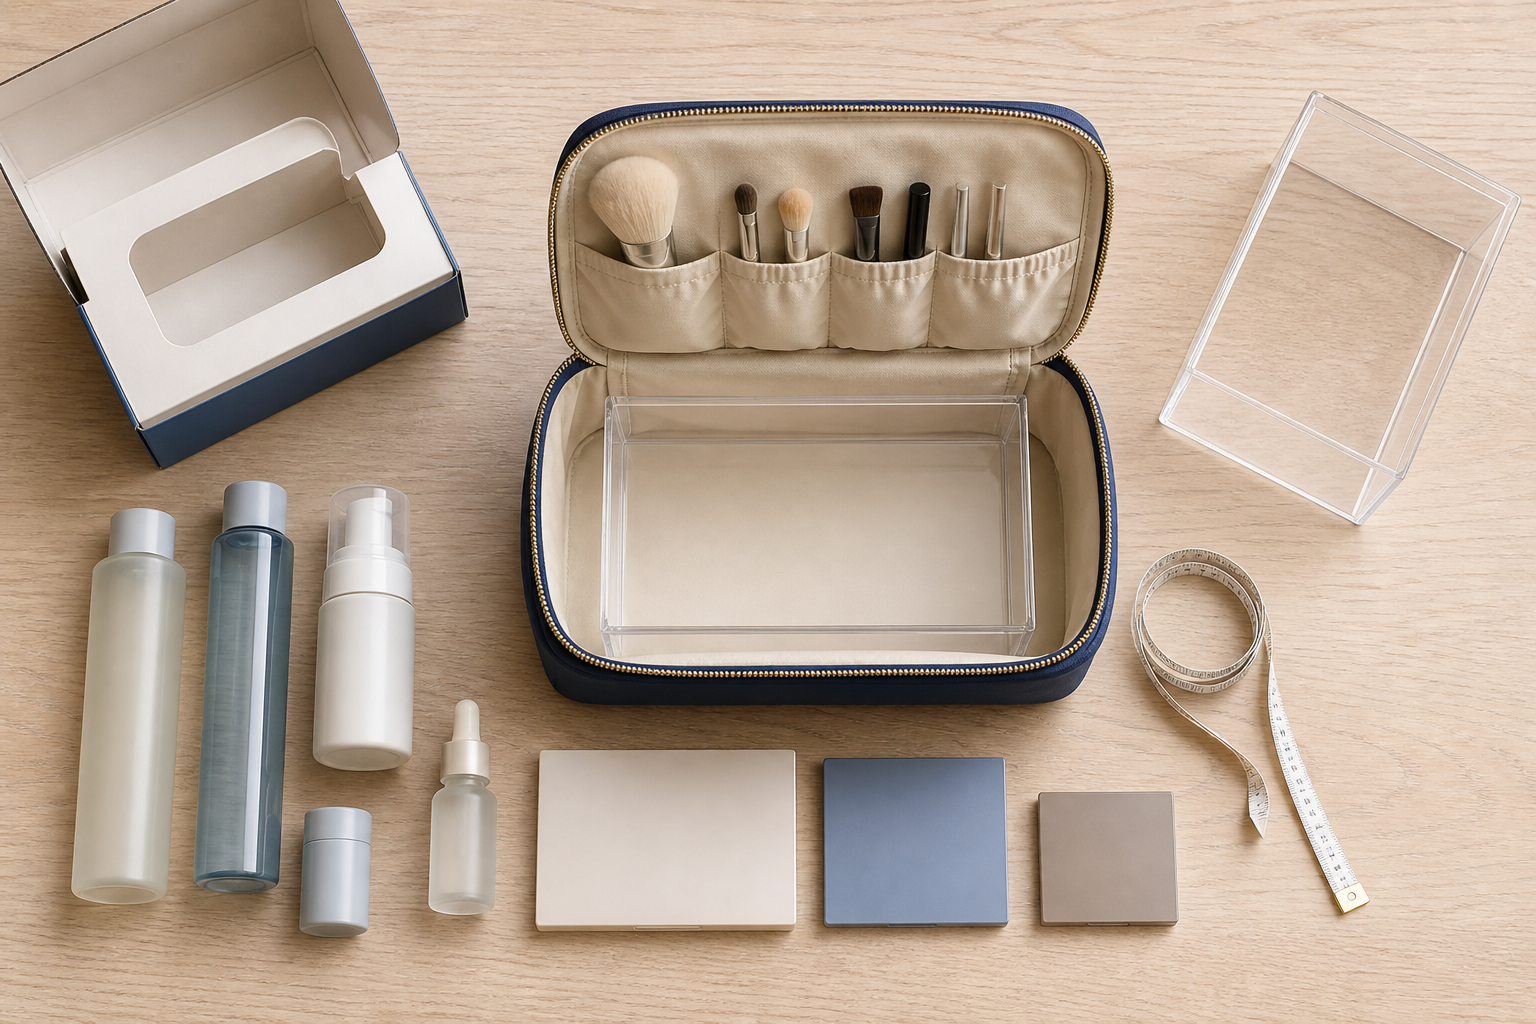
Build a simple volume mock-up before committing to a sewn sample. Card, foam board or a clear acrylic gauge can represent the usable internal envelope.Arrange the actual products, add the planned divider thickness and confirm the opening concept. The mock-up will not prove sewing or material behavior, but it can reveal a fundamentally wrong footprint early.
When the first sample arrives, test it empty, normally loaded and at the stated maximum. Insert the largest item through the opening, close the zipper without compression, lift the bag by its intended carry point and place it into retail packaging. Photograph the approved arrangement so later teams understand what the capacity claim means.
| Fit-test condition | What to do | Approval question |
|---|---|---|
| Empty | Check finished dimensions, shape,opening and internal features | Does the bag establish the intended envelope? |
| Normal load | Pack the assortment most customers are expected to carry | Is access easy and the shape balanced? |
| Maximum stated load | Add only the items included in the defined maximum claim | Can it close and carry without forcing components? |
| Partial load | Remove several products and carry the bag | Do contents move excessively or collapse the shape? |
| Retail pack | Pack the complete bag as sold or shipped | Does presentation remain correct after unpacking? |
The Custom Cosmetic Bag Sample Development Process explains how to record revisions and move from the first prototype to a production reference.
12. Put dimensions and capacity evidence into the tech pack
Translate the approved design into a points-of-measure chart. Include finished width, height, depth, clear opening, internal pocket dimensions, brush-loop pitch, handle drop and logo placement where relevant. Each value needs a diagram, unit, measurement method and tolerance. State whether the bag is measured empty, closed, naturally placed or flattened.
Add a capacity page showing the named contents and arrangement. This prevents an unlabeled photograph from becoming an ambiguous promise. The How to Prepare a Cosmetic Bag Tech Pack provides the full structure for drawings, POMs, material layers, zippers, interiors, packaging and approvals.
| Specification item | Required record | Production use |
|---|---|---|
| Finished dimensions | POM code, diagram, target, method and tolerance | Pattern, sample and inspection comparison |
| Clear opening | Usable passage and largest-item reference | Zipper path and access validation |
| Internal envelope | Clear dimensions after all structural layers | Capacity and divider planning |
| Content layout | Named items, dimensions,quantity and orientation | Sample fit test and claim control |
| Packed dimensions | Unit pack profile and carton arrangement | Packaging, freight and warehouse planning |
13. Inspect the dimensions that affect function
Not every measurement needs the same tolerance or inspection priority. Clear opening, base footprint and retail pack dimensions may be critical for a fitted set. A soft upper panel may naturally vary more without affecting use. Agree on measurement methods and realistic tolerances before production; otherwise the same unit may pass one inspector and fail another because it was handled differently.
Quality review should connect dimensions to function. A bag may be within overall width tolerance but have a misplaced divider that blocks the largest bottle. Check material layers, zipper operation, pocket placement, loaded shape and packing alongside the POM chart. See the Cosmetic Bag Quality Control Checklist for a wider inspection framework.
| Control | Why it matters | Evidence |
|---|---|---|
| Overall POMs | Shape, listing accuracy and retail fit | Recorded measurements using approved setup |
| Clear opening | Largest-item access | Measurement plus insertion test |
| Pocket/divider position | Usable internal arrangement | POM and loaded comparison |
| Loaded closure | Zipper,lining and content clearance | Defined assortment trial |
| Pack-out profile | Presentation and carton efficiency | Approved packed reference |
Common cosmetic bag sizing mistakes
- Starting with a generic size label. Replace “medium” with finished dimensions, a clear opening and actual contents.
- Using cosmetic fill volume as package dimensions. Measure the complete bottle, cap and pump.
- Calculating liters and calling them usable capacity. Treat geometric volume only as an early comparison tool.
- Ignoring the zipper path. Prove that the largest rigid product can enter and exit naturally.
- Adding organizers after fixing the outside size. Pockets, foam and dividers consume the main cavity.
- Scaling one pattern into three sizes. Recheck opening, handle, logo, pocket and reinforcement for every SKU.
- Approving the empty sample. Test normal load, maximum stated load, partial load and complete pack-out.
- Forgetting freight and packaging. Review the unit pack and carton before final approval.
Why choose LUCKYSTAR for cosmetic bag size development?
A capable manufacturer should challenge an incomplete size brief before cutting material. LUCKYSTAR can review the intended assortment, format, dimensions, opening, internal organization, material layers, branding and packaging as one connected product. That review helps reveal conflicts such as a bottle that fits the cavity but not the opening, or a brush panel that occupies the closure zone.
Brands can begin with a detailed specification, a physical reference, an assortment of beauty products or an early concept. Depending on originality, budget and timing, the project may adapt an available construction or develop a custom OEM pattern. Browse our full Product Range and use How to Choose a Cosmetic Bag Manufacturer to evaluate the development evidence that matters.
LUCKYSTAR can also connect the size decision to sampling, logo trials, material sourcing, quality references and pack-out. That continuity is important because changing one dimension can affect zipper length, pattern yield, reinforcement, unit packaging, carton quantity, cost and lead time. The Custom Bag Manufacturer Guide explains how these decisions fit into a wider OEM/ODM sourcing process, while Cosmetic Bag MOQ and Production Time covers planning considerations.
Beauty-brand size brief checklist
| Commercial brief | Product fit | Manufacturing and pack-out |
|---|---|---|
| Program, customer and sales channel | Exact contents with full dimensions | Structure, materials and lining |
| Quantity and color/SKU breakdown | Normal and maximum loaded arrangement | Pockets, dividers and zipper path |
| Target launch and destination | Finished outside and clear inside targets | Logo,labels and retail packaging |
| Target price position | Largest-item entry and closing clearance | Packed dimensions and carton requirement |
| Fixed decisions versus open options | Total loaded weight and carry method | Sample tests, tolerances and approvals |
Frequently asked questions
What is the most common cosmetic bag size?
There is no universal most-common specification. Many everyday bags sit within a medium planning range, but the correct dimensions depend on construction, contents, opening and sales program. Define the use and test the actual products rather than selecting a supplier’s “medium” label.
How do I calculate cosmetic bag capacity?
Length × height × depth can provide a simplified geometric volume for a rectangular concept. It does not account for rounded corners, taper, padding, lining, pockets or access. Use it to compare early options, then validate usable capacity with a mock-up and sewn sample.
Should dimensions be listed length × height × depth?
That order is common, but conventions vary. Label every axis on a drawing instead of relying on order alone.Include the measurement setup and whether piping, handles or other projections are excluded.
How much clearance should I add around bottles?
There is no single allowance for every design. It depends on bottle geometry, material flexibility, padding, pockets, zipper opening and how easily the customer should remove products. Build a content layout, add construction layers and approve the result on a physical sample.
Is a bigger cosmetic bag always more useful?
No. Excess space can allow products to move, increase material and freight, weaken shelf presentation or make the bag inconvenient to carry. Better organization and a wider opening may improve usability more than simply increasing outside dimensions.
Can one cosmetic bag fit several beauty sets?
Possibly, especially with flexible material or adjustable dividers. Test the largest and smallest intended assortments. A bag that fits the largest set may look empty or allow excessive movement with the smallest.
What information should I send for a size recommendation?
Send the program type, product dimensions or physical samples, quantities, preferred orientation, structure, material direction, pockets, branding, retail packaging, target price position, destination and required timing.
Choose dimensions that work after the bag is loaded
The best size is not the largest space a budget can buy. It is the smallest practical envelope that gives the intended assortment comfortable access, useful organization, stable carrying and appropriate presentation.When the brand, designer and manufacturer evaluate contents, construction and pack-out together, the resulting dimensions become easier to sample, explain and control.
Review LUCKYSTAR’s custom cosmetic bag manufacturing options or send us your beauty assortment for a size, capacity and quotation review.

Discuss the size and fit of your cosmetic bag
You do not need a complete specification to start a conversation. Include these details in your message:
- Items to fit, including their dimensions if known.
- Preferred bag format and approximate quantity.
- Destination and required arrival date.
Discuss the size and fit of your cosmetic bag using the contact form, or Email a project brief with this article already referenced. The email link opens a draft in your email app; you can add artwork or a specification before sending.
MOQ, pricing, sample arrangements and delivery terms are subject to specification and written confirmation.