A cosmetic bag tech pack should answer the questions a pattern maker, material buyer, sample room, logo supplier, sewing line, quality inspector and packing team will ask. A mood board may communicate style, but it does not define the clear zipper opening, the lining allowance behind a curved corner or the position of an elastic brush slot after the bag is assembled.
Planning an order? Request a review of your cosmetic bag brief. Start with the details you know; undecided specifications can be discussed.
That distinction matters because cosmetic bags combine a small exterior with a surprisingly dense construction. Outer material, backing, foam, lining, binding, pockets, zippers and hardware meet inside narrow seam allowances. One unclear callout can change the silhouette, usable capacity or cost. The purpose of a cosmetic bag tech pack is therefore not to create an impressive PDF. It is to give every team one controlled, measurable product definition.
This guide focuses on building a custom cosmetic bag specification that a factory can use. The same document may also be called a cosmetic bag technical pack. For a cross-category framework, see How to Prepare a Custom Bag Tech Pack.To compare communication and development capability before sharing the file, use How to Choose a Cosmetic Bag Manufacturer. You can also review LUCKYSTAR’s custom cosmetic bags and the broader Custom Bag Manufacturer Guide.
Quick answer: what belongs in a cosmetic bag tech pack?
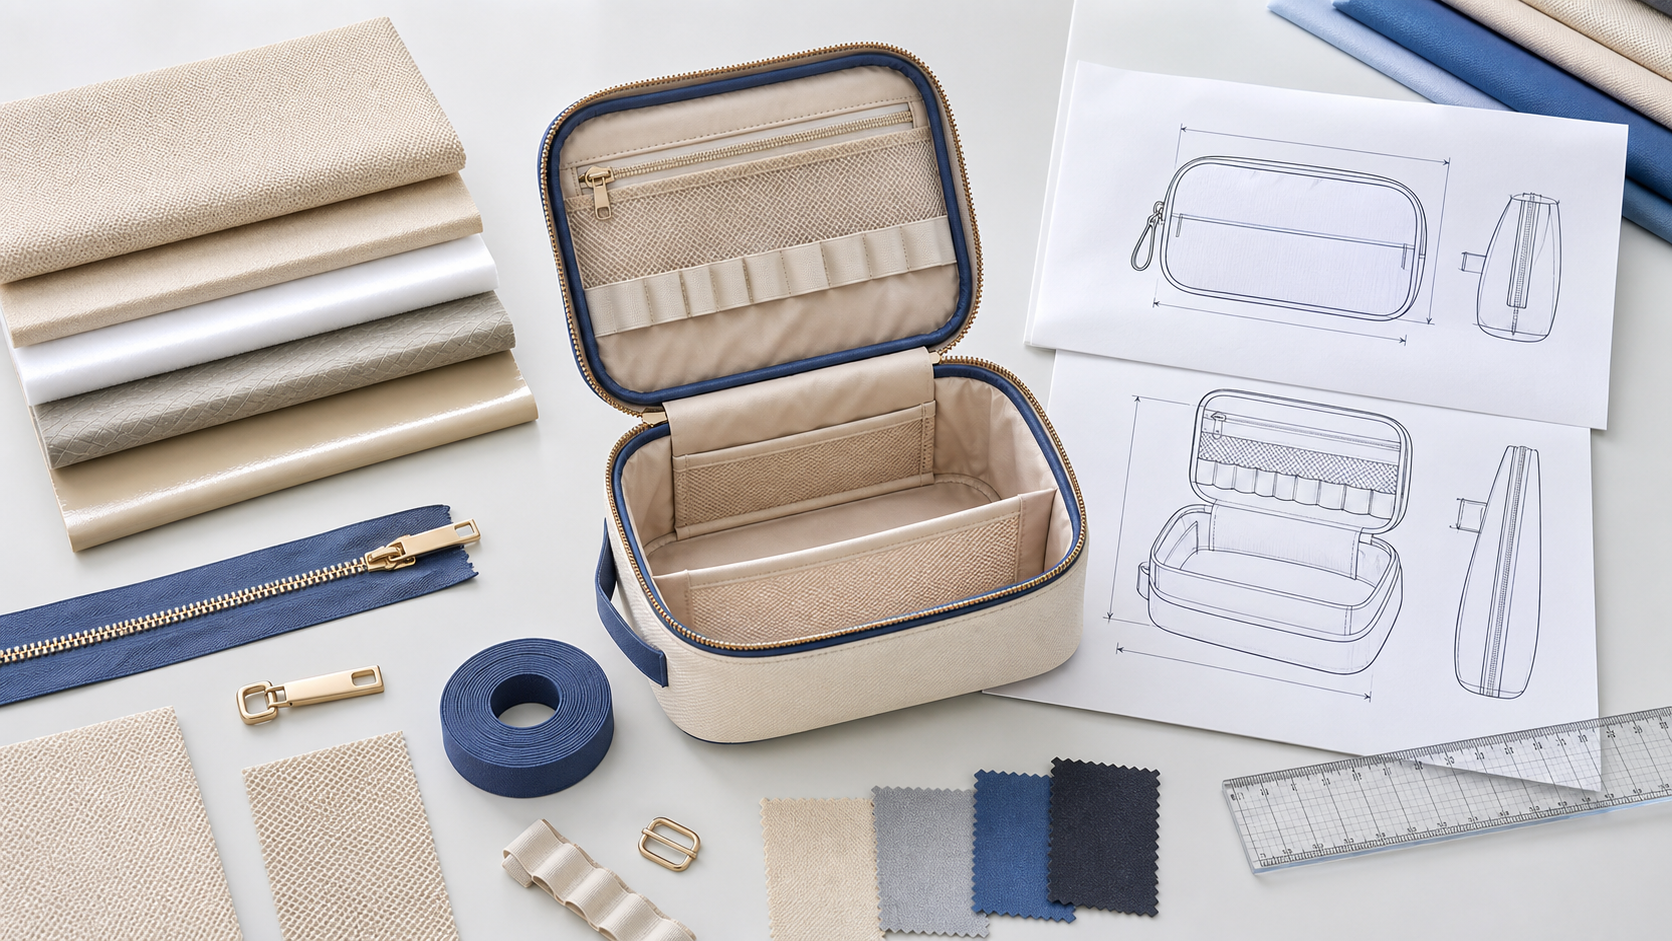
A factory-ready pack normally includes a cover and revision record, technical flats, points of measure, a bill of materials, a layer schedule, construction callouts, zipper and hardware specifications, interior organization, artwork, colors, labels, packaging, quality criteria and approval references. It should also state which details are fixed, which are targets and which remain open to manufacturer recommendation.
| Tech-pack section | Minimum useful information | Question it prevents |
|---|---|---|
| Document control | Style code, version, date, owner and change log | Which file is current? |
| Technical views | Front, back, side, base, top, open interior and key sections | What is hidden behind the exterior view? |
| Measurements | POM codes, diagram, target, unit,method and tolerance | Where and how should the bag be measured? |
| BOM and layers | Every material, component, specification, color and placement | Which foam, lining or zipper was assumed? |
| Construction | Seams, binding, reinforcement, stitch and assembly details | How should the parts be joined? |
| Branding and color | Artwork file, size, position, method and SKU matrix | Which logo goes on which colorway? |
| Packing and quality | Labels, pack-out, tests, visual limits and references | What does an acceptable delivered unit look like? |
1.Begin with document control, not drawings
Assign a unique style code before sending the pack. Put the code, product name, season or program, version number, issue date and document owner on the cover. A date alone is not reliable version control: two departments can export different files on the same day. Use a clear sequence such as V0.1 for a working draft, V1.0 for the first sample issue and V2.0 for a released production specification.
Maintain one change log near the front. Each row should identify the affected page or feature, the previous condition, the requested condition, who approved it and the effective sample version. Do not distribute isolated replacement pages without changing the pack version. A supplier should be able to confirm the exact file before materials are ordered or patterns are changed.
| Control field | Good entry | Risky entry |
|---|---|---|
| Style identity | CB-2608-01, structured travel vanity case | Blue makeup bag |
| Revision | V1.3 issued for second prototype | Latest |
| Change entry | POM D opening increased; pocket P2 moved 12 mm from side seam | Dimensions updated |
| Approval status | Approved outer color; zipper pull finish awaiting strike-off | Mostly approved |
| File ownership | One named brand contact releases revisions | Comments arrive separately from several teams |
2. Define the product job and its real contents
Before drawing a shape, state whether the bag is a retail SKU, gift-with-purchase pouch, travel organizer, subscription-box component, professional makeup case or a package for a beauty set. Note the sales market, expected user, target price position, intended service conditions and the dates that matter. These facts help the manufacturer interpret which decisions affect value and which may be simplified.
List the real products the bag is expected to hold. Include the largest bottle diameter and height, jar width, brush length, palette thickness and total loaded weight. If proprietary products cannot be shared, provide dimensioned dummies. The contents should drive the bag, not be squeezed into a shape chosen only from a rendering.
| Use input | What to record | Tech-pack consequence |
|---|---|---|
| Largest rigid item | Overall dimensions, orientation and removal direction | Clear opening and corner geometry |
| Long tools | Brush or pencil length, head width and quantity | Elastic-slot pitch, pocket height and lid clearance |
| Loaded mass | Expected typical and maximum weight | Handle,seam and reinforcement requirements |
| Liquids or powders | Likely exposure, cleaning method and leakage concern | Lining, seam, coating and test choices |
| Retail presentation | Filled, empty, folded, boxed or hung | Structure, logo orientation and pack-out dimensions |
3. Draw every view the factory needs to build the bag
Technical flats are orthographic instructions, not lifestyle illustrations. Include front, back, both sides when asymmetric, top, base and the fully open interior. Use an exploded view when the lining, foam or divider cannot be understood from a flat. Add cross-sections through padded walls, bound edges, piping, the zipper track and reinforced attachments.
Number features consistently. Pocket P1 in the drawing should be Pocket P1 in the BOM, measurement chart and comments. Show the direction in which a zipper opens, where its pull rests when closed and whether a two-way opening is required. Mark symmetry rather than expecting the pattern maker to infer it.
| View | What it should reveal | Common omission |
|---|---|---|
| Front/back | Silhouette, panel breaks, logo, handle tabs and visible stitching | Different back construction shown as identical |
| Side/base | Gusset, taper, base panel, piping and seam position | Depth given without explaining where it is measured |
| Top/closed | Zipper path, pull direction,handle and end treatment | Zipper length confused with clear opening |
| Open interior | Lining, pocket faces, dividers, elastics and attachment points | Interior described only in prose |
| Section/exploded | Layer order, seam allowance, binding, foam stop and reinforcement | Materials listed without showing placement |
4. Build a cosmetic-bag-specific points-of-measure chart
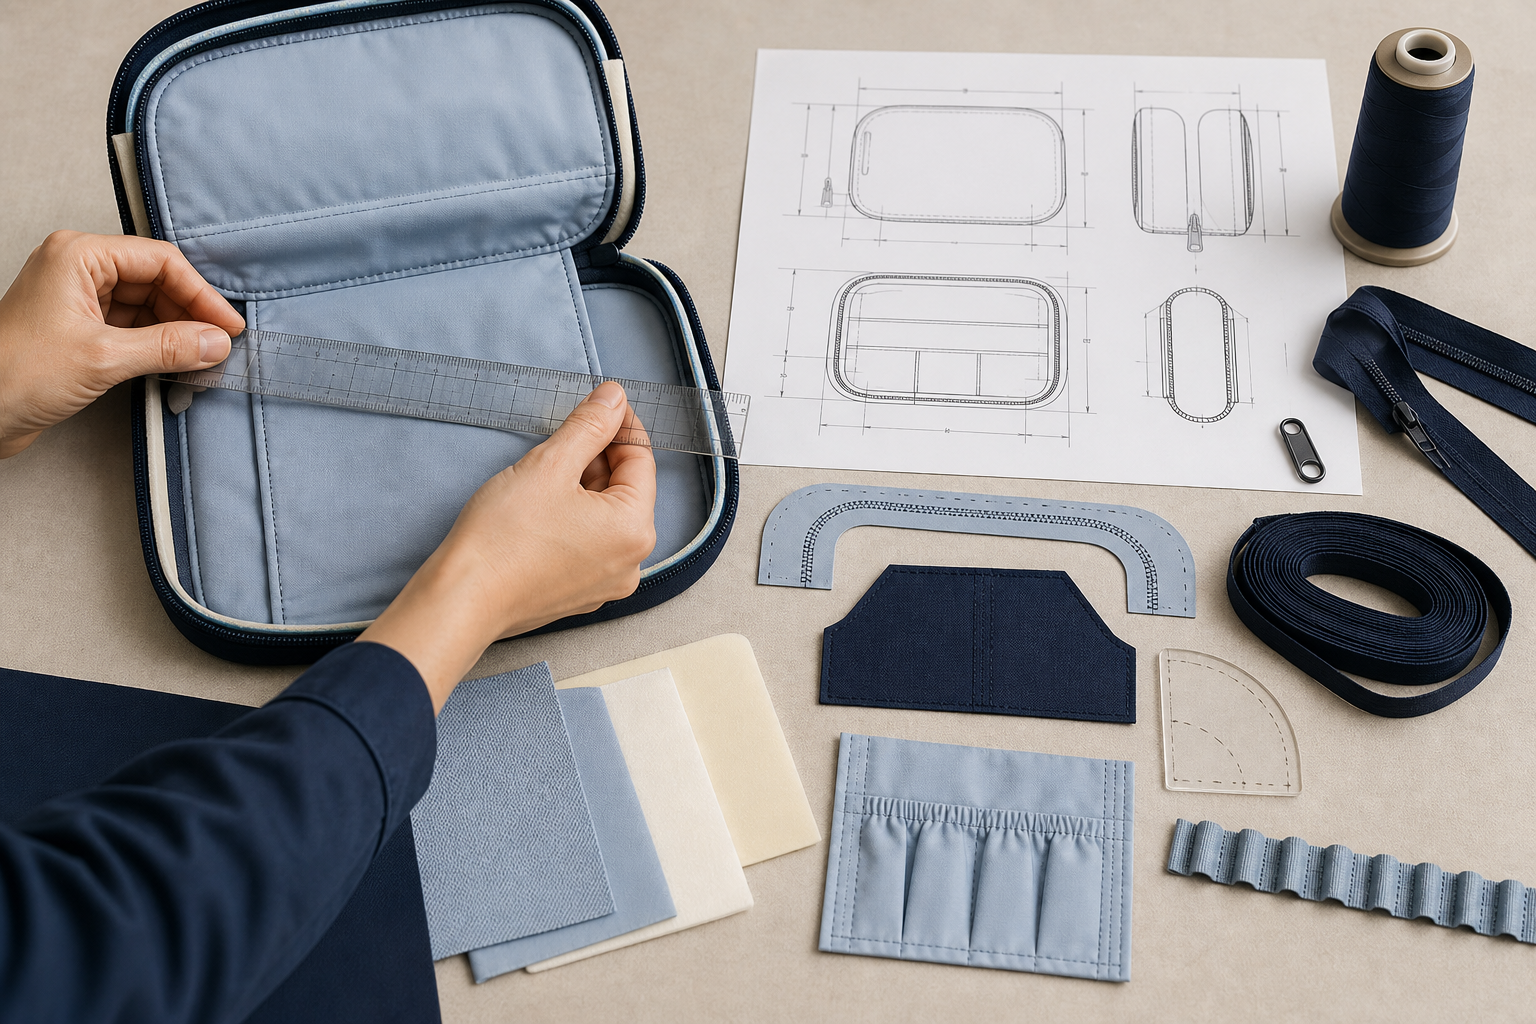
A measurement value is incomplete without a measurement method. Draw POM letters on a simple diagram and repeat those letters in a table. State whether the bag is measured empty, lightly filled or flattened; whether the zipper is open or closed; and whether piping, handles or pullers are included. Use one unit throughout the master file and show tolerances separately from targets.
For soft bags, a measurement can vary with handling. Define a repeatable setup: close the zipper, place the bag on a flat surface without stretching, smooth only major wrinkles and measure between specified seam intersections. Use tighter tolerances only where function or pack-out requires them.Unnecessarily tight limits can add inspection disputes without improving the customer experience.
| Example POM | Measurement method | Why it matters |
|---|---|---|
| A. Finished width | Side seam to side seam at the stated horizontal line | Overall proportion and retail pack fit |
| B.Finished height | Base reference to top edge, excluding handle | Content height and silhouette |
| C. Finished depth | Across base or gusset at the named point | Capacity and standing behavior |
| D. Clear opening | Usable passage between stops with zipper fully open | Whether rigid products can enter |
| E. Pocket opening | Inside edge to inside edge after assembly | Access and product retention |
| F.Handle drop | Top edge to underside center of the raised handle | Carry comfort and carton profile |
| G. Logo placement | From finished seam references to artwork boundary | Consistent appearance after sewing |
5. Specify usable space, not just outside dimensions
A padded cosmetic case may measure correctly outside while losing significant volume to foam, binding, corner radii and internal dividers. Create a separate capacity page for the usable internal zone. Show the intended product arrangement and any “keep clear” area needed for the zipper or lid. For a clamshell case, confirm whether brushes loaded in the lid touch bottles in the base when closed.
Clear opening deserves its own POM. It is not the purchased zipper-chain length, which includes ends hidden inside seams. If the largest jar is 72 mm wide, state the minimum opening it must pass through and the orientation used in the test. When practical, attach a photograph of the real product or a dimensioned dummy completing the insertion test.
| Capacity control | Specify | Review on the sample |
|---|---|---|
| Internal envelope | Usable width, height and depth after all layers | Compare with a physical gauge or product layout |
| Opening clearance | Minimum clear distance and largest item | Insert and remove without forcing the chain |
| Closure clearance | No-go zone below the zipper or lid | Close slowly while fully loaded |
| Pocket capacity | Product count,dimensions and orientation | Check retention, access and distortion |
| Packed profile | Allowed folded or filled dimensions | Trial the complete retail and carton pack-out |
6. Write the BOM as a traceable recipe
The bill of materials should list every physical input, including items the customer does not see. Separate the outer shell, lining, foam, backing, reinforcement board, zipper chain, slider, puller, piping cord, binding, mesh, elastic, thread, labels and packaging. “PU outside, polyester inside” leaves too much room for different thicknesses, backings, finishes and hand feel.
Give each component a code, placement, composition or material family, construction specification, weight or thickness where relevant, color reference, finish, supplier reference if nominated and approval status. If alternatives are allowed, describe the performance target and require approval before substitution. For material selection principles, see Best Materials for Custom Cosmetic Bags.
| BOM line | Useful specification fields | Approval evidence |
|---|---|---|
| Outer shell | Composition, construction, weight/thickness, backing, surface and color | Labeled production-quality swatch |
| Lining | Fiber, weave, coating, color, print and cleanability direction | Swatch plus finished-bag review |
| Structure | Foam/interlining type, thickness,density or recovery and placement | Layer sample and approved silhouette |
| Zipper system | Chain type/size, tape, slider, puller, finish, direction and quantity | Component set and assembled operation |
| Interior trims | Mesh, elastic, binding and reinforcement dimensions | Retention trial and construction sample |
| Brand/pack items | Labels, tags, insert, unit protection, retail pack and carton | Artwork plus complete pack trial |
7. Add a layer schedule for every panel
A BOM says what exists; a layer schedule says where it goes and in what order. For each major panel, show the stack from outside to inside. Identify where foam stops before a seam, whether backing is fused or floating, which layer receives the logo and whether reinforcement is local or full-panel.
The lining pattern needs particular attention.Too little ease can pull the shell inward and reduce capacity. Too much uncontrolled ease can billow, catch in the zipper or hide small products. State whether the lining is loose, drop-in, bound with the shell or turned through an opening, and mark where it is anchored.
| Panel | Example outside-to-inside stack | Critical callout |
|---|---|---|
| Main body | Outer / backing / foam / lining | Foam stop and seam-bulk treatment |
| Base | Outer / reinforcement / foam / wipe-clean lining | Standing requirement and allowed stiffness |
| Lid | Outer / backing / foam / pocket assembly / lining | Loaded brush clearance and hinge flex |
| Pocket face / elastic or zipper / backing where needed | Finished opening, ease and attachment sequence | |
| Handle tab | Outer wrap / webbing or board reinforcement / body layers | Reinforcement footprint and stitch box |
8. Detail the zipper, hardware and opening path
“Gold zipper” is an appearance direction, not a component specification. Define the chain type and size, tape material and color, slider type, puller design, finish, quantity, opening direction, stops and end treatment. If the puller is custom, attach a dimensioned drawing and state whether the logo is molded, engraved, debossed or printed.
Show the zipper path on the pattern and finished bag. Tight radii can increase operating resistance, particularly when padding and binding crowd the chain. State whether the zipper is expected to operate smoothly with the intended contents loaded. If a waterproof claim is being considered, distinguish a water-resistant zipper appearance from a tested bag construction; use Waterproof Cosmetic Bag Manufacturing to define the requirement more carefully.
| Zipper/hardware detail | What to specify | Sample check |
|---|---|---|
| Chain and tape | Type, nominal size, tape width/material, color and length basis | Appearance, seam clearance and curve behavior |
| Slider and puller | Compatible type, quantity, shape, dimensions, finish and logo | Grip, noise, rotation, scratching and pull force |
| Opening path | Start/stop positions, direction,radius and clear opening | Operation empty and with intended load |
| Metal fittings | Dimensions, base material, finish, quantity and attachment | Alignment, movement and surrounding reinforcement |
| Finish reference | Approved physical chip or component, not a screen image alone | Color under agreed lighting and compatibility across parts |
9. Engineer pockets, dividers and brush holders
Every interior feature needs finished dimensions, placement from stable seam references, material, edge finish, ease or stretch and attachment method. A pocket height without its opening width is incomplete. A brush strip without elastic width, finished loop pitch and target tool diameter leaves the sample maker to guess.
Show how internal components behave when the bag is full. A center divider may improve organization but block a large jar. Mesh can show contents yet snag a cap. Elastic retention changes after repeated stretching. Decide whether dividers are fixed, removable or adjustable and how hook-and-loop, snaps or tabs are oriented.
| Interior feature | Required callouts | Functional review |
|---|---|---|
| Slip pocket | Finished size, opening, ease, edge and position | Access, retention and effect on lining |
| Zipper pocket | Bag depth, zipper length, pull direction and backing | Contents do not collide with outer chain |
| Mesh panel | Mesh type, stretch direction, binding and seam | No snagging, excessive stretch or raw edge |
| Brush loops | Elastic width,loop pitch, count and target tool diameters | Secure hold without damaging handles |
| Divider | Thickness, finish, position and removable attachment | Stable under load and easy to reconfigure |
10. Translate construction into unambiguous callouts
Construction pages connect the drawing to the assembly route. Identify seam type, seam allowance, visible stitch lines, stitch density where critical, thread color, binding width, piping diameter, reinforcement and any edge treatment. Mark the start and end points of topstitching. If appearance depends on a specific assembly result but not a mandatory method, describe the result and invite the manufacturer to propose the most stable route.
Use enlarged detail bubbles around corners, zipper ends, handle tabs and interior intersections. Those zones combine multiple layers and are frequent sources of bulk, twisting or exposed raw edges. If a reference sample is supplied, label which features are to be copied and which must change. Never write “same as sample” without linking the physical sample to a code and date.
| Construction zone | Call out | Approval focus |
|---|---|---|
| Bound edge | Finished width, material, overlap/join and visible side | Even width, covered raw edge and neat curve |
| Piping | Cord diameter, cover material, seam position and join | Consistent profile and smooth corners |
| Handle attachment | Tab dimensions, reinforcement and stitch pattern | Alignment and performance under intended load |
| Zipper end | Stop,garage/tab, folding and lining intersection | No exposed teeth, bulk or puller obstruction |
| Turning/closing point | Location and closing method in the lining or seam | Clean finish without a visible weak spot |
11. Control artwork, colorways and the SKU matrix
Attach vector artwork and name the exact file inside the pack. State finished logo width and height, application method, colors, orientation, safe area and placement from finished seams. A logo positioned on a flat panel before sewing can move visually after padding and binding are added, so placement should reference the finished bag.
Create a colorway table with one row per SKU. Connect outer, lining, zipper tape, puller finish, binding, thread, logo and label to that SKU. This prevents a “navy bag” from inheriting the zipper or lining intended for another version. If the collection includes related styles, use How to Design a Cosmetic Bag Collection to decide which components should be shared.
| SKU matrix field | Example decision | Reference type |
|---|---|---|
| Outer and lining | Warm ivory shell / muted blue lining | Approved physical swatches and supplier codes |
| Zipper and binding | Tone-on-tone tape / navy binding | Component set |
| Hardware | Brushed warm-metal finish | Approved finish chip or actual parts |
| Logo | One-color print at stated finished dimensions | Vector file and strike-off |
| Labels/pack | SKU label, insert and retail sleeve matched to colorway | Approved artwork and pack sample |
12. Include packaging, labeling and carton data
The product is not fully specified until its delivered condition is defined. Show whether the bag is filled with tissue or a form, zipped, folded, placed in unit protection, boxed or sleeved. Identify every label, insert, barcode, warning and carton mark by artwork filename and position. Record units per inner and master carton, carton orientation and any protection needed for hardware or logo surfaces.
Trial the pack-out on a finished sample. A technically correct bag can arrive creased if reinforcement is compressed in a small carton. Metal pullers can mark coated material during transport. For a beauty-brand presentation checklist, read Custom Cosmetic Bag Packaging for Beauty Brands.
| Pack level | Specification | Verification |
|---|---|---|
| Bag preparation | Shape/fold, zipper position, straps, stuffing and surface protection | Approved sequence photos |
| Unit pack | Material, size/thickness, closure, ventilation and labels | Complete packed sample |
| Retail presentation | Insert, sleeve, box, hangtag, barcode and orientation | Artwork, scan and shelf-facing review |
| Master carton | Quantity, arrangement,carton dimensions, marks and protection | Pack-out trial and shipment data |
| Mixed SKUs | Whether allowed, assortment ratio and identification | Carton label matches physical contents |
13. Define quality criteria and approval references
A tech pack should state how important characteristics will be judged, but it does not replace an inspection plan. List critical dimensions and tolerances, visual workmanship expectations, functional checks, applicable tests and the approved physical references. Separate mandatory product requirements from preferences.
If performance or regulatory requirements apply, identify the target market, product context and test method at quotation stage. Do not use vague phrases such as “high quality,” “eco-friendly” or “waterproof” as substitutes for measurable evidence. The Cosmetic Bag Quality Control Checklist provides a separate framework for incoming, in-line and final inspection.
| Characteristic | Governing reference | Possible verification |
|---|---|---|
| Dimensions | POM chart, setup and tolerance | Measured units from agreed sample |
| Materials/colors | BOM plus approved physical swatches/components | Incoming identity, lot and appearance review |
| Logo | Artwork, placement diagram and approved strike-off | First-piece and production comparison |
| Function | Defined load, zipper,retention or cleaning procedure | Recorded test on sample and/or production units |
| Workmanship | Detail drawings, visual limit samples and defect rules | In-line and final visual inspection |
| Packing | Pack instructions and approved packed reference | SKU, label, quantity and carton check |
14. Manage samples and revisions without losing decisions
Issue the first pack with an open-issue list. When the sample arrives, review measurements, capacity, opening, lining, construction, materials, branding and pack-out against the same version. Mark photographs, give every comment an ID and consolidate feedback into one release. Avoid parallel email instructions that never reach the master specification.
When a change is approved, update every affected page. Increasing foam thickness may alter finished measurements, zipper sewing, corner bulk, usable space, carton size and price. Changing one BOM cell is not enough. The complete physical review sequence is covered in the Custom Cosmetic Bag Sample Development Process.
| Revision step | Brand action | Manufacturer confirmation |
|---|---|---|
| Issue | Release one dated/versioned file and list open decisions | Acknowledge file identity and feasibility questions |
| Sample review | Measure, load, operate, photograph and record comments | Respond to each numbered comment |
| Revision | Update drawings, POM, BOM, artwork and log together | State completed,pending and proposed alternatives |
| Approval | Identify exact sample, strike-offs and documents approved | Retain matching factory references |
| Bulk handoff | Freeze production pack and later changes through written control | Connect purchasing, line setup, QC and packing to that version |
Common cosmetic bag tech-pack mistakes
- Showing only the closed exterior. Add the open interior, base, zipper ends and layer sections.
- Confusing outside size with capacity. Define internal envelope, clear opening and the actual loaded arrangement.
- Naming materials too broadly. Record construction, weight/thickness, backing, finish, color and placement.
- Ignoring lining behavior. Specify layer order, ease, attachment and its relationship to pockets and the zipper.
- Approving color from a monitor. Use physical references for textiles and hardware finishes when appearance is critical.
- Sending comments through several channels. Consolidate, number and close them in the master revision.
- Leaving packaging until after approval. Trial the finished bag in its unit and carton pack before release.
- Writing unrealistic tolerances. Match control limits to function, process capability and the actual measurement method.
Why prepare your tech pack with LUCKYSTAR?
A useful manufacturing partner does more than accept a file. The development team should identify missing measurements, reveal conflicting requirements and show how a material or construction choice affects sample outcome, cost and production practicality. LUCKYSTAR can review a complete tech pack, a rough brief or a reference sample and organize the open decisions into a clearer development route.
For cosmetic bags, that review can connect the intended contents with the opening, layer schedule, lining, pockets, zipper, logo method and pack-out. It also helps distinguish a design preference from a measurable production requirement. Explore our wider Product Range or use How to Choose a Cosmetic Bag Manufacturer as a supplier-screening framework.
The right route depends on originality and readiness. A brand may adapt an existing construction, develop a new OEM pattern or begin with an ODM direction. LUCKYSTAR’s role is to make the selected route explicit, sample the unresolved details and link the approved outcome to production documentation.Read the Custom Bag Manufacturer Guide for the broader sourcing process and Custom Bag Manufacturing Process: From Design to Delivery for the production sequence.
Factory-ready handoff checklist
| Before requesting a quote | Before sampling | Before bulk release |
|---|---|---|
| Use, market and intended contents defined | Technical views and POM chart issued | Final sample and pack version identified |
| Quantity/color breakdown and target timing stated | BOM, layer schedule and components traceable | Materials, colors, logo and trims approved |
| Fixed requirements separated from open choices | Artwork,interior and construction details complete | Comments closed and POM results accepted |
| Packing and destination context shared | Tests and review procedures agreed | Packing trial, QC references and change control frozen |
Send the current pack, target quantity, color breakdown, intended contents, destination and required delivery window when asking for pricing. If some fields are still open, label them rather than filling the page with guesses. Review cost drivers in How Much Do Custom Cosmetic Bags Cost? and planning assumptions in Cosmetic Bag MOQ and Production Time.
Frequently asked questions
Do I need a complete tech pack before contacting a manufacturer?
No. A clear brief, dimensioned sketch or reference sample can start a feasibility discussion. Mark missing details as open and ask for recommendations. Before bulk production, however, the approved product should be consolidated into controlled specifications and physical references.
Can I use a photo of another cosmetic bag?
A photo can explain direction but cannot define hidden layers, exact dimensions, ownership of design details or construction. State what you like, what must change and what is unknown. Build an original, measurable specification rather than asking the factory to infer an entire product from images.
How many pages should a cosmetic bag tech pack have?
There is no ideal page count. A simple flat pouch may need a concise pack, while a structured case with dividers, custom hardware and retail packaging needs more detail. Include every decision required to quote, sample, produce and inspect the specific style; remove pages that add no usable information.
Should tolerances be the same for every measurement?
No. Tolerances should reflect function, material behavior, measurement repeatability and process capability. Clear opening or pack-out dimensions may need closer control than a noncritical soft-panel measurement. Discuss proposed limits with the manufacturer before release.
Is the approved sample enough for mass production?
The sample is an important visual and functional reference, but it should work with the frozen tech pack, approved materials, artwork, packing instructions and quality criteria. Bulk inspection remains necessary because one sample cannot represent every production unit.
What should I send LUCKYSTAR for an initial review?
Send the latest file or sketch, intended contents, quantity by color, desired materials, branding files, packaging direction, target market, destination and required timing.A reference bag or clear photos are useful when differences are annotated.
Turn the specification into a manufacturable cosmetic bag
A strong tech pack does not eliminate every development question; it makes those questions visible, traceable and easier to resolve. When measurements, layers, components, interior function and approvals point to the same product, sampling becomes more informative and production teams have a dependable reference.
Browse LUCKYSTAR’s custom cosmetic bag manufacturing options or contact our team for a cosmetic bag tech-pack review and quotation.

Request a review of your cosmetic bag brief
You do not need a complete specification to start a conversation. Include these details in your message:
- Current drawing or specification version, if available.
- Intended contents and quantity by color.
- Open material, construction or packaging decisions.
Request a review of your cosmetic bag brief using the contact form, or Email a project brief with this article already referenced. The email link opens a draft in your email app; you can add artwork or a specification before sending.
MOQ, pricing, sample arrangements and delivery terms are subject to specification and written confirmation.