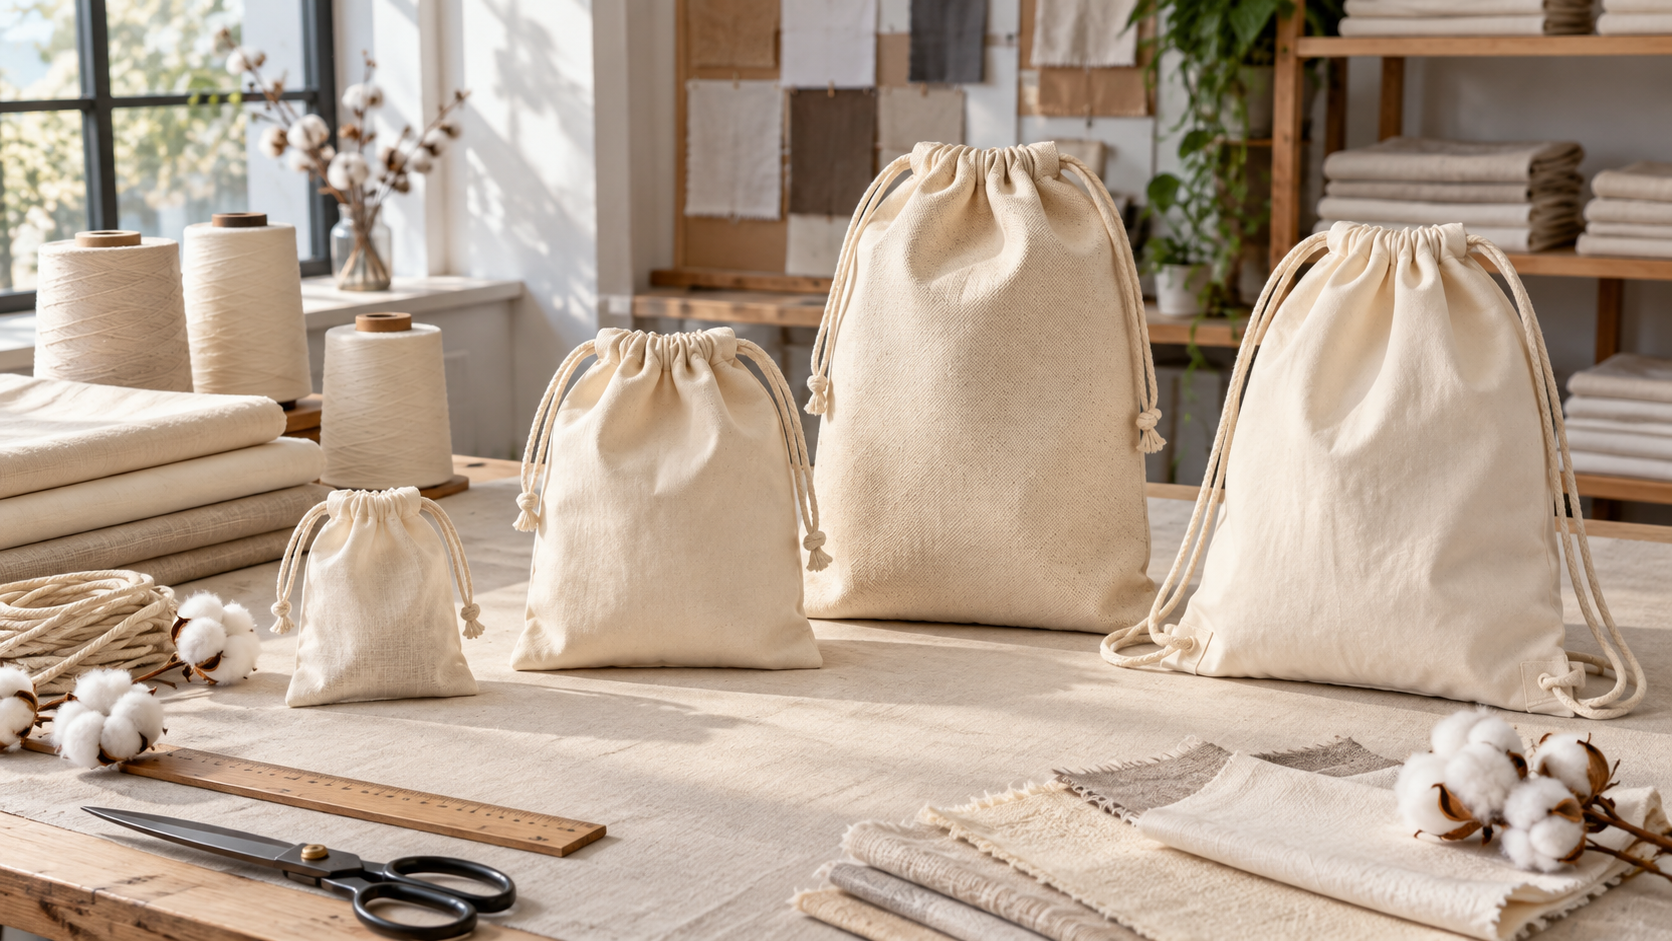
A reusable tote bag looks simple only after the factory has solved dozens of connected details. Fabric must behave consistently, cut parts must stay within their shade lots, artwork has to enter the sewing line in the correct order, handles need reinforcement, and the packed bulk order must still match the approved sample.
This guide follows the reusable tote bag manufacturing process at factory level. It focuses on the controls that make repeated carrying realistic: material conditioning, cutting discipline, stress-point construction, in-process checks, functional testing and traceable packing. Buyers comparing shapes and specifications can start with LUCKYSTAR's custom tote bag range. For the broader supplier and sourcing framework, see the Custom Bag Manufacturer Guide.
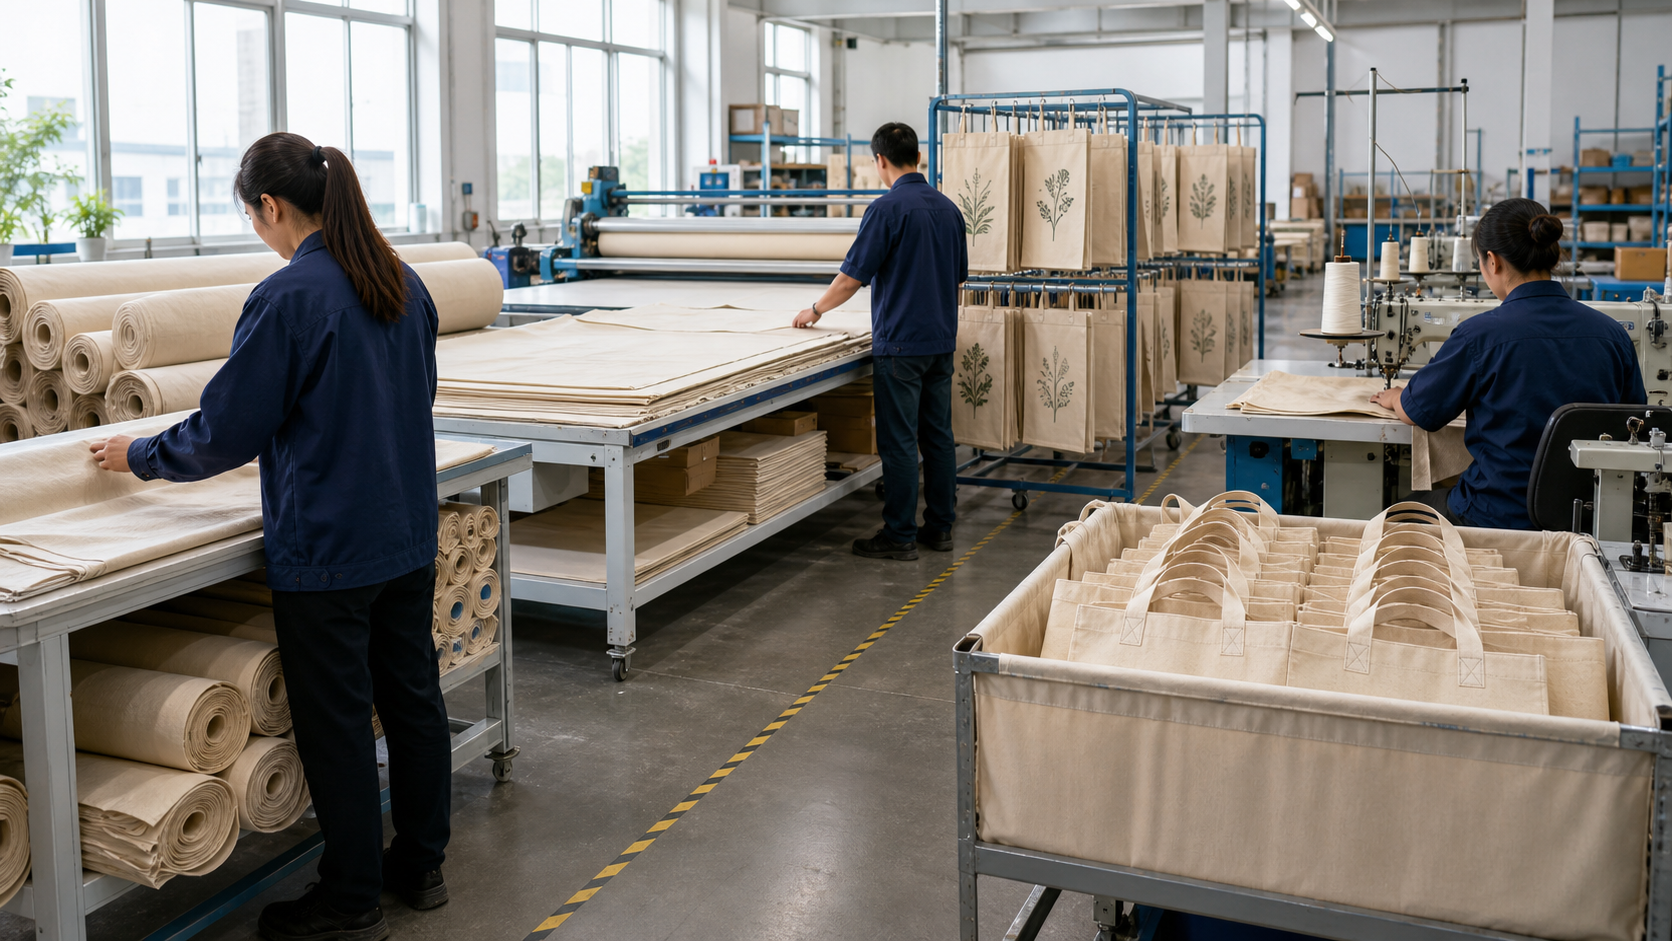
A controlled line links material inspection, accurate cutting, decoration, sewing and final audit rather than treating them as isolated operations.
Need a production-ready reusable tote brief? Send the intended use and load, destination market, finished dimensions, material and claim requirements, handles and reinforcement, artwork, quantity by variant, sample and test gates, inspection plan, packing, Incoterm and required arrival date. LUCKYSTAR can return missing inputs and its own order-specific proposal.
Reusable is a performance brief, not a fabric label
Cotton, canvas, non-woven material or recycled content does not automatically make a tote suitable for repeated use. Reuse depends on the complete product: intended load, handle comfort, seam strength, print behavior, dimensional stability and care expectations. A light event bag and a grocery tote may both be called reusable, but their construction targets should not be identical.
Before production begins, the buyer and manufacturer should turn the intended use into measurable decisions. A useful brief names what the bag will carry, how it will be worn, the desired service context and any market-specific testing or labeling requirement. The factory can then build the sample around a real duty rather than an abstract adjective.
| Use case | Likely load pattern | Construction emphasis | Sample trial |
|---|---|---|---|
| Retail checkout | Mixed products, short carry, frequent folding | Opening width, base support and easy packing | Load actual cartons or product mock-ups |
| Grocery and market | Dense, uneven and sometimes rounded contents | Handle anchors, side seams and bottom geometry | Carry a realistic mixed load, not one flat weight |
| Commuting | Longer shoulder wear with personal items | Handle drop, seam finish, closure and pocket access | Walk with the filled sample over normal clothing |
| Event distribution | Brochures, bottles and samples collected gradually | Low empty weight, comfortable grip and visible branding | Use the complete event kit during a handling trial |
| Retail merchandise | Repeated daily use with higher appearance expectations | Material hand, neat top edge, balanced shape and detailing | Review appearance after loading, folding and recovery |
The production flow and its control gates
A good line does not wait until the last inspection to discover mistakes. Each stage produces evidence for the next one. Material approval protects cutting; cut-part control protects decoration and sewing; a signed sample protects bulk assembly; and packing records help isolate a problem if one appears later.
| Stage | Key factory action | Release gate | Useful record |
|---|---|---|---|
| Specification | Resolve use, dimensions, material, artwork and packing | One approved product specification | Revision-controlled tech pack |
| Incoming material | Check identity, width, appearance, shade and behavior | Accepted lots separated from holds | Lot and inspection log |
| Cutting | Lay, mark and cut panels with bundle control | Critical pieces match the pattern | Bundle ticket and cut audit |
| Decoration | Position and apply artwork to panels or bags | Color, placement and cure match approval | Strike-off and first-piece check |
| Sewing | Assemble in a defined operation sequence | First completed units pass construction review | In-line inspection sheet |
| Finishing | Trim, clean, shape and prepare for audit | No unresolved appearance or function issue | End-line count and repair log |
| Final inspection | Evaluate the defined sample and acceptance plan | Shipment disposition is recorded | Inspection report |
| Packing | Fold, label, count and carton by variant | Carton matrix and marks are correct | Packing list and carton trace code |
Step 1: lock the approved sample and specification
Bulk production should not start from a chain of emails. The factory needs one current specification and one approved reference sample. They should agree on finished size, material and color, handle construction, seams, gusset, pockets, closures, labels, artwork, tolerance priorities and packing. If a dimension changes after sample approval, related items such as artwork position, handle drop and carton count may also need review.
The approved sample is not useful unless it is identified and preserved. Mark its revision and approval date, photograph the important details and note any deliberately accepted variation. The broader logic of turning a drawing into a production reference is covered in the Custom Bag Sample Development Process.
Step 2: inspect and condition incoming materials
Fabric inspection starts before the roll reaches the cutting table. The factory confirms that the delivered material matches the order and looks consistent enough for the intended product. Checks may include composition documentation, usable width, weight or thickness, weave, color, surface faults, odor, finish and shrinkage behavior, depending on the specification.
Rolls and lots should remain identifiable. If visibly different shades are mixed within one tote, the difference may be obvious even when every individual panel falls within a broad approval range. Keeping shade groups together makes the finished appearance more coherent and makes later investigation possible.
| Material control | Why it matters | What to decide before cutting |
|---|---|---|
| Usable width | Changes marker efficiency and available panel size | How narrow sections or damaged edges are handled |
| Weight and hand | Affects structure, print response and sewing setup | Approved sample range and measurement method |
| Shade grouping | Prevents visibly mismatched body, gusset or handles | Whether components must stay within one lot |
| Shrinkage and recovery | Can change dimensions after processing or care | Pattern allowance and expected care instruction |
| Surface condition | Knots, slubs or contamination can affect appearance and print | Which natural features are acceptable and which are defects |
| Finish or coating | May change needle penetration, adhesion and hand feel | Decoration and sewing trials on production material |
Fabric weight is only one part of the decision. For a dedicated discussion of ounces, GSM, weave and structure, use the Best Fabric Weight for Custom Tote Bags guide.
Step 3: plan the marker, lay and cut bundles
The marker determines how pattern pieces fit across the material. Efficient use matters, but the cutter must also respect grain direction, one-way surface effects, print or weave orientation, fold placement and defects. Changing the orientation of a handle or body panel to save fabric can alter stretch, drape or visual consistency.
Layers are spread without excessive tension and aligned before cutting. Critical notches and drill or placement references must remain usable without weakening a visible area. Cut parts are then bundled by size, color, lot and order. Bundle identity is especially valuable when several similar artwork or market variants share one production line.
| Cutting risk | What it can cause | Practical control |
|---|---|---|
| Fabric laid under tension | Panels relax smaller or distort after cutting | Allow material to settle and control lay tension |
| Wrong grain or nap direction | Twisting, shade change or inconsistent hand | Mark direction on the pattern and bundle ticket |
| Mixed shade lots | Body, base and handles look unrelated | Separate lays and identify every bundle |
| Worn or shifted pattern | Dimensions drift across the batch | Audit selected top, middle and bottom cut pieces |
| Poor notch control | Handles, pockets or gussets are assembled off position | Use consistent, non-damaging alignment references |
Step 4: decorate at the right point in the sequence
Many tote graphics are applied to flat panels before sewing because the surface is easier to position and support. Other marks, labels or small details may be added after partial or complete assembly. The correct sequence depends on artwork size, seams, pockets, lining, heat sensitivity and equipment access.
A first decorated panel should be compared with the approved artwork and physical target before the full run. The check includes orientation, distance from finished edges, color, coverage, detail, hand feel and any effect on the fabric. Remember that placement measured from a raw cut edge must translate correctly after seam allowances and hems are consumed.
| Decoration timing | Advantage | Control to protect |
|---|---|---|
| Before sewing on a flat panel | Open working area and repeatable positioning | Finished-edge calculation, panel orientation and clean bundling |
| Before attaching a pocket | Artwork can sit behind or align with the pocket design | Pocket location and sewing allowance |
| After partial assembly | Graphic can reference an established seam or feature | Equipment access and distortion from multiple layers |
| On the completed tote | Placement relates directly to the finished shape | Support, heat exposure, wrinkles and access to the interior |
This article does not repeat the full method comparison. For process suitability, color count and artwork behavior, read Custom Tote Bag Printing Methods.
Step 5: assemble the tote in a stable sewing sequence
The exact order varies with the design, but a factory normally prepares subassemblies before closing the main body. Pockets, labels, closures, handle components and reinforcement pieces can be completed or positioned first. Body panels and gussets are then joined, edges finished, the top hem or facing constructed, handles secured and remaining features installed. Thread ends and loose fibers are controlled throughout, not only at the packing table.
A defined sequence improves repeatability. It also lets inspectors check difficult areas while they are still visible. For example, a reinforcement piece hidden inside a top hem is easier to confirm before the hem is closed than after the tote is complete.
| Operation group | Typical work | First-piece question |
|---|---|---|
| Small parts | Prepare pockets, labels, tabs, closures and handle ends | Are folds, orientation and component identity correct? |
| Panel preparation | Attach pockets, labels and internal reinforcement | Do positions match the finished reference points? |
| Body assembly | Join side, bottom, gusset or boxed-corner seams | Is the bag square, symmetrical and within size? |
| Top construction | Form hem, facing or opening reinforcement | Is the opening clean, even and stable? |
| Handle attachment | Set spacing, drop and reinforcement stitch pattern | Are both handles aligned and anchored to the correct depth? |
| Completion | Install final closure, trim, turn and shape | Does every function operate without stressing adjacent seams? |
Engineer the stress points for the intended load
Handles attract attention because their anchors carry concentrated force, but they are not the only risk. The upper opening, bottom corners, gusset junctions, pocket ends and closure attachments can also fail or distort. Reinforcement should be matched to the material and use rather than added decoratively.
More stitching is not automatically stronger. Needle holes placed too closely can weaken some materials, a large reinforcement can create a stiff transition, and a strong handle attached to a weak top edge simply moves the failure point. The sample should be evaluated as a system.
| Stress area | Possible construction response | What inspection should see |
|---|---|---|
| Handle anchor | Box-X, bar tack, extended attachment or hidden reinforcement | Complete pattern, secure backtack and no cut fabric |
| Top opening | Turned hem, facing or tape with suitable depth | Even width, no twisting and compatible handle insertion |
| Bottom and corners | Seam choice, binding, double row or local reinforcement | No skipped stitches, puckering or exposed raw edge |
| Pocket ends | Backtack, bar tack or strengthened corner | Pocket remains aligned when opened repeatedly |
| Snap or closure | Backing layer and adequate edge distance | Hardware is secure without tearing or distortion |
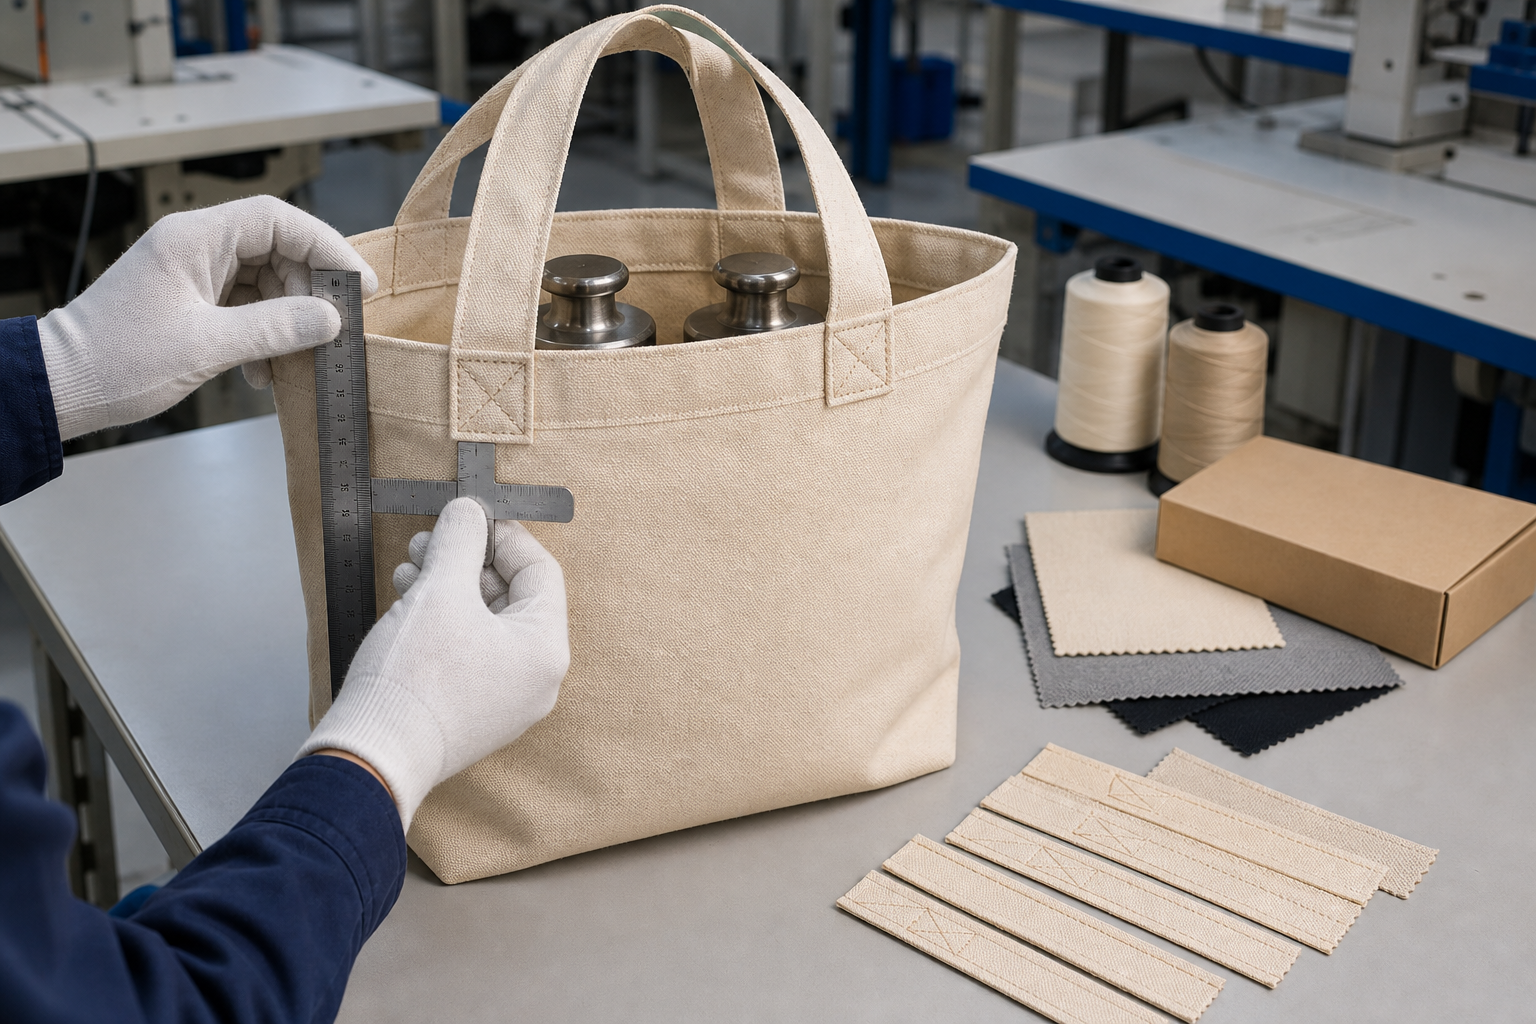
Handle attachment, opening stability and loaded dimensions should be checked together because one strong component cannot compensate for a weak connection.
Step 6: use in-process inspection to stop repetition
A defect found after 5,000 bags have been sewn is expensive to sort and repair. In-process inspection looks at first pieces and selected units while the affected operation is still running. The purpose is not merely to remove bad units; it is to identify why the result is drifting and correct the process.
| Control station | Examples of checks | Immediate response to drift |
|---|---|---|
| After cutting | Panel dimensions, notches, shade and bundle identity | Hold the affected lay and verify marker or spreading |
| After decoration | Orientation, placement, coverage, color and cure | Stop the run and adjust setup before more panels enter sewing |
| First sewn tote | Finished size, sequence, seam type, handles and functions | Correct the workstation instruction and confirm again |
| Mid-line | Hidden reinforcement, seam allowance, skipped stitches and alignment | Segregate work since the last accepted check |
| End-line | Complete appearance, cleanliness, operation and count | Record repair, reinspection or rejection by defect type |
Step 7: finish without changing the approved product
Finished totes may be turned, shaped, lightly pressed where appropriate, cleaned and trimmed. The finishing method must suit the fabric, decoration and accessories. Excessive heat or pressure can flatten texture, mark a coated surface, change a transfer or create a hard fold. The team should agree on the final presentation during sampling, including whether a relaxed natural appearance is intentional.
Loose threads, oil marks, chalk, dust and fibers are easier to address before individual packing. Repairs should be controlled; repeatedly sewing through one small area can damage the material even if the result looks tidy from a distance.
Step 8: validate function, dimensions and appearance
Final approval combines visual inspection with the functional checks named in the purchase specification. A bag can look acceptable while its opening is too small for the intended product, its handles twist under load or its print shows damage after a defined care simulation. Test methods, sample quantities and pass criteria should be agreed for the relevant market and use. Avoid vague instructions such as “must be strong.”
| Evaluation | What it examines | Buyer decision needed |
|---|---|---|
| Finished dimensions | Body, gusset, opening, handle width and drop | Reference points, measurement condition and tolerances |
| Static or cyclic load | Interaction of handles, seams, base and material | Load, duration or cycles and acceptable change |
| Seam examination | Opening, slippage, skipped stitches and edge security | Critical locations and required test method |
| Decoration durability | Adhesion, cracking, rubbing or color transfer | Relevant conditioning or care simulation |
| Closure and pocket use | Access, repeated operation and surrounding distortion | Expected contents and operating cycles |
| Appearance recovery | Creasing, shape and presentation after folding or loading | What is acceptable for the material and price position |
| Packing trial | Fold marks, moisture risk, carton fit and unpacking | Individual pack, fold method and carton limits |
For a detailed buyer-side inspection structure, link these product-specific tests to the Custom Bag Quality Inspection Checklist.
Final inspection uses an agreed acceptance plan
Final inspection should occur at the agreed completion and packing stage so the defined lot can be identified and sampled. The inspector checks identity, quantity, workmanship, dimensions, function, artwork, labels and packing against the released documents and approved sample. If the order uses acceptance sampling, specify the current standard and edition, lot definition, inspection level, sampling scheme, critical/major/minor classifications, AQL values, acceptance and rejection numbers, switching rules and disposition of a failed lot. ISO 2859-1:2026 defines AQL-indexed lot-by-lot sampling schemes; it does not replace agreed functional tests or automatically make any defect acceptable.
| Defect category | Reusable tote example | Why classification must be agreed |
|---|---|---|
| Critical | A safety or compliance issue as defined for the product and market | Consequences extend beyond appearance or minor repair |
| Major | Open seam, insecure handle, wrong artwork or unusable closure | The intended use, saleability or brand identity is materially affected |
| Minor | Small workmanship variation outside the approved standard | The item remains usable, but accumulated variation lowers presentation |
Classification depends on the agreed specification and end market. The examples above are discussion points, not a universal legal or inspection standard.
Step 9: pack by variant and preserve traceability
Packing is part of manufacturing because it can alter the bag and determine whether the correct version reaches the correct customer. The fold should avoid damaging artwork or creating an unacceptable hard crease. Individual protection, labels, carton liners and desiccant decisions should reflect material, route, season and buyer requirements rather than habit.
Carton marks and internal records can identify order, style, color, artwork version, quantity and packing date. Where practical, a carton or production reference can connect finished goods back to material and line records. Traceability does not prevent every defect, but it reduces the scope of a later investigation.
| Packing control | Question to resolve | Risk if ignored |
|---|---|---|
| Folding | Where can the bag fold without marking print or hardware? | Permanent-looking crease or decoration damage |
| Individual protection | Is it needed for cleanliness, retail handling or variant control? | Unnecessary packaging or insufficient protection |
| Carton quantity | What count and weight suit handling and destination limits? | Crushed goods, counting disputes or handling difficulty |
| Variant separation | Can color, artwork and market version be identified quickly? | Mixed cartons and incorrect distribution |
| Carton code | Which order and production information must remain traceable? | A small issue requires a much wider hold or recall |
How process choices affect cost, MOQ and lead time
A factory quote reflects operations, material commitments and production risk. Custom-dyed fabric, several artwork versions, complex gussets, interior features, special reinforcement or retail packing can create more setups and inspections than a flat single-color tote. A lower total quantity divided across many combinations may also behave like several small orders.
For a deeper cost breakdown, read How Much Do Custom Tote Bags Cost?. For quantity allocation, see the Custom Tote Bag MOQ Guide. Production time should be planned around material, sample and approval dependencies; the custom bag production lead-time guide explains those gates.
Common manufacturing failures and where to prevent them
| Observed problem | Likely process origin | Best prevention point |
|---|---|---|
| Tote twists when loaded | Grain, cutting, seam feeding or asymmetrical assembly | Cut audit and first completed-unit load review |
| Handles differ in length or position | Inconsistent folding, guide or attachment reference | Handle preparation fixture and first-piece measurement |
| Artwork looks low after sewing | Placement referenced from raw rather than finished edge | Pre-production panel calculation and finished sample |
| Shade changes between panels | Mixed rolls or components from different lots | Incoming grouping, separated lays and bundle control |
| Seam opens near a handle | Load path, material damage, tension or inadequate reinforcement | Construction trial, in-line inspection and defined load test |
| Print is marked after unpacking | Incomplete process control, fold position, pressure or packing interaction | Packed-sample trial before bulk packing |
| Cartons contain mixed versions | Weak bundle identity or packing matrix | Variant codes at cutting, sewing, audit and carton stages |
Company-claim boundary: the following section is LUCKYSTAR publisher self-description and a commercial service proposal. It is not independent proof of factory ownership, in-house control of every process, material or capacity availability, reusable performance, test results, sample or bulk quality, MOQ, price or delivery. Legal seller, nominated production sites, outsourced steps, materials, samples, tests, inspection, packing and schedule depend on the exact order and written confirmation.
How LUCKYSTAR describes its reusable tote production review
LUCKYSTAR states that it can review an order brief and prepare a proposal connecting intended duty, construction, process gates, quality controls and packing.
- Define the duty: record destination, contents, load distribution, carry method, reuse and care expectations, product claims and failure modes.
- Release the construction: identify material lot, finished size, gusset, handles, attachment and reinforcement, closure, pocket, labels and artwork.
- Map the route: name the mill and cutting, printing, sewing, finishing and packing sites, including outsourced operations and substitution controls.
- Approve gates: connect material and colour references, strike-off where applicable, construction sample, pre-production sample, packed sample and reapproval triggers.
- Control bulk: define in-process checks, functional methods and loads, tolerances, lot sampling, defect classes, failed-lot disposition and retained records.
Review the custom tote bag range and bag inspection checklist, then send the released requirements for an order-specific response.
What to send the manufacturer before quotation
| Information | Good input | Why it changes the process |
|---|---|---|
| Use and contents | Typical load, carry duration and user context | Guides material, handle and reinforcement decisions |
| Finished construction | Dimensions, gusset, handle drop, pockets and closure | Defines patterns, operations and measurement points |
| Material direction | Composition, color, target hand, weight or reference sample | Affects sourcing, cutting, decoration and sewing |
| Artwork | Vector files, colors, actual size, sides and placement | Determines method, setup and production sequence |
| Quantity matrix | Units by shell color, artwork, market and delivery | Reveals real lot sizes and variant complexity |
| Quality needs | Key tests, tolerances, inspection plan and market requirements | Defines evidence, sample work and release criteria |
| Packing and timing | Fold, individual pack, labels, carton limits, destination and date | Changes materials, labor, volume and scheduling |
Frequently asked questions
What are the main steps in reusable tote bag manufacturing?
The usual flow is specification and sample approval, incoming material inspection, spreading and cutting, decoration, subassembly, main sewing, finishing, in-process and final inspection, functional validation, packing and shipment release. The exact order changes with pockets, lining, closures and the chosen decoration method.
Is canvas always better than lighter cotton for a reusable tote?
No. Canvas can provide body and durability, but a lighter fabric may be appropriate for folding, event distribution or lower loads. Performance depends on weave, construction, reinforcement and intended use as well as nominal weight or material name.
Should tote bags be printed before or after sewing?
Large panel artwork is often applied before sewing because a flat surface is easier to position. Some marks are better after partial or full assembly. The factory should choose the stage after reviewing seams, pockets, heat sensitivity, support and finished placement.
How are reusable tote handles reinforced?
Options include box-X stitching, bar tacks, longer attachment areas and hidden backing layers. The correct choice depends on the handle, shell and target load. Reinforcement should be tested with the complete top edge and body, not judged by appearance alone.
What should a buyer approve before bulk production?
Approve the current specification, material and color, artwork or strike-off, finished sample, key dimensions, construction, functional targets, variant matrix and packing presentation. Keep one clearly identified control sample for production and inspection.
How is bulk tote quality checked?
Factories can inspect incoming material, cut parts, decorated panels, first sewn units, work in progress, end-line goods and packed cartons. Final inspection then follows the agreed sampling and acceptance plan, including the critical dimensions and functions named by the buyer.
How can a buyer reduce production delays?
Provide complete files, identify the final decision-maker, approve by milestones and limit late variant changes. Confirm material, artwork, sample, quantity matrix, tests and packing before bulk production. A faster answer is useful only when it is tied to the current revision.
Convert the intended duty into released production gates
Use one controlled package that connects the tote’s duty to construction, production route, material lot, artwork, samples, functional validation, inspection, packing and arrival requirement.

Review LUCKYSTAR custom tote bag options, then send the manufacturing brief through the contact form or Email a project brief. The email link opens a prefilled draft for your review before sending.
Legal seller and facility, material and capacity availability, reusable and environmental claims, samples, tests, inspection, price, MOQ, packing, schedule and delivery terms are subject to current evidence, final specification, contract and written confirmation.