Last reviewed: September 28, 2026
Wholesale cap embroidery is not a logo pasted onto a flat rectangle. The artwork must sew cleanly on a curved crown, around seams and within the movement limits of a cap frame. A buyer therefore needs an approval record that connects the exact cap style to the exact digitized file and production settings.
Buyer Quick Answer
For reliable embroidered caps wholesale, approve the cap body and embroidery as one product. Freeze the cap style, crown structure, fabric, color and placement before digitizing. Review a physical sewout on the actual cap, not only a screen proof or flat fabric sample. Record the artwork revision, finished size, coordinates, thread colors, backing, stitch method and approved appearance, then use the same record for the first production piece, bulk inspection and reorders.
This guide focuses on artwork-to-stitch translation and approval. It does not repeat the cap silhouette and supplier-selection topics in the baseball caps supplier guide, the global rollout framework in Custom Caps and Hats for JOBO, or the broad sourcing structure in the Custom Bag Manufacturer Guide.
Start With the Physical Cap, Not the Logo File
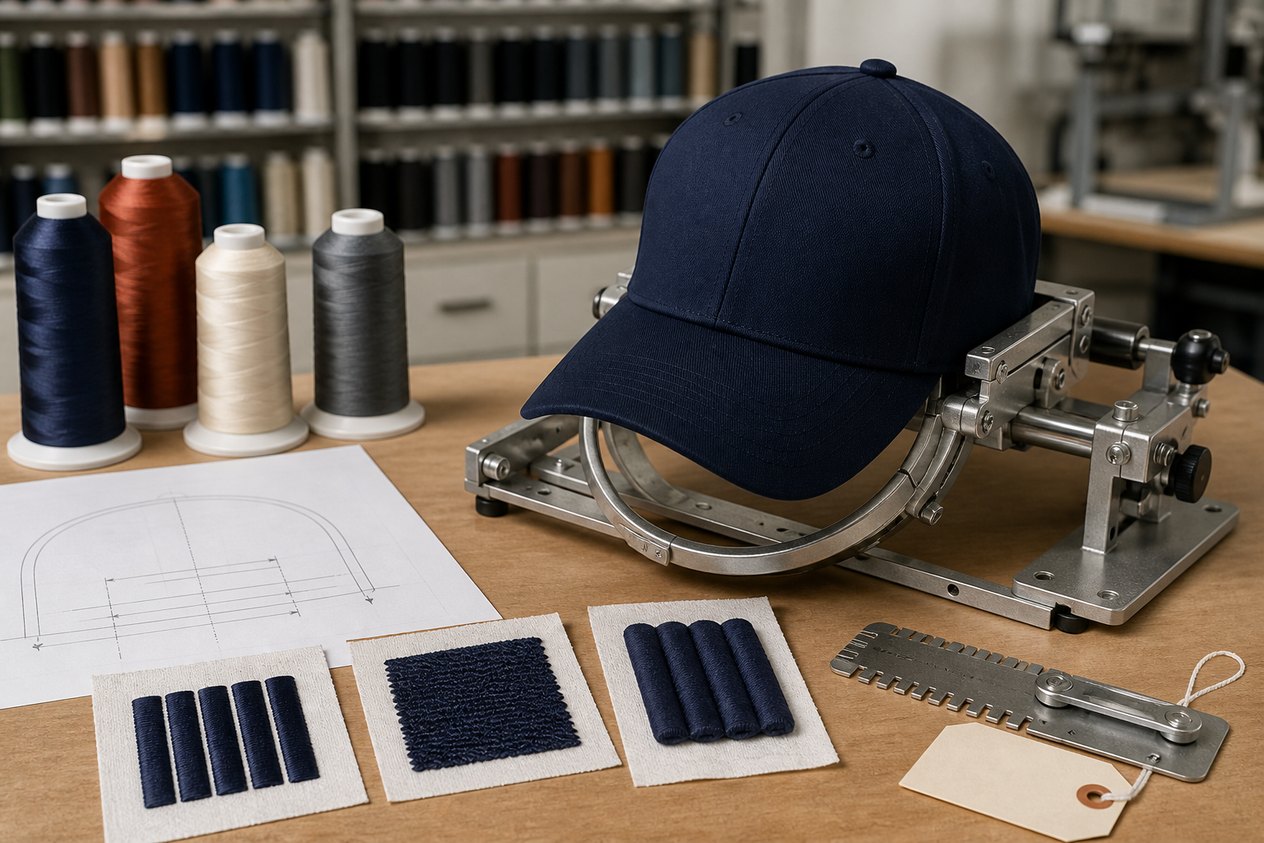
A logo cannot be digitized responsibly without knowing where it will sew. Record the cap style code, crown profile, panel count, structured or unstructured construction, front reinforcement, fabric, center seam, visor relationship, closure and intended decoration positions. A file that works on a firm six-panel cap may pucker, shift or become unreadable on a soft low-profile cap.
Use the baseball caps product guide when the first decision is the cap category. Return to this page after the decoration surface is known.
Define the Cap Decoration Surface
Describe the front as an actual curved surface bounded by crown seams, eyelets, visor attachment and the cap frame. Side and back positions have their own seams, closure openings and curvature. Do not copy a flat-garment embroidery size onto a cap without checking the usable sewn area on the exact style.
Ask the manufacturer to identify any machine, frame or construction limitation before the artwork is finalized. A visual mockup can show intent, but it cannot prove that the selected size and position can be stitched consistently.
Match Crown Architecture to Artwork Risk
| Cap feature | Embroidery effect | Buyer decision | Approval evidence |
|---|---|---|---|
| Structured front | Firmer support but greater bulk near seams | Confirm reinforcement, frame access and design height | Sewout on the final structured cap |
| Unstructured front | Softer surface can move or pucker more easily | Review backing, density, hooping and design complexity | Worn and flat appearance after sewout |
| Six-panel center seam | Creates a ridge and two surfaces with different tension | Decide whether the artwork crosses, avoids or uses the seam | Close-up of seam registration and coverage |
| Five-panel front | May offer an uninterrupted face but still curves toward the visor | Measure the actual panel and frame reach | Style-specific placement sample |
| Side or back panel | Smaller field with seams, eyelets or closure interference | Create a separate position file and coordinate map | Finished cap viewed on head form |
Treat the Front Center Seam as a Design Decision
A center seam can interrupt small counters, thin outlines and narrow lettering. If the design crosses it, the digitizer may need a seam-aware path, underlay and compensation strategy. If it avoids the seam, the placement must still look intentionally centered on the worn cap. Do not assume the seam center and the visual center of an asymmetric logo are the same point.
Create a Cap-Specific Placement Coordinate
Define finished width and height plus vertical and horizontal references on the actual cap. A useful placement sheet identifies the style, size state, front or side position, center reference and distance from a stable construction feature. Avoid instructions such as normal front placement or same as last order unless the referenced record is attached.
Take approval photographs square to the crown and on a head form. A flat table photograph can make a correctly placed logo appear low or a crooked logo appear centered because the cap collapses differently.
Separate Front, Side and Back Files
Each position has different curvature, hooping access and viewing angle. Use one master artwork source, then create controlled position-specific embroidery files and placement sheets. Do not resize one machine file at the embroidery machine without documented approval. If the same mark appears in several positions, record each finished size and thread sequence independently.
Audit the Artwork Before Digitizing
Start with a clean vector source when available. Identify exact colors, required elements, optional detail, minimum readable text and which shapes may be simplified. Gradients, distressed texture, very thin lines, tight negative spaces and tiny lettering may not translate directly into thread. The goal is not to preserve every screen pixel; it is to preserve the intended identity at the approved sewn size.
Remember That Thread Is Not Ink
Thread has width, direction, sheen, height and physical pull. Satin columns, fill areas and running stitches reflect light differently even when they use the same thread color. The cap fabric can show between stitches or influence edge appearance. Approve the real thread on the real cap color rather than relying on a monitor or printed color sheet.
The custom embroidery T-shirt guide covers broader embroidery production. Cap work requires an additional crown, seam and frame review.
Build the Digitized File for the Named Cap
The embroidery file contains stitch types, directions, sequence, trims, color changes, underlay and compensation. Keep the source artwork, digitized revision and machine-ready output linked by a controlled identifier. If the cap style or size changes materially, review whether the file must be adjusted and resampled rather than assuming the previous file remains valid.
Control Density, Underlay and Pull Together
There is no universal density setting for every cap. Thread, fabric, reinforcement, stitch type, column width, seam crossing and machine conditions interact. Excessive coverage can create stiffness, puckering, needle stress or a heavy ridge. Insufficient support can expose fabric or weaken edges. Approve the sewn appearance and reverse-side condition, then retain the settings with the file.
Plan Stitch Direction and Sequence Around the Crown
Cap embroidery training materials emphasize that sew order must consider the visor, center seam and cap-frame movement. The exact solution depends on design and equipment, but the production path should avoid pushing excess material toward an anchor point or allowing one area to drag another out of registration. The Melco embroidery manual discusses cap sew order and directing stitches away from restrictive areas.
Ask for a slow inspection of the first sewout if the design is complex. Observe where distortion begins rather than treating the final defect as a thread-color problem.
Hoop the Cap as a Repeatable Setup
The cap must be seated consistently in the correct frame, aligned to the intended center and held without wrinkles or trapped slack. A good first piece produced by unusually careful hand adjustment is not a stable process. Record the frame, reference points and handling instructions so operators can reproduce the setup through the lot.
Brother describes cap frames as specialized embroidery frames and notes that hooped material and backing should be flat and free from bubbles in its embroidery hooping guidance. Equipment instructions must be followed for the actual machine and attachment used.
Choose Backing for the Cap and Design
Backing supports the crown during stitching and affects the inside finish. Its need and type depend on crown structure, fabric, design coverage and process. Approve the backing identity, size, placement and trimming or tearaway condition. Check whether edges remain uncomfortable, visible or loose inside the finished cap.
Approve Flat and Raised Embroidery Separately
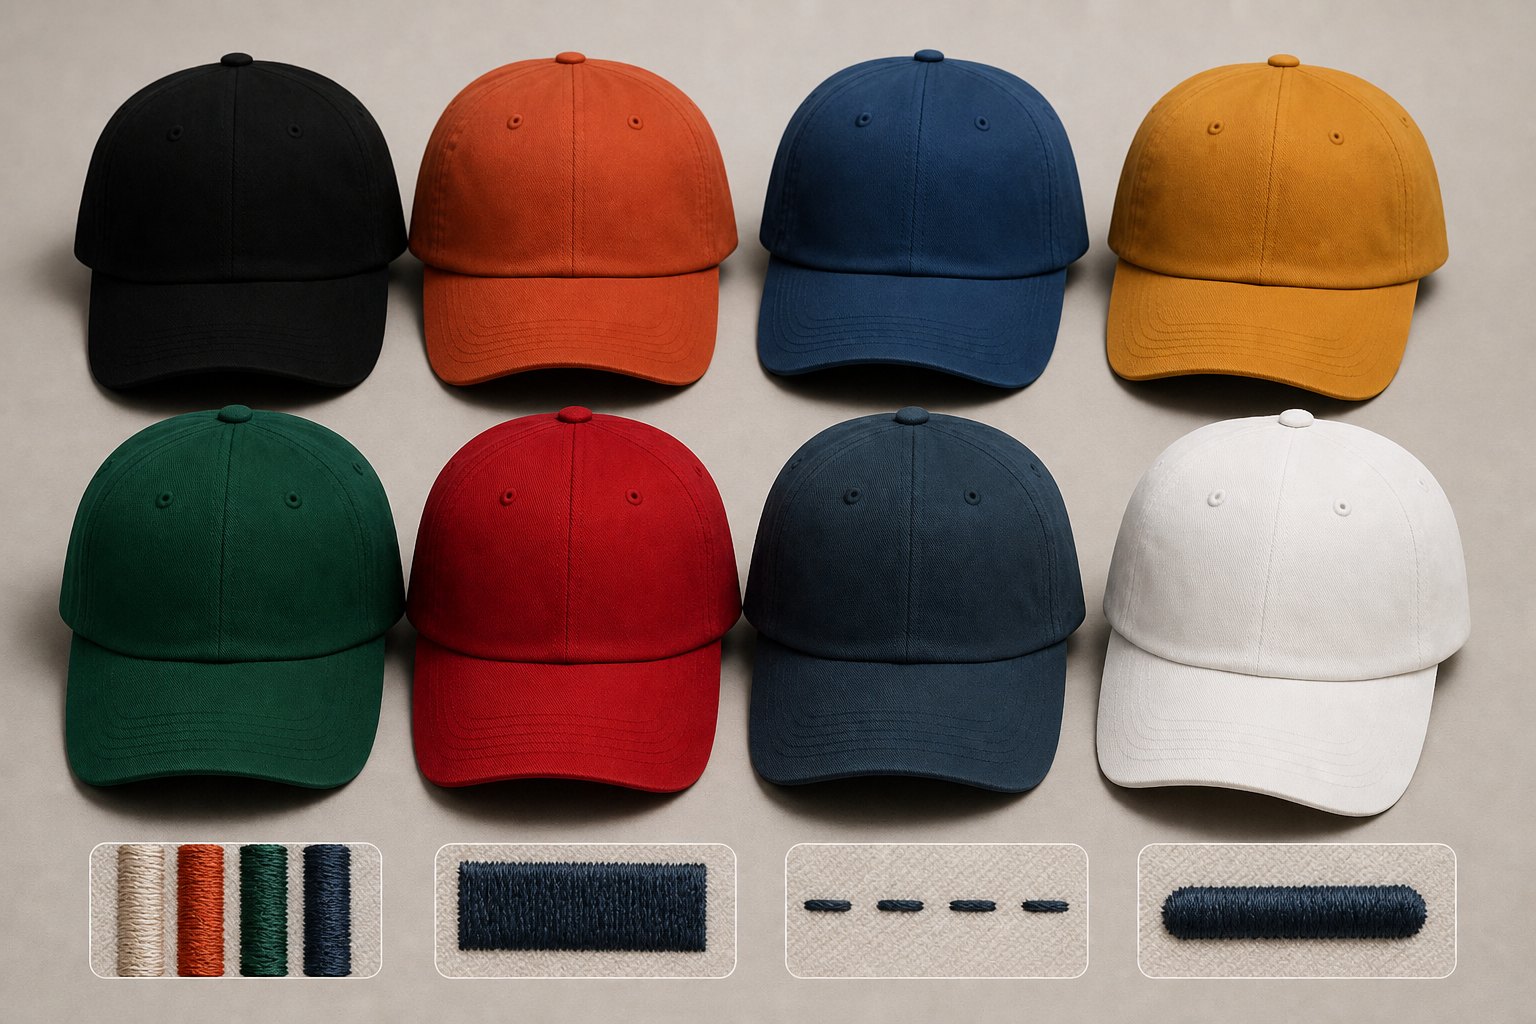
Flat embroidery and raised foam embroidery are different constructions. Raised work needs artwork shapes, stitch coverage, foam behavior and edge finishing that support the intended height. Thin detail, small counters and tight corners may behave differently from a bold open shape. Do not approve a flat sewout as evidence for a raised version or convert a file without a new sample.
Control Thread Color by Role
Assign each thread color to an artwork element and keep the approved physical thread reference or supplier code with the record. Review contrast on every cap color. One thread may disappear on a dark color or appear harsh on a light color even when the brand color is nominally correct. If the program changes thread colors by cap color, treat each combination as a controlled variant.
Review Small Lettering at Finished Size
Do not judge text from a zoomed-in proof. Stitch the exact approved size, inspect normal reading distance and confirm that counters remain open, strokes do not merge and the center seam does not consume a letter. If the result is not readable, choose a larger size, simplified type treatment, different position or another decoration method rather than hiding the problem with more density.
Use Three Physical Approval Gates
| Gate | What it proves | What it cannot prove alone | Release record |
|---|---|---|---|
| Stitch test | Thread behavior, detail translation and initial settings | Final curvature, placement and cap-frame effect | Test image, file revision and comments |
| Decorated cap sample | Actual crown, seam, placement, inside finish and worn appearance | Lot-wide repeatability | Sealed cap, photos, dimensions and approved thread list |
| First production piece | Bulk materials, operator setup and production file | Every later unit without ongoing checks | First-off approval and line reference |
Do Not Treat a Screen Proof as a Sewout
A screen proof verifies artwork elements, size, colors and intended placement. It does not show thread sheen, fabric exposure, seam coverage, pull, puckering, backing or cap curvature. Approve the digital proof for intent, then approve the physical cap for production. Keep both because they answer different questions.
Inspect the First Production Cap Under Bulk Conditions
Confirm that the production operator, file, thread, backing, frame and cap lot match the released setup. Compare placement, size, registration, edges, small detail, seam coverage, puckering, loose threads and inside finish with the sealed sample. Release the run only after the first piece is acceptable, then schedule checks through production rather than relying on the first result for the entire lot.
Measure Bulk Placement Without Flattening the Evidence
Use the agreed cap laying or head-form method and the same construction references used at approval. Measure both logo dimensions and position. Classify findings separately: artwork appearance, registration, thread color, position, cap damage and finishing. This prevents a placement issue from being recorded as a generic bad embroidery defect.
Diagnose Repeat Defects by Process Stage
| Visible finding | Possible review area | Evidence to compare | Immediate control |
|---|---|---|---|
| Logo drifts or tilts | Hooping, cap seating, pathing or file-position reference | Frame setup and first-off coordinates | Hold the affected run and revalidate setup |
| Fabric puckers | Density, backing, tension, hooping or cap structure | Approved sewout face and reverse | Stop and test one controlled adjustment |
| Elements no longer register | Sequence, pull compensation, frame movement or material shift | Digitized revision and color sequence | Quarantine output since last accepted check |
| Seam shows through | Seam-aware underlay, coverage or artwork location | Approved close-up across the same seam | Do not add density without a test sewout |
| Loose thread or rough inside | Trimming, tie-in, backing finish or final cleaning | Approved inside-finish standard | Correct finishing and reinspect held units |
Control Colorways as Separate Production Variants
Cap color, thread color and file revision form a production combination. Build a matrix that names the allowed thread sequence for every cap color and position. If one design is simplified on a softer cap or recolored on a dark cap, give it a distinct controlled identifier. This helps prevent the operator from loading a visually similar but incorrect file.
Preserve the Reorder Package
Keep the cap style and color record, source artwork, digitized source, machine-ready output, finished dimensions, placement sheet, thread list, backing, approved sample photographs, first-off record and bulk findings together. A reorder should start by confirming what remains unchanged. A replacement cap body, different reinforcement or new embroidery machine may require a new sewout even when the logo is unchanged.
Compare Wholesale Quotes at Equal Scope
Normalize cap body, quantity by color, number of embroidery positions, finished design size, flat or raised method, thread colors, digitizing, sample stages, private labels, packing, testing, inspection and delivery basis. A quote that excludes digitizing or physical sampling is not comparable with one that includes a complete approval route.
Use the custom product cost guide to separate setup and variable costs, and the cost and lead-time guide to simplify variants without weakening the approval record.
Keep Related Headwear Programs Distinct
Use the bulk sports caps guide for use-case and sports-program questions, the global cap rollout guide for market variants and reorders, and the cross-category supplier guide when caps must coordinate with apparel and bags.
For uniform wearer groups, sizing and replenishment, see the corporate uniform supplier guide. For event quantity allocation, use the promotional apparel campaign guide.
What to Send for a Useful Quote
Send the cap reference or style, structured or unstructured requirement, material and color direction, quantity by color, closure, artwork source, embroidery positions, intended finished sizes, thread colors, flat or raised method, private labels, target date, packing and required approval stages. State whether you need a decorated stock cap, modified existing style or fully custom cap.
How LUCKYSTAR Can Support Cap Embroidery Approval
LUCKYSTAR can review the cap body, artwork feasibility, placement, thread plan, sample stages, bulk first-off control, colorway matrix and packing handoff before quotation. The global custom apparel working framework explains how these records can be coordinated across markets and categories.
The core manufacturer guide links this embroidery approval workflow to supplier review, quotation, sample control, quality planning and delivery.
Frequently Asked Questions
Can a T-shirt embroidery file be reused on a cap?
Not automatically. A cap has a curved crown, seams and different frame movement. Keep the source artwork, but review the stitch file, sequence, compensation, size and placement for the named cap style and approve a new physical sewout.
Is a structured cap always better for embroidery?
No. A structured cap provides a firmer front, while an unstructured cap offers a softer product character. The correct choice depends on the intended look, artwork, fabric and approval result.
Should a logo cross the front center seam?
It can, but the seam must be treated as part of the design and digitizing plan. Small text or narrow detail may be better moved, enlarged or simplified. Approve the actual seam-crossing sewout.
What is the difference between a proof and a cap sample?
A proof confirms design intent, size, colors and planned placement. A physical cap sample reveals thread, curvature, seam coverage, registration, puckering, backing and worn appearance.
How should wholesale cap embroidery placement be checked?
Use the agreed cap style, laying or head-form method, stable construction references and recorded coordinates. Compare logo dimensions and position separately from registration and stitch appearance.
Does a reorder need another embroidery sample?
Confirm whether the cap body, fabric, reinforcement, thread, backing, file, machine route and placement remain equivalent. If a relevant variable changes, perform a controlled sewout before bulk release.
Turn Embroidery Into a Reproducible Cap Specification
Review the current custom baseball cap range to define the cap body before the stitch file is approved. A strong wholesale embroidered cap program does not depend on one attractive sample or an operator remembering the previous order. It links the named cap body to controlled artwork, a cap-specific stitch file, measured placement, physical approval, first-off release, bulk checks and a complete reorder package.
Send LUCKYSTAR your cap reference, quantities, colors, artwork, positions, embroidery method, target date and approval requirements for a feasibility review and quotation.
Email a prefilled embroidered-cap brief