Last reviewed: September 24, 2026
Leather Tote Bag Factory: Material, Craft and QC Guide
Buyer Quick Answer
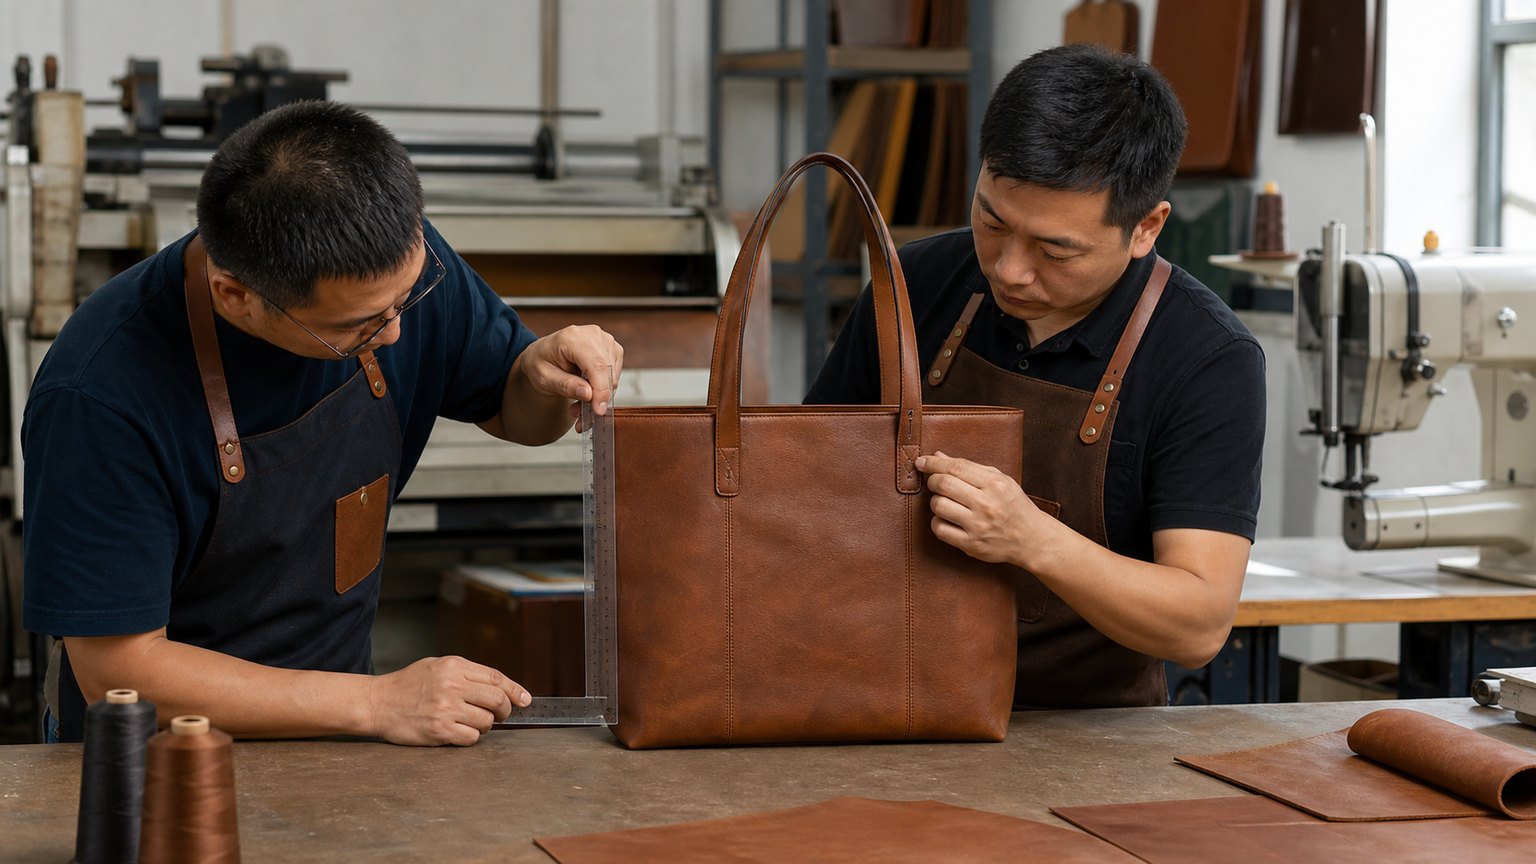
Choose a leather tote bag factory by the evidence it can maintain from leather identity to finished-bag release. Freeze species, leather type, tannery article, thickness, temper, finish, color, panel grading, reinforcement, handle construction, edge route, lining, hardware and logo. Approve the actual leather lot, a construction sample and a finished pre-production tote. Then convert those approvals into first-off and bulk checks. A polished showroom sample does not prove traceable material, controlled variation or repeatable production.
Scope: this guide owns leather-tote material identity, factory craft controls, durability evidence and responsible-claim verification. For complete supplier selection, commercial terms and shipment planning, use the custom bag manufacturer pillar guide.
Scope: What This Guide Owns
This page answers one precise sourcing question: how should a factory convert a leather-tote concept into a traceable, manufacturable and inspectable product? It does not repeat supplier rankings from the China tote manufacturer comparison or worldwide tote manufacturer guide. It also avoids duplicating the cross-material lifecycle framework in Sustainable Bags That Last. Here, the unit of control is the actual leather tote and its order-level evidence.
Define the Finished Bag Program
State the wearer, retail position, contents, working load, carry duration, opening, closure, interior organization, target dimensions, colorways, order volume, packaging and destination markets. A soft unlined shopper, structured work tote and premium gift tote may share a silhouette while requiring different leather, machinery and testing. Identify the promise that leads the design: natural patina, shape retention, low weight, wipeability, formal appearance or long service. The factory should challenge conflicts before quoting.
Name the Material Before Comparing Quality
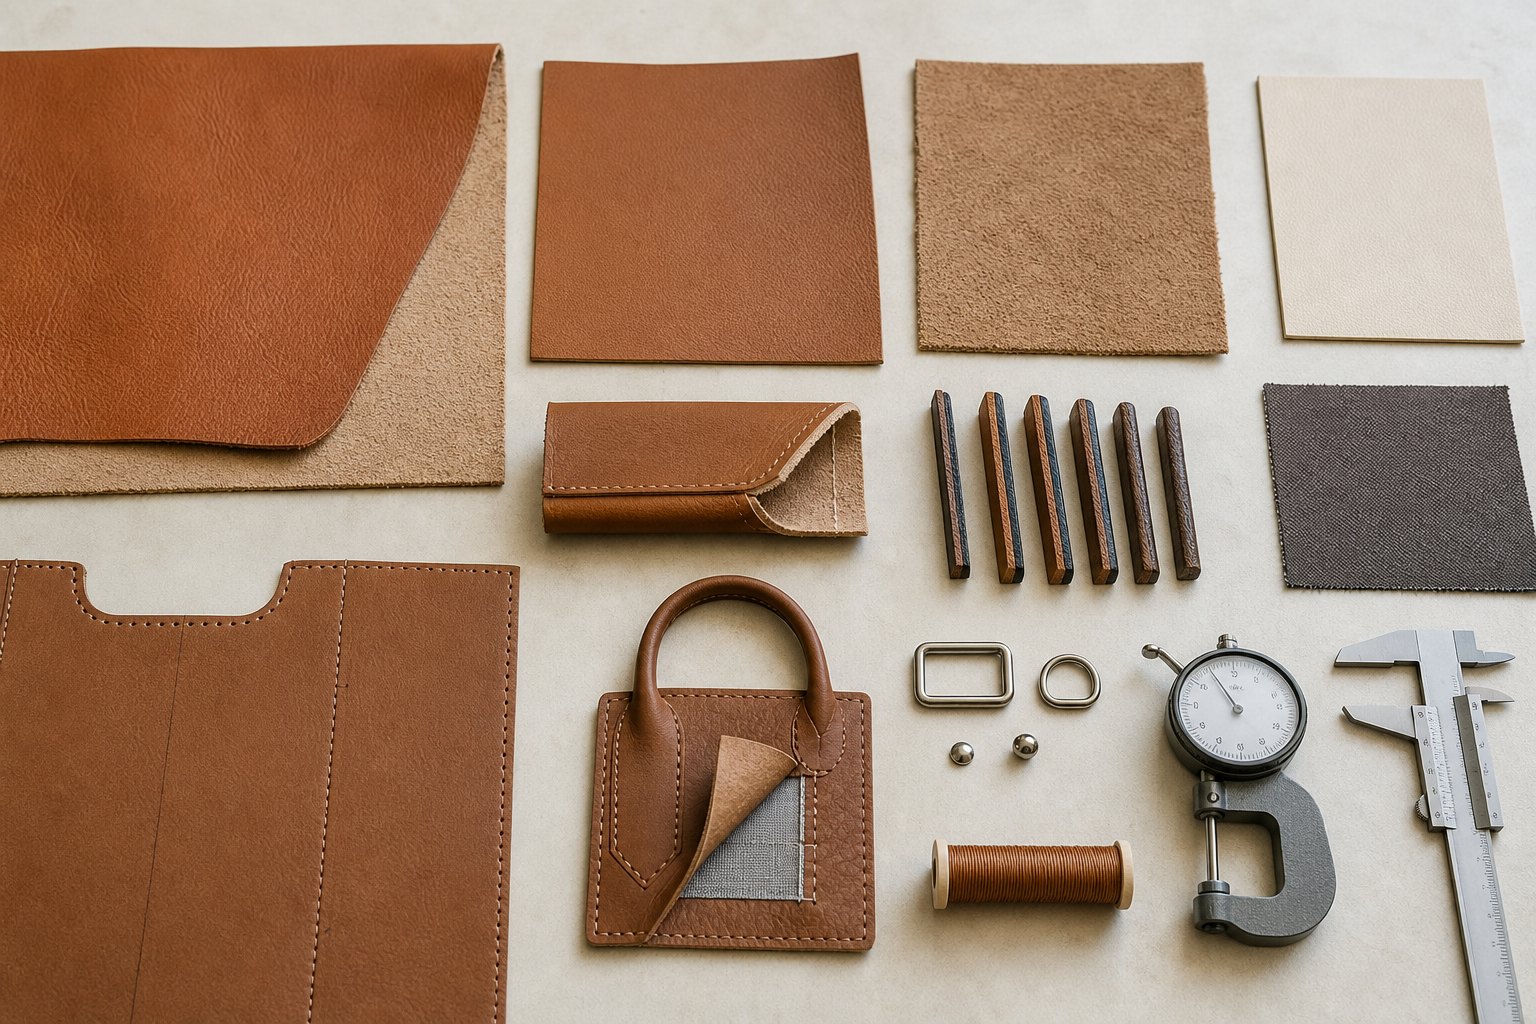
Do not approve “genuine leather,” “real leather” or “premium leather” as a specification. Record species, hide or skin source where relevant, grain layer, tannage, finish system, color, thickness range, temper, surface character, tannery and supplier article. ISO's current ISO 15115:2019 leather vocabulary defines industry terms; buyers should align naming with the applicable market and contract. A marketing label cannot replace a physical swatch and traceable material code.
Separate Leather From Non-Leather Alternatives
PU-coated textile, microfiber, plant-content composite and other alternatives can be useful materials, but their compositions and performance routes differ from leather. Do not call a material leather merely because the surface is embossed like grain. Ask for a component breakdown, substrate, coating, bio-based percentage if claimed, backing, thickness and supplier article. If a collection mixes leather and alternatives, create separate bills of materials, tests and consumer-facing descriptions so buyers can distinguish them accurately.
Compare Leather and Alternative Categories
| Material route | Useful starting point | Main risk | Evidence to approve |
|---|---|---|---|
| Full-grain or minimally corrected leather | Natural surface character and patina-led premium products | Visible variation, yield loss and inconsistent panel pairing | Tannery article, range board, grading map and finished sample |
| Corrected-grain finished leather | More uniform color and surface for repeat retail programs | Heavy finish may hide defects or crack under flex | Finish construction, flex/color tests and approved lot |
| Split or coated split leather | Controlled cost and selected structured applications | Lower tear margin, delamination or misleading naming | Layer identity, thickness, tear/flex route and label review |
| Coated textile or composite alternative | Uniform fashion surfaces and non-leather collections | Hydrolysis, peeling, unclear composition and broad green claims | Full composition, supplier article, aging/flex data and precise claim |
Full-Grain and Natural-Surface Routes
Natural marks are not automatically defects, but their location and severity must match the product promise. Build a range board showing acceptable grain, scars, veins and shade. Define which panels are appearance-critical and which may use more character. The cutter needs the same board as the buyer.
Corrected-Grain and Finished Leather
Surface correction and finishing can improve uniformity and cleanability. Approve gloss, emboss, hand and grain scale against flex and adhesion behavior. If the finish is part of the visual identity, treat finish-lot change as a material change requiring reapproval.
Split, Bonded and Coated Alternatives
These terms are not interchangeable. Ask the supplier to identify the load-bearing layer and percentage composition. A bonded material containing leather fibers, a coated split and a PU-coated textile need different naming, performance tests and sustainability statements.
Freeze Species, Cut, Origin and Tannery Article
Record the species and the region of the hide used for the approved sample when origin matters to the buyer's risk or claim. Identify the usable cut or selection route because shoulder, side, belly and other zones can differ in stretch, grain and defect frequency. The tannery article code should connect the color, thickness, finish and temper to purchasing records. If sourcing shifts, require written approval before the new lot reaches cutting.
Build a Traceability Chain
Map the physical route from raw material through tannery, leather distributor, bag factory and shipment. Distinguish supply-chain mapping, traceability and chain of custody rather than treating them as synonyms. The Leather Working Group standards program describes separate production and chain-of-custody directions and continues to develop its system. Check the current standard, facility, scope, dates and material flow for the actual order; a tannery medal alone is not a finished-bag certificate.
Treat Certificates as Scoped Evidence
Create an evidence index listing document owner, issuing body, legal entity, facility address, scope, validity, leather article and purchase order. Confirm whether a document covers tannery environmental performance, chemical testing, social conditions, chain of custody or the finished product. These functions are different. Ask who will supply order-level records and when. If the factory cannot map a certificate to the purchased leather lot, use it only as a supplier-qualification lead, not a product claim.
Define Finish and Color Physically
Approve color, gloss, grain, pull-up effect, wax, touch, opacity and surface protection on the actual leather. Use a signed swatch or retained cutting under agreed lighting. A digital value cannot capture direction, gloss or natural variation. For multi-panel totes, define whether panels must match tightly or show deliberate character. Record limits for rubbing change, finish transfer and shade distribution, then retain the approved bulk lot before cutting begins.
Approve Thickness and Temper Together
Thickness influences structure, seam bulk, weight and edge work, while temper describes softness or firmness. Measure multiple points because hides are not uniform. Specify a range by component: body, gusset, handle, trim and reinforcement may require different substances. A thicker leather is not automatically stronger, and aggressive splitting can change tear margin. Approve the finished construction after skiving, folding and reinforcement rather than judging a single swatch.
Control Natural Variation With a Range Board
Build one physical board for acceptable shade, grain, scars, wrinkles, growth marks and surface character. Add reject examples for holes, weak belly, deep damage, loose grain or finish faults. Define critical appearance zones such as front center, top edge and handle face. The board converts “natural variation” from a sales excuse into a controlled range. Review it with merchandisers, cutters and inspectors, because each group sees different risks.
Inspect Incoming Leather Before Cutting
At receiving, verify supplier, article, lot, color, quantity, area, thickness, temper, finish, odor, surface and reverse condition. Condition material according to the agreed process before measurement. Mark or segregate defects instead of allowing cutters to discover them piece by piece. Record usable yield and keep a labeled cutting. If the lot does not match the approved range, stop it before nesting; cutting destroys the easiest recovery path.
Treat Nesting as Yield and Quality Engineering
Leather is not a uniform roll. A skilled cutter places patterns around defects while matching stretch, grain and shade across the bag. Define grain direction and mirror requirements on patterns. Track gross area, usable area and rejected zones so the quotation and later yield loss can be explained. Do not reward yield alone: rotating a critical front panel or placing a handle in weak belly can reduce waste while creating failures.
Pair Visible Panels Deliberately
State which pieces must be cut from compatible areas or hides: front and back, paired handles, gussets, pocket trims and strap tabs. Approve whether tonal variation is allowed between them. Mark face orientation and top direction on the pattern. If the design celebrates contrast, define the contrast rather than leaving it random. A pair rule should survive bulk line balancing; otherwise senior sample-room judgment disappears when production scales.
Choose Soft, Semi-Structured or Structured Architecture
Define the empty silhouette, loaded silhouette, base behavior and acceptable collapse. A soft tote may use fewer internal layers; a structured work tote may need board, foam, nonwoven reinforcement or bonded leather components. Record every internal material and edge shape. Structure should support the intended use without turning the bag heavy or creating hard stress boundaries. The tote size guide owns capacity planning; this page controls how leather construction holds that volume.
Map the Load Path Before Adding Reinforcement
Sketch how load travels from contents through base, body, top edge, handle bases and handles. Reinforce the interfaces, not every panel equally. Define tape, board, fabric, leather patch or other insert by material, dimensions, placement and attachment. Abrupt stiffness can make the leather tear beside the reinforcement. Build a component trial and inspect both the stitches and surrounding leather after load rather than celebrating an unbroken thread.
Engineer Handles for Stretch and Comfort
Specify handle length, drop, width, finished thickness, edge route, internal core, grain direction, stitch path and pairing. Check how the handle feels under the target load and whether it rolls or cuts into the shoulder. A soft leather handle may stretch permanently; a rigid core may crack the outer layer at a fold. Approve handle construction separately before it is trapped inside the final tote.
Control Handle Attachments as Safety-Critical Interfaces
Define tab size, reinforcement footprint, stitch pattern, rivet or screw use, edge distance and location tolerances. Inspect the reverse to see how force spreads into the body. Test representative attachments with production leather and thread. A decorative box stitch can perforate leather if stitch spacing is too dense; a rivet can pull through without a washer or patch. The acceptance plan should record the failure mode, not only a peak load.
Specify Lining and Interior Organization
Record lining fiber, construction, weight, color, coating, shrinkage route, seam and attachment. Define pockets, zipper tape, label, key leash, base panel and clean-out access. Test color transfer between dark leather, lining and carried items. If the bag is unlined, specify flesh-side appearance, loose fibers, stain control and seam finishing. A premium exterior cannot compensate for a lining that twists, tears or pulls free.
Control Adhesives, Reinforcements and Coatings
List adhesives and internal materials in the bill of materials. Approve open time, application, odor, staining, bond line and compatibility with heat, humidity and flex. Excess adhesive can bleed through thin leather; insufficient bonding can allow bubbles or edge separation. Coatings used on edges or reverse surfaces also need lot control and cure time. Do not make chemical or environmental claims from a generic supplier statement when the actual recipe or component changed.
Skive Edges With Component-Specific Limits
Skiving reduces thickness where leather folds, overlaps or enters seams. Specify start point, taper, remaining thickness and prohibited cuts for each component. Inspect the transition by touch and measurement. Too little skiving creates bulky corners and uneven stitching; too much removes tear margin. Retain a cross-section or labeled skived strip as the standard. Operators should not decide the remaining substance from appearance alone.
Compare Edge Construction Routes
| Edge route | Best starting use | Primary risk | Approval evidence |
|---|---|---|---|
| Painted raw edge | Clean modern profiles and precise color accents | Cracking, tack, overflow, uneven layers or poor adhesion | Layer recipe, cured limit sample and flex review |
| Turned or folded edge | Soft wrapped appearance and protected cut edge | Bulky corners, weak skive or visible adhesive | Skived cross-section and finished corner sample |
| Bound edge | Interior seams and selected casual constructions | Twist, inconsistent width or differential stretch | Production binding assembly after flex |
| Burnished or polished edge | Suitable vegetable-tanned or compatible leather routes | Fiber lift, uneven darkening or unsuitable finish | Actual-leather edge standard and wear trial |
Painted Raw Edges
Control cutting, sanding, base, color layers, drying, final coat and cure. Approve edge radius, color, gloss and acceptable joint marks. Flex the finished edge only after full cure and inspect thin corners and handle ends where stress concentrates.
Turned and Folded Edges
Control skive depth, fold allowance, adhesive spread and corner relief. Inspect for show-through and ridges. The fold should protect the cut edge without leaving insufficient substance at the stitch line or creating an oversized seam.
Build Edge Paint as a Controlled Process
Specify edge material, color standard, application layers, sanding or polishing sequence, drying conditions and cure before assembly or packing. Create a limit sample for bubbles, pinholes, overflow, underfill, visible layer lines and tack. Edge paint can appear dry while remaining vulnerable to blocking in packaging. Record rework limits; repeated sanding and coating can change dimensions or make the edge brittle.
Stitch Leather Without Creating a Tear Line
Define seam type, allowance, stitch length, edge distance, thread tension, backtack or tie-off and expected appearance by component. Too many penetrations can perforate leather; too few may reduce control or allow gaps. Check needle holes after flex and load. Corners, top edges and handle tabs need their own settings. A straight decorative row is not enough if the leather puckers or the lockstitch balance is wrong.
Match Thread and Needle to the Assembly
Record thread material, size, color and approved equivalent, plus needle system, point and size. Match the setup to leather thickness, finish, number of layers and lining. A needle that is too aggressive can leave permanent holes or cut near an edge; an unsuitable point can deflect and cause irregular stitches. Monitor needle condition and replacement. Approve contrast stitching under the same tolerances as a visible logo because small deviations become prominent.
Install Hardware Without Damaging the Leather
Specify base metal, finish, dimensions, coating, supplier article, mating parts and installation method. Check post length or screw engagement against the full stack. Use washers or patches where needed to spread force. Inspect for spinning parts, sharp edges, cracked finish, leather indentation and galvanic or color transfer risk. A hardware salt-spray or coating claim is relevant only when linked to the actual finish and method selected for the order.
Set Logo Method From the Leather Finish
Compare blind debossing, foil, screen print, metal plate, embroidery on a carrier or other methods on the actual leather. Heat, pressure, grain, oils and coatings change the result. Define finished size, location, depth, color, edge clarity and allowable natural interruption. Route general artwork control to the tote bag decoration methods guide; this leather page owns substrate-specific approval.
Approve a Same-Material Logo Strike-Off
Use a production-lot cutting with the intended finish and backing. Label the strike-off with leather article, color, lot, artwork revision, die or screen, temperature, pressure and date where applicable. Inspect immediately and after conditioning for migration, gloss change, surface damage, foil release or finish lift. A logo approved on PU, paper or unrelated leather does not authorize bulk marking. Retain front and reverse evidence.
Build Samples in Risk-Reducing Gates
Start with material range and component trials, then a size/structure prototype, a finished leather sample and a pre-production tote from intended materials. Each gate should close named risks before adding cost. Freeze the bill of materials only after handle, edge, hardware and logo systems are proven together. The custom bag sample guide explains why a presentation sample is not automatically a production standard.
Load-Test the Finished Tote
Define normal and peak loads from the contents, carry time and use route. Agree the test mass, item shapes, dwell or cycles, lifting method and post-test recovery period. Measure handle stretch, body distortion, base sag and permanent change. Inspect handle tabs, reinforcement edges, stitches, leather holes and lining. Do not publish one universal kilogram capacity without the specific finished bag, method, state and acceptance result.
Validate Flex, Abrasion and Surface Aging
Choose methods with a competent laboratory for the actual leather and claim. Focus on high-movement zones: handle folds, top edges, gussets, pocket openings and painted edges. Include temperature, humidity, conditioning and specimen orientation where relevant. Inspect finish cracking, grain break, delamination, color change and edge behavior. Development tests should reveal failure modes; shipment inspection should confirm production matches the tested construction rather than trying to reproduce laboratory aging at the warehouse.
Control Colorfastness and Transfer
Assess dry and wet rubbing risk for leather, lining, edge paint and logo, especially dark bags carried against pale clothing. Agree the method, rubbing material, cycles, assessment scale and pass level with the lab and destination-market owner. Test actual colors and finishes; results from one article do not cover every shade. Also inspect internal transfer to laptops, papers or garments after representative humidity and load.
Map Chemical Compliance to Every Component
Create a restricted-substance and market-requirement matrix for leather, lining, adhesive, edge paint, ink, hardware coating and packaging. ISO states that ISO 17075-1:2017 determines chromium(VI) in leather under defined extraction conditions and applies to leather types within its scope; it is a method, not a universal legal limit. Ask the responsible laboratory which methods and limits apply to the destination, color, material and risk. Link every report to the submitted sample and lot.
Define Sustainability Through Use and Evidence
Separate five questions: What is the leather? Where did it move? How was the tannery assessed? How long should the finished tote perform? What exact claim will the brand make? A certified tannery does not prove long product life, and a durable tote does not prove chain of custody. Compare repairability, replaceable hardware, material efficiency and packaging alongside sourcing evidence. Use the sustainable tote manufacturer comparison only for supplier shortlisting, then return to order-level proof here.
Build a Claim and Approval Evidence Matrix
| Approval layer | What it supports | Required evidence | What it cannot prove alone |
|---|---|---|---|
| Material identity | Species, leather type, finish and article | Tannery specification, lot record and retained swatch | Tannery performance or finished-bag durability |
| Tannery or chain evidence | Named facility, scope and material movement | Current certificate plus order mapping | Every factory process or marketing claim |
| Performance evidence | Use-life criteria under defined tests | Approved finished tote and test record | Environmental superiority |
| Environmental claim | A specific qualified benefit | Claim text, boundary, comparison basis and substantiation | Broad “green” benefit for the whole product |
Freeze One Golden Evidence Package
Label the approved tote, leather range, material lot, construction samples, hardware, logo strike-off, test reports and claim text with one revision. State whether the golden sample is conditioned or tested. Buyer, factory and inspector should compare the same package rather than different photographs or sales swatches.
For U.S. marketing, the FTC's Green Guides summary cautions against broad unqualified environmental-benefit claims and emphasizes clear, specific qualifications and substantiation. Other markets have their own rules. Review current requirements with the responsible legal or compliance owner before publishing claims.
Release Bulk Through First-Off and Line Checks
Before the full run, verify bulk leather lot, range board, pattern revision, reinforcement, thread, hardware, edge materials, logo setup and lining. Inspect first-off totes from relevant operators or machines for dimensions, panel pairing, handle position, skiving, stitch balance, edge finish, hardware and interior. Retain an approved unit. During production, sample at agreed intervals and stop on material substitution or systematic drift. The bag quality CTQ guide helps turn these features into decision-ready acceptance lines.
Inspect Pack-Out as Part of Product Quality
Classify defects by consequence: wrong leather or claim evidence, structural failure, sharp hardware, severe color transfer, open seam, visible mismatch, edge-paint defect, stain, deformation and packing damage. Use the custom bag inspection checklist as the inspection framework, then add leather-specific range and surface limits. Shape the tote appropriately, protect hardware and handles, control moisture and avoid pressure that creates permanent creases or blocks uncured edge paint.
Normalize MOQ, Cost and Lead Time
Compare quotes against one frozen specification. Hide minimums, custom color, grading yield, paired cutting, skiving, hand-applied edge layers, hardware tooling, logo dies, sample rounds, tests, rework and shape-protective packing all affect cost and schedule. Ask factories to separate one-time development from recurring unit costs and state the yield assumption. The wholesale tote assortment guide owns channel allocation, while the custom tote supplier guide owns reorder continuity.
Red flags: the quote says only “genuine leather”; no tannery article or range board exists; the sample uses hand-selected hide unavailable for bulk; certification is shown without facility, scope or lot mapping; edge paint has no cure or limit sample; load claims omit the method; or the supplier can substitute leather, backing, hardware or chemicals without written approval.
Send a Leather-Tote-Specific RFQ
Provide use case, target load, dimensions, architecture, species and leather route, tannage and finish preference, thickness and temper, color range, panel-grading expectation, lining, reinforcement, handles, edge construction, hardware, logo, target markets, required claims, quantity, packing and delivery. Ask for a material identity pack, traceability map, staged samples, applicable chemical and performance plan, first-off release, bulk CTQs and change control. Review factory capability through the tote manufacturer selection guide, connect development to the design-to-delivery process, compare the current custom tote bag range, and align final commercial decisions with the complete custom bag sourcing framework.

GET A LEATHER TOTE QUOTE
Email a prefilled leather tote brief
Include the leather route, dimensions, target load, edge construction, logo and required claim evidence so sampling can test the real risk.